Using your oven, Automatic ignition, To light the oven burner – GE JGKS16GEH User Manual
Page 6: Air adjustment, Before using iiiur oven, Oven temperature control, Shelf positions, Oven light, Ignition, Oven shelves
Attention! The text in this document has been recognized automatically. To view the original document, you can use the "Original mode".
Using Your Oven
Automatic
Ignition
The oven and broiler burners on
ynijr oven arc lighted by electric
ignition eliminating the need for
standing pilot lights with constantly
burning flame.
CAUTION: DO NOT MAKE ANY
ATl’EMPT TO OPERATE THE
ELECTRIC IGNITION OVEN
tATtnuXT/^ A XT Cl C/~rr>TiT/^ A T
WVJXVilNVI rtiN JDL,EiV-.l
POWER FAILURE. Resumption
of electrical power when OVEN
TEMP control is in any position
other than OFF will result in
automatic ignition of the oven
burner and could cause severe
burns if, at the time, you were
attempting to light the burner with
a match.
To Light the Oven Burner
Turn the OVEN TEMP knob to the
desired temperature. The burner
should ignite within 60 seconds.
Air Adjustment
An air adjustment shutter for the
oven burner regulates the flow of air
to the flame.
Remove the broiler pan and rack,
pull the broiler compartment drawer
trfc tlio
rir\citir\n r\r
V/i^L LV/ UiW Otvyj^
V./1 AWAAAV'W'
the broiler compartment shelf and
you’ll find the shutter against the
back wall of the compartment.
To adjust the flow of air to the
burner, loosen the Phillips head
screw and rotate the shutter to allow
more or less air into the burner lube
as needed.
When the right amount of air
flows into the burner, the flame
should be sicady, wiili approximaiely
1-inch blue cones and should not
extend out over the baffle edges.
Before Using iiiur Oven
1. Look at the control. Be sure you
understand how to set it properly.
2. Check the inside of the oven.
T
fit
tLi»
JL^V^V/XV C&t LliW OIAWAVWO*
X
AC&WA.AWW
removing and replacing them
while the oven is cool.
3. Read the information and tips
on the following pages.
4. Keep this book handy where you
can refer to it—especially during
the first few weeks of getting
acquainted with your oven.
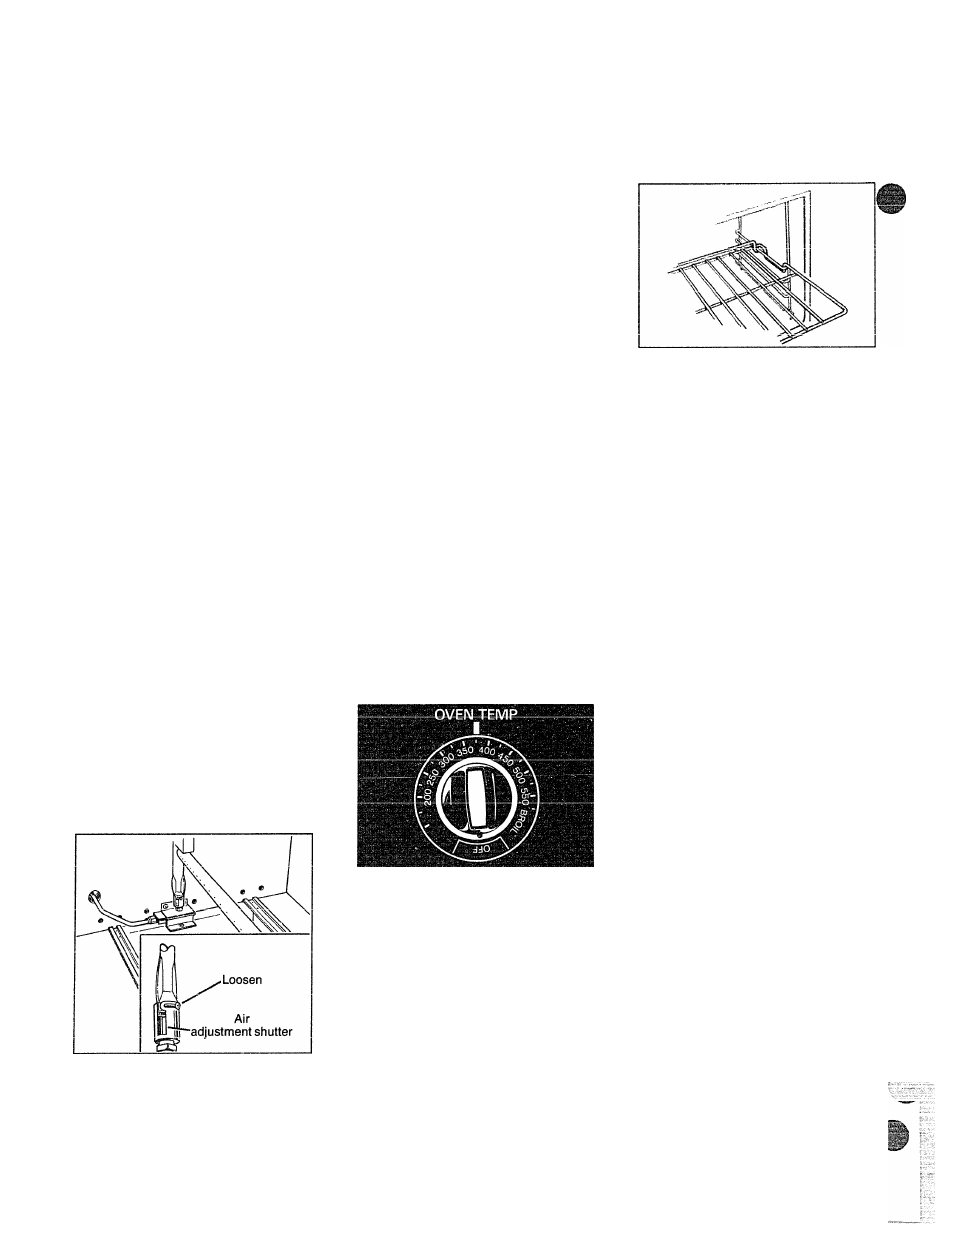
Oven Temperature Control
The OVEN TEMP control is
located on the upper oven control
panel.
Oven Shelves
Simply turn the knob to the desired
cooking temperatures, which are
marked in 25 °F. increments on the
dial. It will normally take 30 to 60
seconds before the flame comes on.
After the oven reaches the selected
temperature, the oven burner cycles
off completely, then on with a full
flame to keep the oven temperature
controlled.
The shelves are designed with
stop-locks so when placed correctly
on the shelf supports, they will stop
before
Coming
eompletely out of
the oven and will not tilt when you
are removing food or placing food
on them.
When placing cookware on a shelf,
pull the shelf out to the “stop”
position. Place the cookware on
me Micii, iiieu siiuc me Mien uaetv
into the oven. This will eliminate
reaching into the hot oven.
To remove the shelves from the oven
for cleaning, pull out to stop
position, lift up on front and pull
them out.
Shelf Positions
The oven has four shelf supports—
A (bottom), B, C and D (top). Shelf
positions for cooking are suggested
on Baking and Roasting pages.
Oven
Moisture
As your oven heats up, the
temperature change of the air
in the oven may cause water
droplets to form on the door
glass. To prevent this, open the
oven door for the first minute
of oven heat-up to let the moist
siir ruit
Oven Light
Use switch on control panel to turn
light on and off.