Removing the freezer shelf, Using the ice cube trays, Using the automatic ice maker – Whirlpool RT18BK User Manual
Page 12
Attention! The text in this document has been recognized automatically. To view the original document, you can use the "Original mode".
USING YOUR REFRIGERATOR
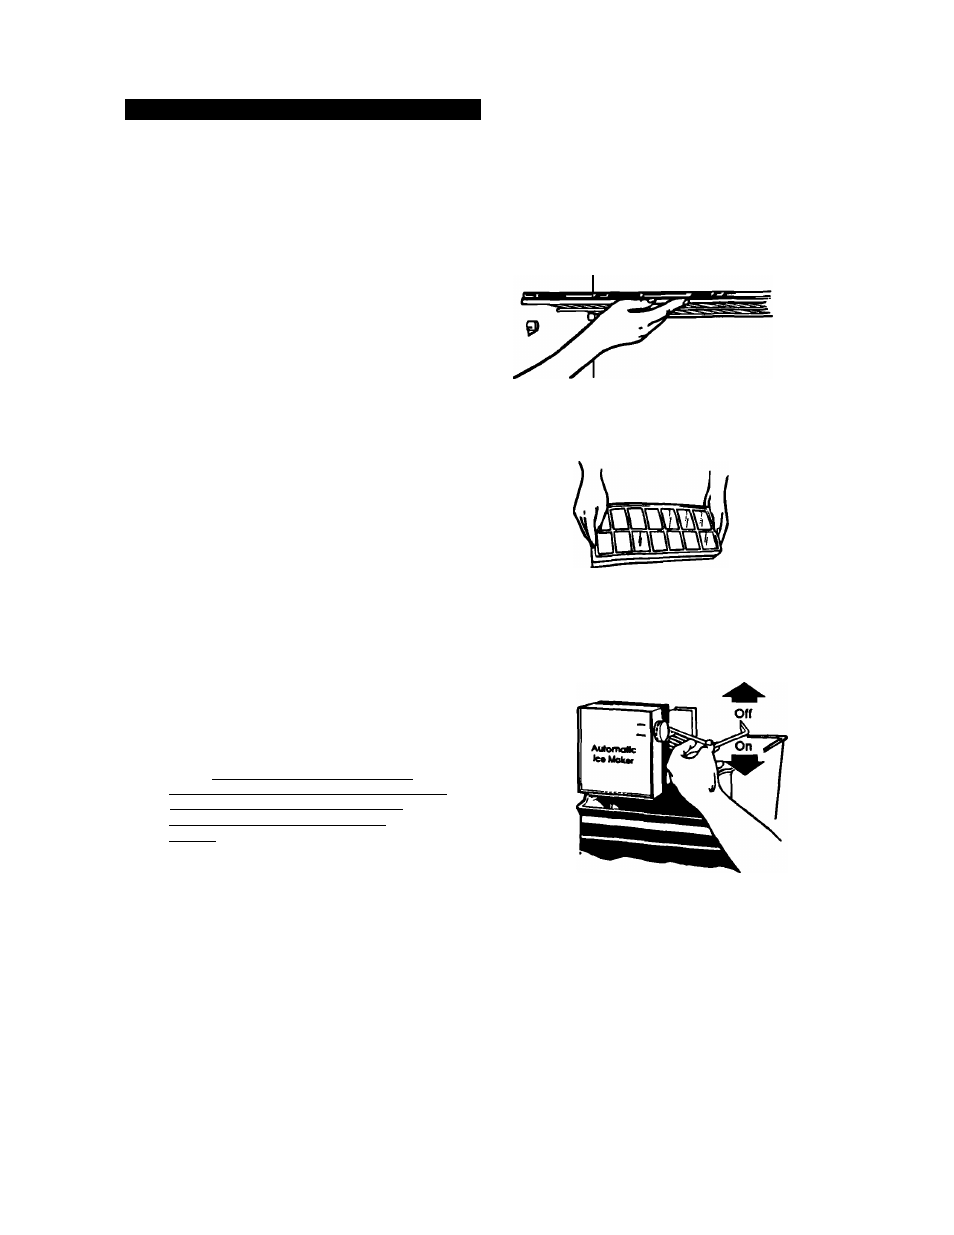
Removing the freezer shelf
(not on
rtisek
)
To remove the shelf:
1. Lift front of shelf slightly.
2. Lift back of shelf off supports.
3. Replace in reverse order.
Using the ice cube trays
(on some models)
If cubes are not used, they may shrink. The
moving cold air starts a slow evaporation. The
longer cubes are stored, the smaller they get.
To remove Ice:
1. Hold tray at both ends.
2. Twist slightly.
* •
Using the automatic ice maker
(Factory-installed on RT18BM, optional on other models)
If you have an automatic ice maker, or if you plan
to add one later (Part No. IMKIT), there are a few
things you will want to know;
• The ON/OFF lever is a wire signal arm.
Down ... to make ice automatically.
Up ... to shut off the ice maker.
NOTE: Do not turn ice maker on until it is
connected to the water supply. Instructions for
ice maker water supply hook up are at
tached to the back of the refrigerator
cabinet.
• The dial or lever on the side of the ice maker
changes the size of the cubes.
• Shake the bin occasionally to keep cubes
separated and to obtain increased storage
capacity.
• It is normal for ice crescents to be attached by
a corner. They will break apart easily.
• You will hear water running when ice maker is
working. You’ll hear ice fall into the bin. Don’t
let these sounds bother you. They are part of
the normal operation of your refrigerator.
• The ice maker will not operate until the freezer
is cold enough to make ice. This can take
overnight.
Raisa
signal
arm to
stop fca.
Lower
signal
arm to
start it
12