Warning, Proper loading, Changing a setting – Whirlpool WU685OV User Manual
Page 6: Top rack loading, Bottom rack loading, Silverware basket loading
Attention! The text in this document has been recognized automatically. To view the original document, you can use the "Original mode".
To add a dish after starting
1. To be sure the added item is
washed and rinsed, make sure
the Cycle Control Knob has not
passed LIGHT WASH on models
WU3000V, WU3006V, WU4400V,
and WU4406V or ENERGY
SAVER WASH on models
WU5650V and WU6850V.
2. Lift up on the door latch to unlatch
door and stop the cycle. Don't open
the door until the spray arms stop
spinning.
3. Open the door and add the dish.
4. Close the door. Do not latch it. Wait
30 seconds for air in the dishwasher
to warm up. This helps reduce the
amount of moisture that can come
from the vent when restarting the
cycle.
5. Press the door to latch it. The
dishwasher will start from where it
stopped.
Changing a setting
You can change a setting anytime during
any cycle.
1. Lift up on the door latch to unlatch
the door and stop the cycle.
2. Turn the Cycle Control Knob
clockwise to the cycle you want.
3. Be sure the detergent dispensers
are filled properly for the new cycle.
4. Press door firmly to latch it. The
dishwasher will automatically start
the new cycle.
Proper Loading
Preparation for loading
It is not necessary to rinse dishes
before putting them into the
dishwasher. Just remove large pieces
and quantities of food and bones. The
filtering system helps keep food
particles out of the wash water. Small
particles are flushed away as water is
pumped out. Larger particles are
trapped on the fUter screen system.
Refer to “Dishwasher care and
cleaning" on page 8 for filter screen
cleaning instructions.
Always load dishes so soiled
surfaces are reached by spray from
rotating spray arms. Water must be
able to drain off completely for best
drying results. Be careful to separate
items so spray can reach all surfaces
Top rack loading
The top rack is designed for cups,
glasses and smaller items.
Cup and glass load
■ Place so open ends face down for
cleaning and draining.
■ Load glasses in top rack only.
Bottom rack is not designed for
glasses. Damage may occur.
Place items in the rows
between
prongs. Placing them over the
prongs can lead to breakage.
Be sure lightweight items are
held firmly in place.
China, crystal and other delicate
items must not touch each other
during dishwasher operation.
Damage may occur.
Mixed load
■ Load plastic items
only in the top
rack.
Only plastic items marked
“Dishwasher Safe" are recom
mended. Plastic items can melt in
the bottom rack.
■ Load plastic items so the force of the
spray does not move them during
the cycle.
Utensil load
■ Small bowls, pans and other utensils
can be placed in the top rack.
Bottom rack loading
Items with cooked-on or dried-on food
should be loaded in the bottom rack with
soiled surfaces facing inward to the
spray.
Mixed load
■ Make sure pot handles and other
items do not stop rotation of either
the upper or lower spray arm. Spray
arms must move freely.
■ Load items so they do not block or
cover the spray tower.
■ Securely place heavily soUed
cookware face down in rack.
Dish load
■ Place plates, soup bowls, etc.,
between
prongs and facing the
spray.
■ Do not place items directly over
spray tower.
Utensil load
■ Load cookie sheets, cake pans and
other items at sides or back.
Loading items in front may keep
water spray from reaching detergent
dispenser.
NOTE:
■ Do not load glasses, cups or plastic
items in the bottom rack.
■ When lower rack is removed, replace
with bumpers in front.
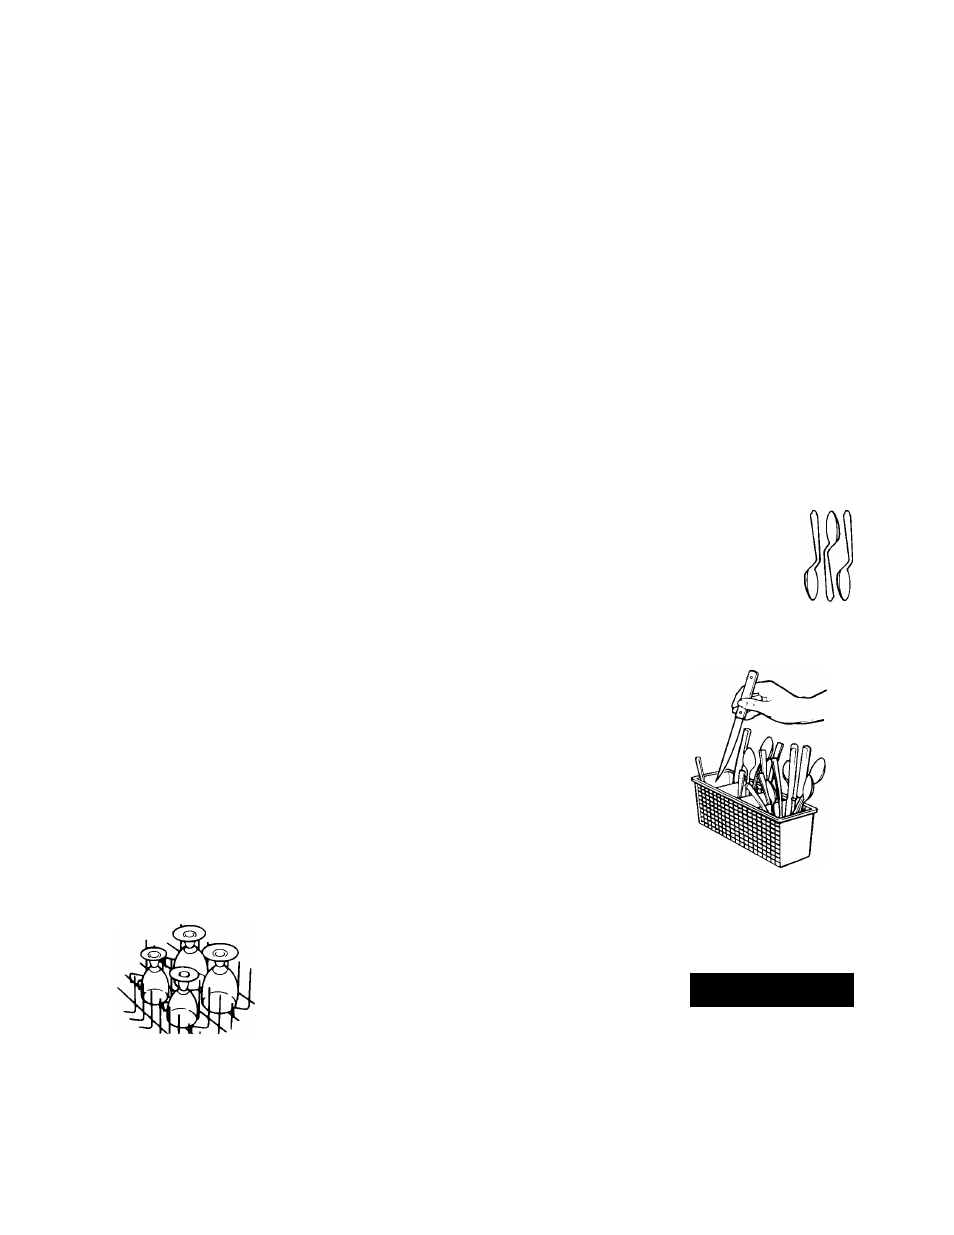
Silverware basket loading
Load the silverware basket while in or
out of the bottom rack. The loaded
basket should be in the center front of
the bottom rack.
Load forks and spoons so they don't
nest together. Spray can not reach
nested items.
Mix items in each section of the
basket with some pointing up and some
down. Small items—baby bottle caps,
jar lids, etc.—can be put in any section.
A
warning
Personal Injury Hazard
To avoid cuts from sharp items
(knives, forks, skewers, etc.), make
sure these items are put in point
down.
Make sure sharp items (knives, forks,
skewers, etc.) are put in point down.
Make sure long items do not stop the
upper spray arm from spinning.
Page 6