Vrla, Vrla rb battery rack assembly - task flow chart, Receive and inspect rack components – C&D Technologies 41-6976 RB VRLA Rack User Manual
Page 3: Review drawings and instructions, Verify parts received against bill of materials, Obtain installer supplies (listed on page 2)
Page 3 of 9
VRLA
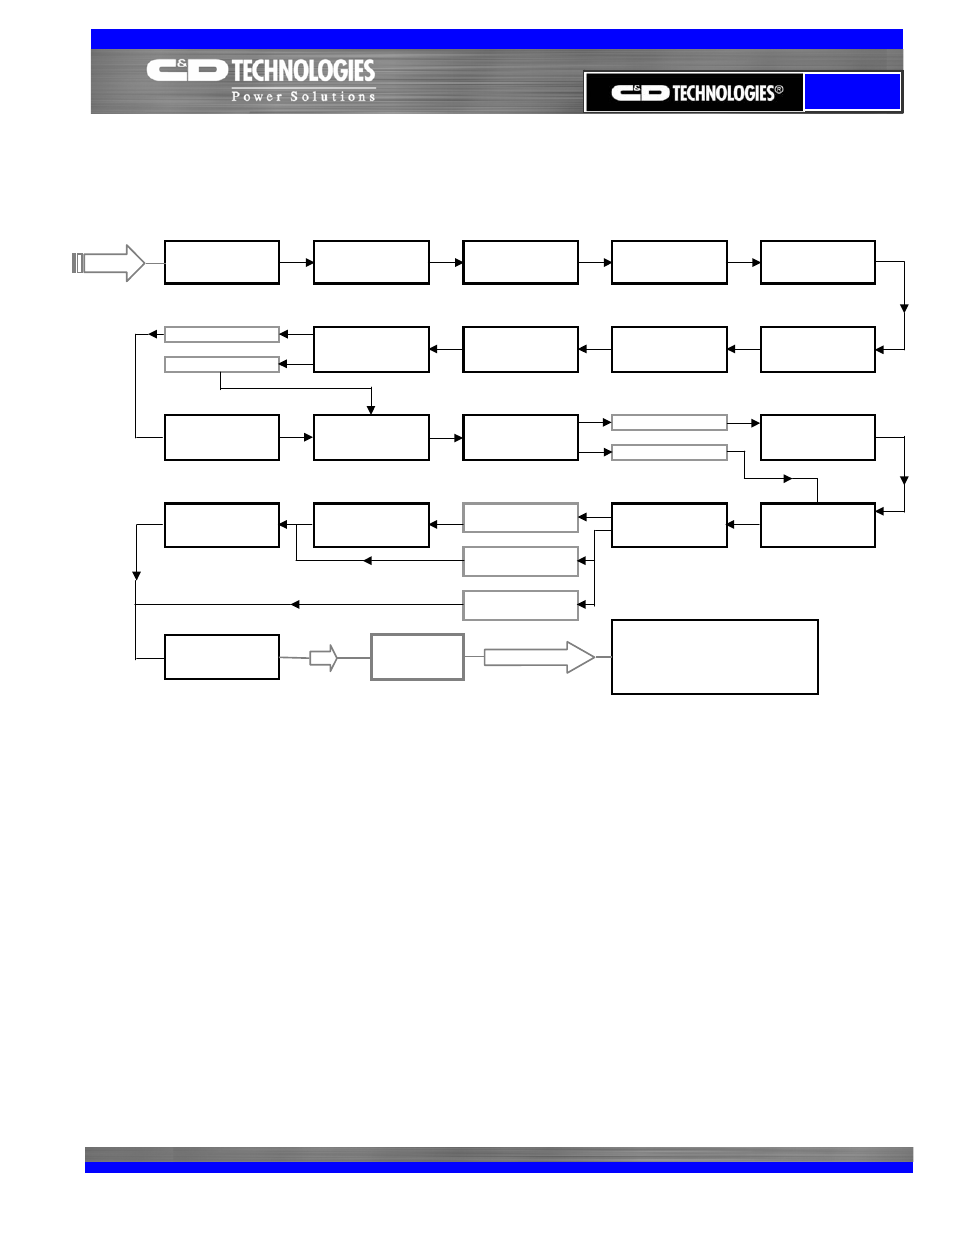
1. Receive and inspect rack components
Upon receipt of the RB Rack materials, inspect and document any damage to these materials.
Damage claims must be filed promptly with the carrier.
2. Review drawings and instructions
3. Verify Parts Received Against Bill of Materials
Standard RB Series Rack components are shipped in 2 boxes. If an optional cover was ordered, there will be one
additional box.
Seismic RB Series Racks are shipped in 3 boxes plus one additional box for each tier.
Before assembly, verify that all rack materials are present against the detailed bill of materials shown on the RB
Rack Assembly Drawing (RB_ _T) or (RB_ _TEQ).
4. Obtain installer supplies (listed on page 2)
5. Get safety equipment and tools (listed on page 2) to rack installation location
Contact C&D Technologies @
1-800-543-8630
Install Batteries
Seismic Rack
Standard Rack with
cover
Standard Rack
without cover
Affix identification
labels to batteries and
strings
Standard Rack
Seismic Rack
To cable
installation phase
Verify proper torque
of all connecting
hardware
Install Top Cover
Install Seismic Hold
Down Kit
VRLA RB Battery Rack Assembly - Task Flow Chart
Install hold down rod
Seismic Rack
Standard Rack
Install spacer blocks
and end braces
Prepare Batteries for
Installation
Assemble rack tiers
(rails), level rack and
torque bolts
Verify parts received
against Bill of
Materials
Receive and inspect
Rack Components
Install floor mounting
hardware
Get safety equipment
and tools to rack
location
Secure end support
frames to floor
Mount sway braces to
support frame
Review drawings &
instructions
Obtain installer
supplies - Anchor
bolts & shims etc.
Install ground strap to
rack
START
QUESTIONS ?