Awntech California User Manual
Page 4
I
I
I
N
N
N
S
S
S
T
T
T
A
A
A
L
L
L
L
L
L
I
I
I
N
N
N
G
G
G
T
T
T
H
H
H
E
E
E
A
A
A
W
W
W
N
N
N
I
I
I
N
N
N
G
G
G
O
O
O
N
N
N
T
T
T
O
O
O
T
T
T
H
H
H
E
E
E
B
B
B
R
R
R
A
A
A
C
C
C
K
K
K
E
E
E
T
T
T
S
S
S
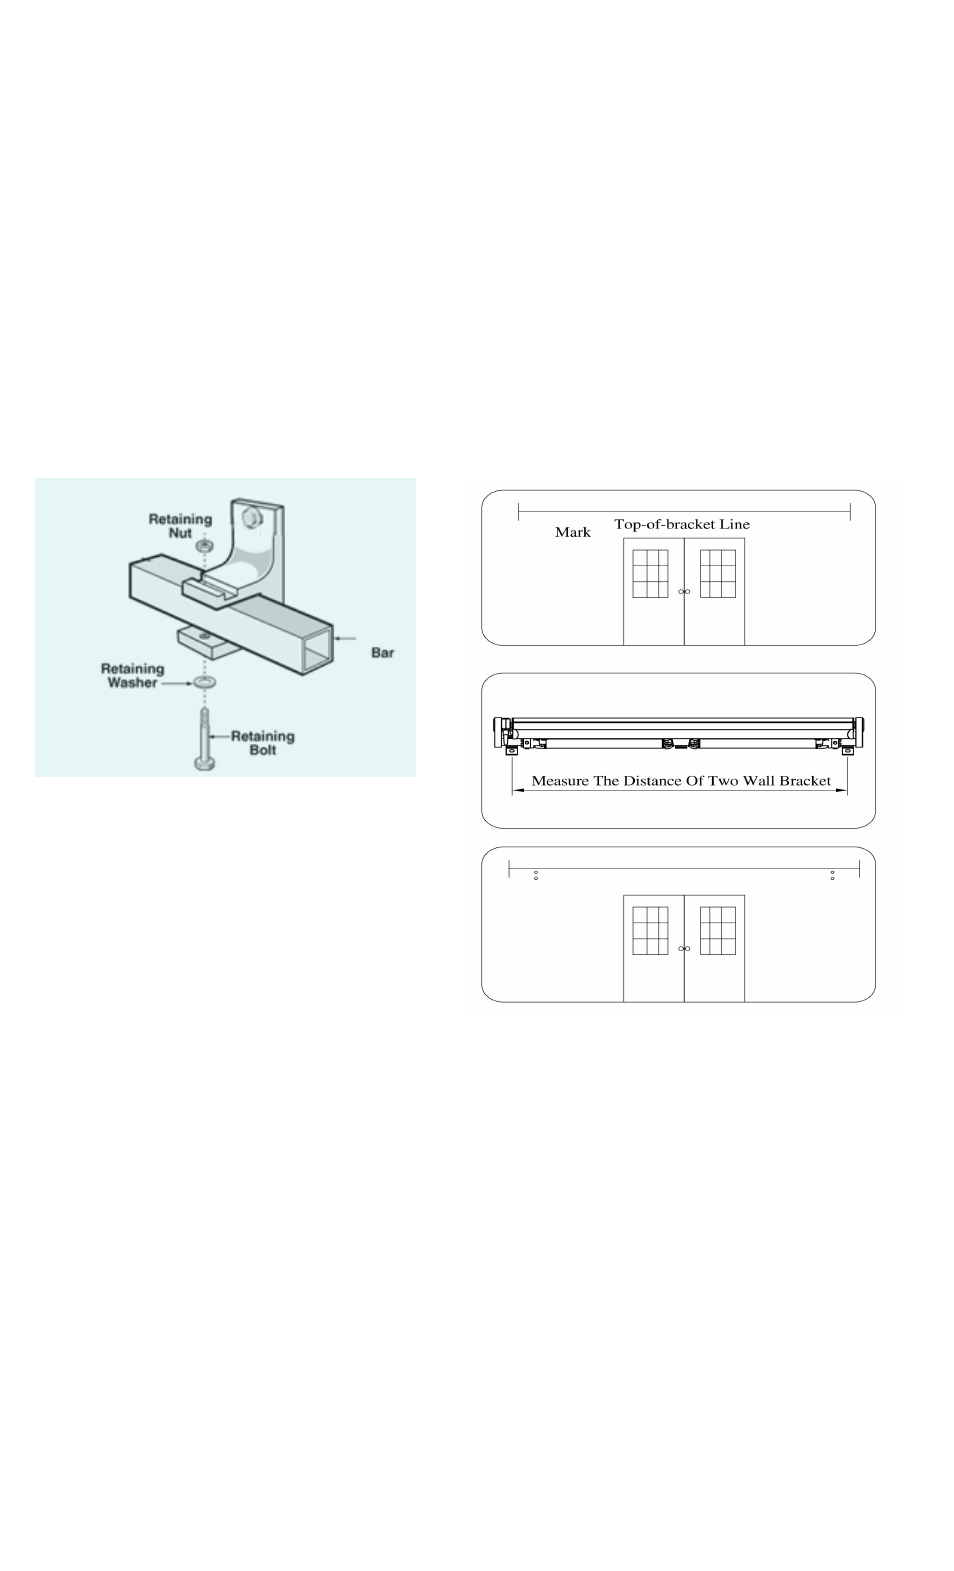
•
Place safe ladders on a flat, dry, stable surface at both ends (and in the middle if wider than 12’) of where the
awning will be installed
•
For the DESTIN® only: Assemble the hood and secure the mounting bracket to the back of the back bar of the
awning (see diagram on page 26 for installation instructions)
•
Assure that the awning is in the closed position and the arms are tied closed. This will prevent the unit from
inadvertently opening while being lifted into the brackets.
•
With the help of a capable assistant (or two-if your awning is more than 12’ long), lift the awning to the brackets
and slip the torsion bar (back bar) into the brackets. Make sure the torsion bar slides all the way to the back of
the bracket. Then slide the retaining bolts into the brackets. Center the unit as needed then tighten the nuts on
the retaining bolts.
•
If the torsion bar does not easily slip into the brackets, make sure the torsion bar is held in place and lift or lower
the front bar slightly till it is horizontal with the torsion bar. You may need to loosen the brackets slightly to
accomplish this fit.
•
Once fully secure, retighten the nuts on the brackets and carefully cut the zip ties off the arms.