Directions for wall mounting diagnostix, 750w – American Diagnostic Corporation (ADC) Diagnostix 750W User Manual
Page 2
DIRECTIONS FOR WALL MOUNTING DIAGNOSTIX
™
750W
Tools Needed
•
Medium slotted screwdriver
•
Hammer
•
Drill with 3/16” drill bit
Directions
1. Position manometer (with attached wall bracket) on wall at desired location
and rotate gauge to right side to permit access to left side mounting holes
on bracket. Make pencil marks on wall through the mounting holes. Holding
bracket firmly in place, rotate gauge to left side to permit access to right
side mounting holes. Make pencil marks on wall through the mounting
holes. Recommended height is near the eye level of the intended users.
2. At each of the four pencil marks, drill a 3/16” hole approximately 7/8” deep.
Use a masonry type bit if drilling through ceramic tile.
3. Gently tap the 4 screw anchors into the holes until they are flush with the
wall.
4. Position the manometer and bracket over the screw holes and screw bracket
into wall first on one side, then the other using the procedure outlined in
step one to gain access to each of the four mounting holes. Take care not to
over tighten screws.
5. Attach 8 foot length of coiled tubing to air inlet at bottom of gauge.
Insert “male” luer connector on free end of coiled tubing to “female” luer
connector on bladder tubing. Wrap cuff around bulb and store in mounting
bracket/storage compartment behind gauge.
Note: If the mounting hardware supplied is not suitable for the application,
select hardware of adequate size and type to secure the instrument firmly to
the wall.
Important: The instrument is designed to permit wall mounting without
having to first remove the bracket from the instrument. If the instrument is
removed from the bracket for mounting or service, we recommend applying
removable locktite to the bracket hardware to prevent the instrument from
working loose. Locktite can be obtained from most hardware stores.
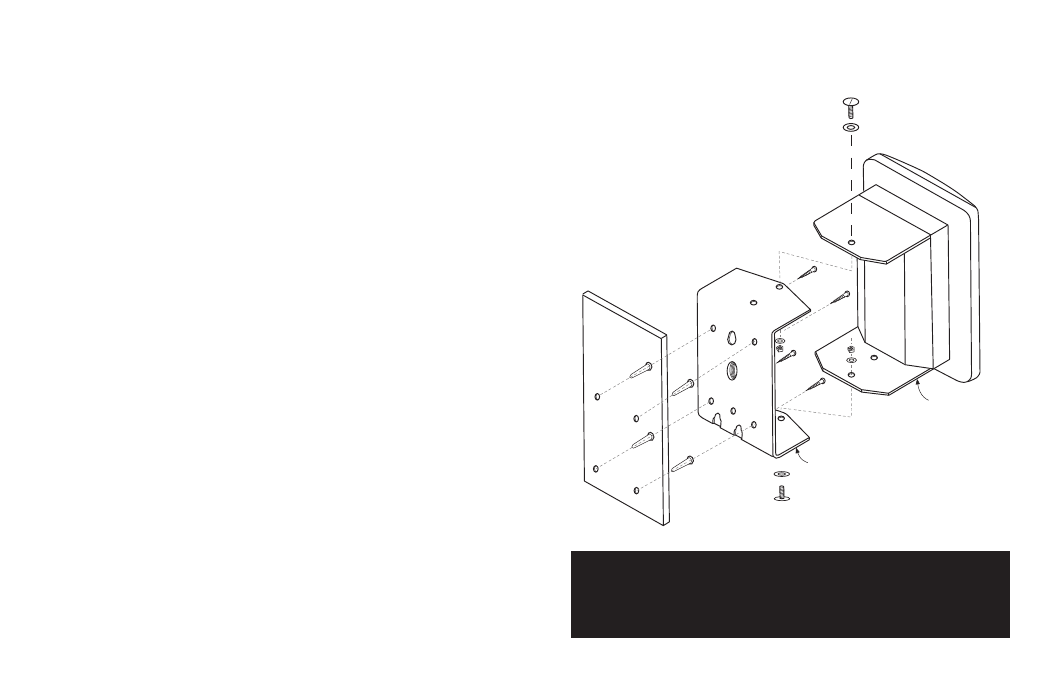
Main Unit
Wall Bracket
CAUTION: Ensure that the unit is securely mounted prior to use to
avoid damage to the instrument and/or potential injury.