Important, Installation (between joists mounting) – Panasonic FV-08VRL1 User Manual
Page 5
Attention! The text in this document has been recognized automatically. To view the original document, you can use the "Original mode".
INSTALLATION (BETWEEN JOISTS MOUNTING)
IMPORTANT:
Remove the tape from damper and adaptor
before installation. As shown below:
Adaptor
Tape
Damper
Joist situation:
, A
p
Spacing A is 12 inches
%
%
(305mm) to 24 inches
Joists
p \
(609mm) on center joists
——'
p.
—
—'
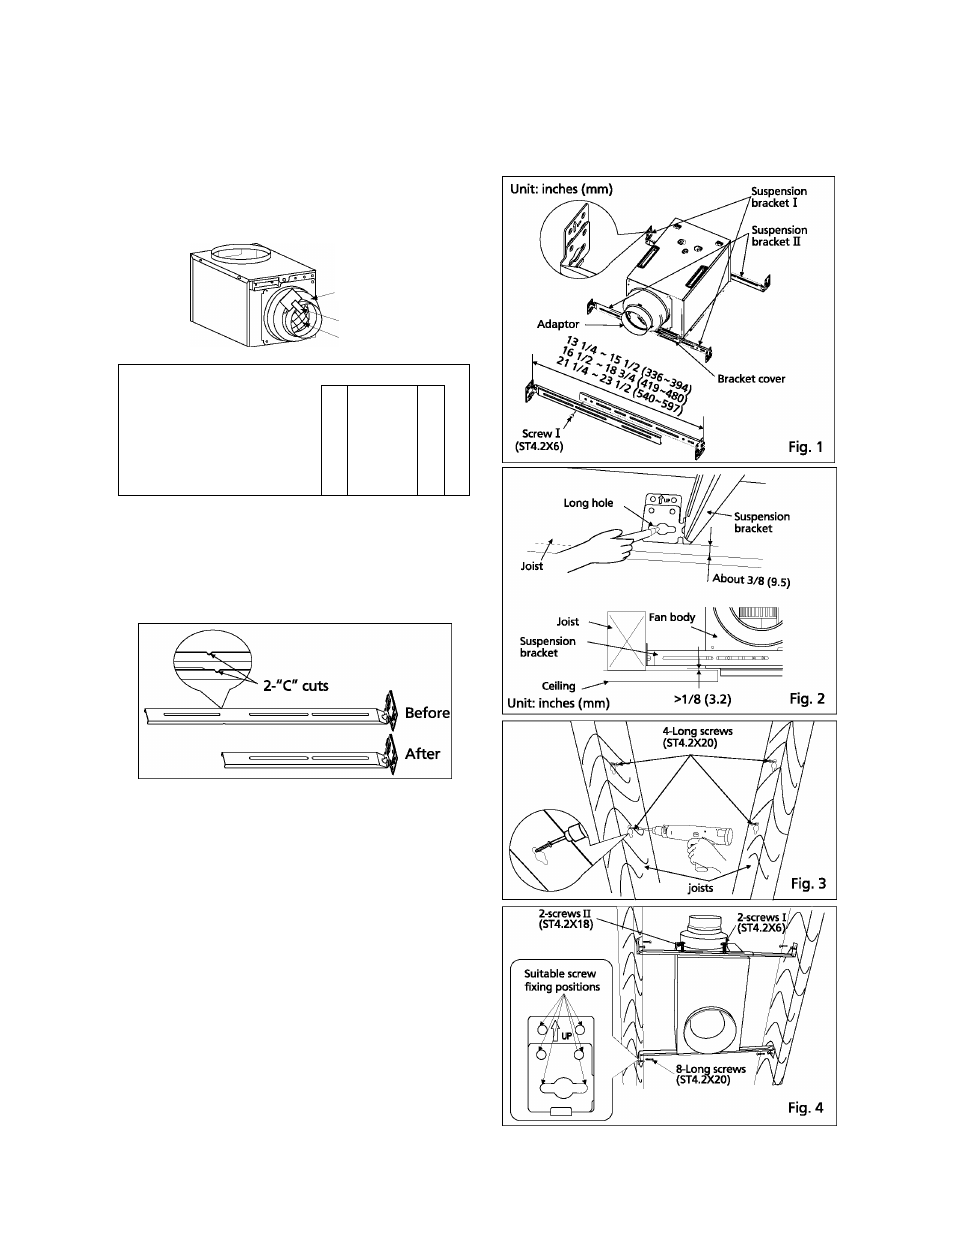
Please follow the installation steps as below:
1. Insert the suspension brackets into the fan body
from each side of the bracket cover. (Fig. 1)
If spacing A between center joists is 12 inches,
cut all suspension brackets afong the two "C"
cuts with a hacksaw or other tools.
2. Fix suspension brackets I and II with screws I
(ST4.2X6), but remember not to tighten the screws
up yet. (Except that the spacing is 12 inches between
joists.) (Fig. 1)
3. Position the fan body between joists, and hold it
properly. Mark the long holes of all the four
suspension brackets on joists. (Fig. 2)
4. Fix four long screws (ST4.2X20) partially into joists
at the four marked locations. (Fig. 3)
5. Hang the fan body down from the four long screws,
and adjust the suspension brackets if necessary.
Then, tighten the four long screws up. And that, fix
the other four long screws (ST4.2X20) to other holes.
Make sure the fan body is level and square with
the joists. (Fig. 4)
6. Tighten the two screws I (ST4.2X6) up (Except that
the spacing is 12 inches between joists.). Then secure
suspension bracket I and Etothefan body with
screws n (ST4.2X18). (Fig. 4)