Jaclo ½" thermostatic valve - J-THVC12 User Manual
Page 4
JACLO.COM
| PG 4
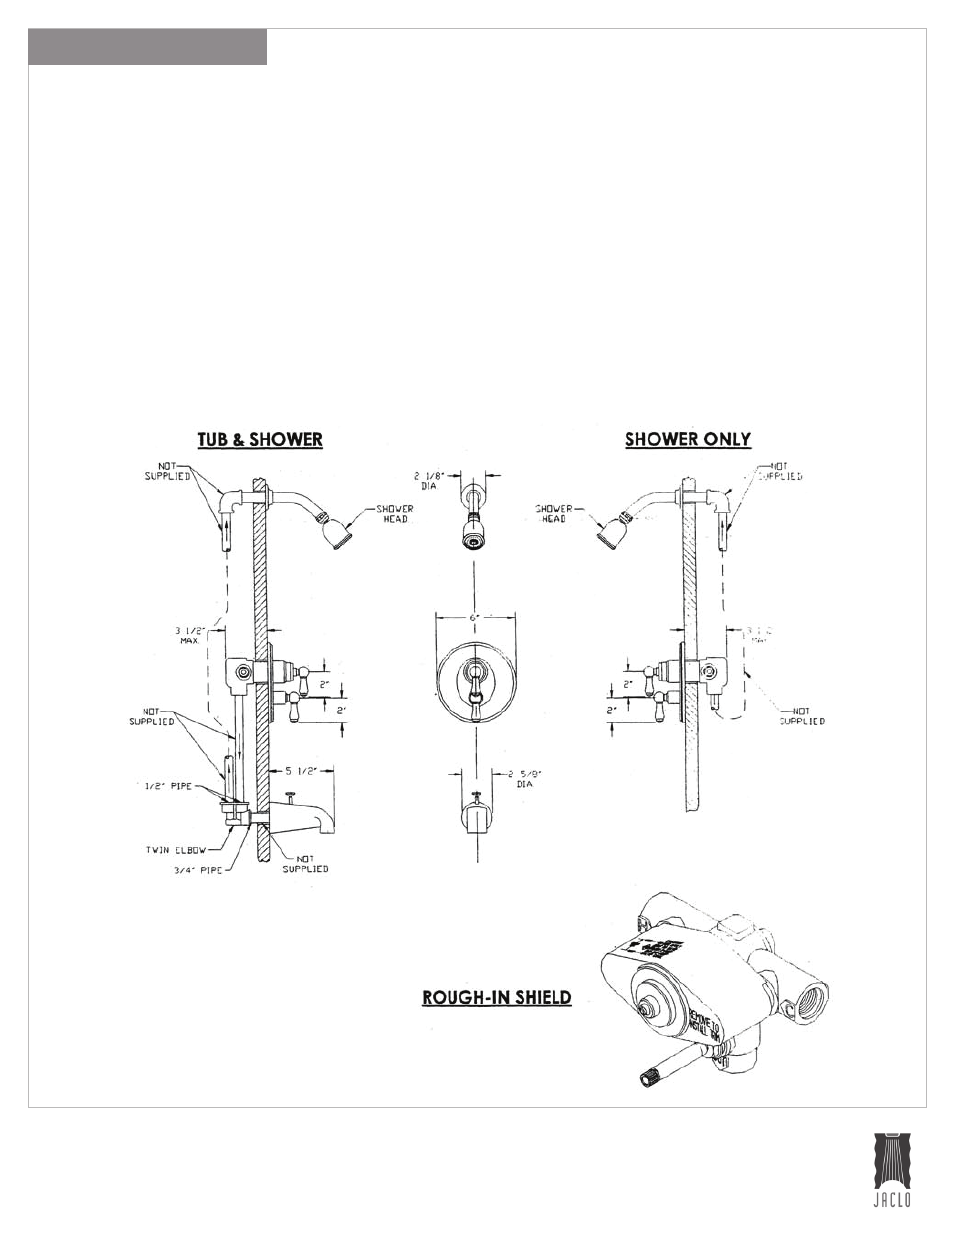
THERMOSTATIC WALL VALVE
ROUGH INSTALLATION
1
›
Make sure hot and cold water is piped to the correct valves inlets.
2
›
Do Not Solder Connections unless valve is kept cool and heat is no closer than 3" to body. Otherwise
remove check stops and cartridge.
(See check stop removal section).
3
›
Postion valve so the finished wall falls between min./max. thickness mark on the rough-in shield.
Caution: Valve can accommodate walls up to 1" thick. For walls up to 2" thick order a DUAL THERM_
EXT Kit (See Page 2).
4
›
A twin elbow is required for tub/shower installations (see below). For shower only installations the twin
elbow is not required. (See below).
5
›
Install tub spout.
6
›
Remove rough-in shield & tag (see Fig. 2, Page 5).
7
›
Before pressurizing system for testing, make sure that both check stops are in the open position and
the volume control is in the closed position.
8
›
Once system is pressurized turn on water by opening volume control valve. Check for leaks. To adjust
temperature, see section on limit stop and temperature setting.
- Dual lever therm - T6592- Dual lever ½" thermostatic valve with integral volume control - T6570- Contemporary thumb and lever - T6572- ½" therm extension kit - J-THVC12-EXT Cross and lever dual therm - T6534- Dual lever therm valve - T6536- Dual mini lever therm valve - T6000- Contemporary cross and lever - T6530- Contemporary dual lever - T6532-