Cub Cadet GT-2554 User Manual
Page 28
28
4.
Saturate the foam precleaner with new engine oil.
Squeeze out all excess oil.
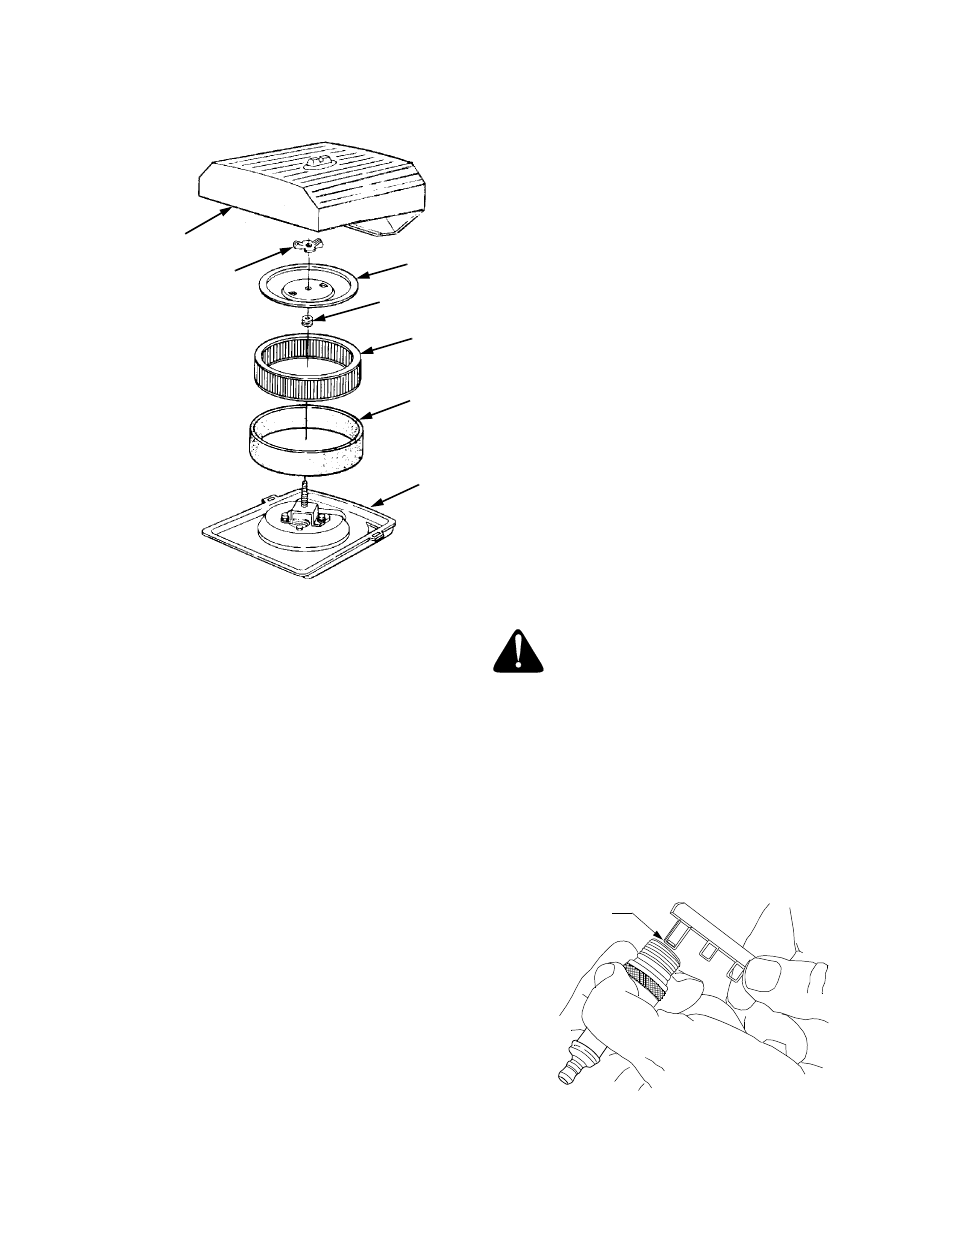
Figure 23
5.
Reinstall the precleaner over the paper element.
6.
Reinstall the air cleaner cover and secure with the
retaining knob.
Servicing the Paper Element
Inspect the paper element before each use. Every 100
hours of operation (more often under extremely dusty
or dirty conditions) replace the element.
1.
Unfasten the air cleaner cover retaining knob and
remove the air cleaner cover (Refer to Figure 23).
2.
Remove the foam precleaner by sliding it up off the
paper element (Refer to Figure 23).
3.
Remove the wing nut and element cover plate,
then lift out the paper air filter element.
4.
Do not wash the paper element or use pressurized
air, as this will damage the element. Replace a
dirty, bent or damaged element. Handle new
elements carefully; do not use if the sealing
surfaces are bent or damaged.
5.
When servicing the air cleaner, check the air
cleaner base. Make sure it is secured and not bent
or damaged. Also check the element cover for
damage or improper fit. Replace all damaged air
cleaner components.
6.
Inspect the rubber grommet (Refer to Figure 23)
for deterioration, cracks, and for a snug fit on the
air cleaner stud. Replace if damaged or worn.
7.
Reinstall the paper element, foam precleaner,
element cover, wing nut and air cleaner cover.
Make certain the cover retaining knob is tightened
securely.
Properly cleaned and installed air cleaner elements
significantly contribute to prolonging engine life.
CLEANING ENGINE
This tractor has an air-cooled engine. Air must be able
to circulate freely through the flywheel screen, blower
housing, and cooling shrouds, and over the cooling fins
of the cylinder head and cylinder block. Regularly
check these areas for accumulated dirt and debris to
prevent engine overheating and possibly causing
extensive engine damage. Every 100 hours of
operation, remove the blower housing and cooling
shrouds to clean the cooling surfaces of the engine.
Make sure the cooling shrouds are reinstalled.
SPARK PLUG
WARNING: To avoid possible injury, be
sure the engine is off and has cooled
before making any adjustments or
repairs.
IMPORTANT: Remove all dirt from around the spark
plug before removing.
To remove the spark plugs, always use a spark plug
wrench. Check the gap after every 200 hours of
operation.
Replace a defective plug with a new plug. Set the
spark plug gap at .030 inch (See Figure 24). Tighten
the plug to 18-22 ft-lbs. See your authorized dealer for
the correct replacement plug.
Figure 24
1.
2.
3.
4.
5.
6.
7.
Air Cleaner Cover
Wing Nut
Element Cover
Rubber Grommet
Paper Element
Foam Precleaner
Air Cleaner Base
1
2
3
4
5
6
7
.030 in. gap