4 main menu setup guide – COP-USA DVR16HEC-960 User Manual
Page 23
DVR User Manual
17
4 Main Menu Setup Guide
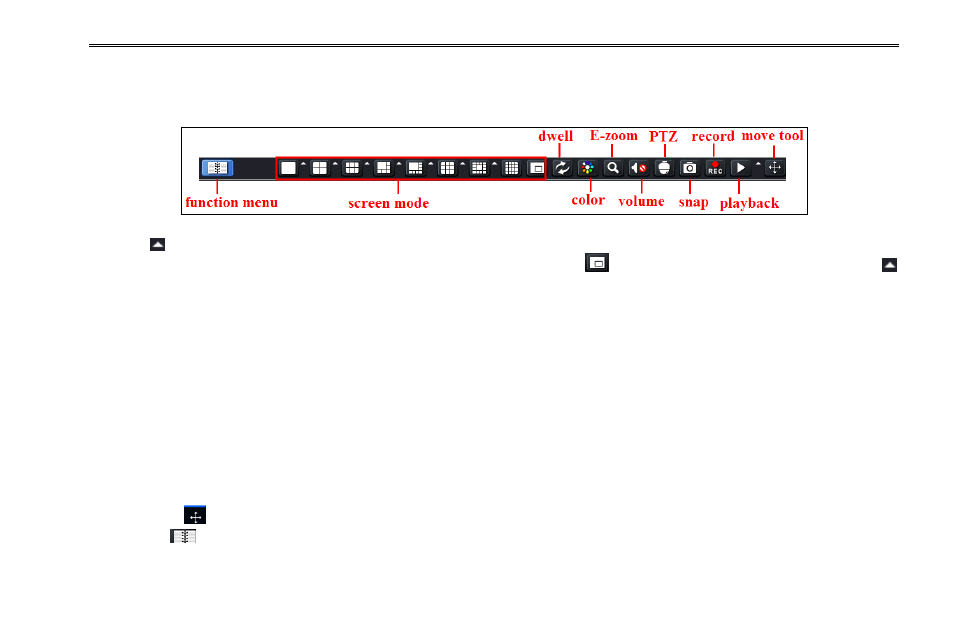
Click right mouse or press Stop/ESC button on the front panel to display the menu on the bottom of the screen. Refer to Fig 4-1:
Fig 4-1 Main Menu Toolbar
Click the
icon beside the screen display mode to display a channel select dialog. 6/8/13 channels can realize single channel
big screen. Images can drag to any place to display in the live interface. Click
icon to set up picture-in-picture. Click the
icon beside the playback icon to select the time to playback. For example, if 2 minutes is selected and then click playback
button, it will start to playback from the past 2 minutes.
Dwell: Dwell means to display live images from different cameras in a sequence. The images may be displayed as a single
channel or in a grid fashion from different cameras. Dwell mode is enabled only when the chosen display mode is not able to
display all the available cameras.
Color: If this button is enabled, you can adjust the color of live images.
E-Zoom: Single channel large screen electronic amplification.
Volume: Enable sound.
PTZ: Click the PTZ button to control rotation position, speed and auto scan of the PTZ connected to the IP camera.
Snap: Use this button to take snapshots. These pictures will automatically be saved in the HDD.
Record: Click this button to start/stop recording.
Playback: Click this button to playback the recorded files.
User can click
button and drag it anywhere with the left mouse.
Click Menu
button to pop up a window as Fig 4-2; you can also press MENU button on the front panel or operate with
remote controller to display the main menu. Clicking Setup icon will pop-up the configuration menu: