Panasonic WJ-HDE500 User Manual
Page 5
Attention! The text in this document has been recognized automatically. To view the original document, you can use the "Original mode".
6
Set the unit address with jumper connector on the
HDD as shown.
Note; For further details, refer to the instructions
included in the HDD unit.
HDD #2 & #4
(SLAVE)
HDD #1 & #3
(MASTER)
o
o
o
o
o o
o o
Jumper Position
o o O
o o o
o
o
Jumper Position
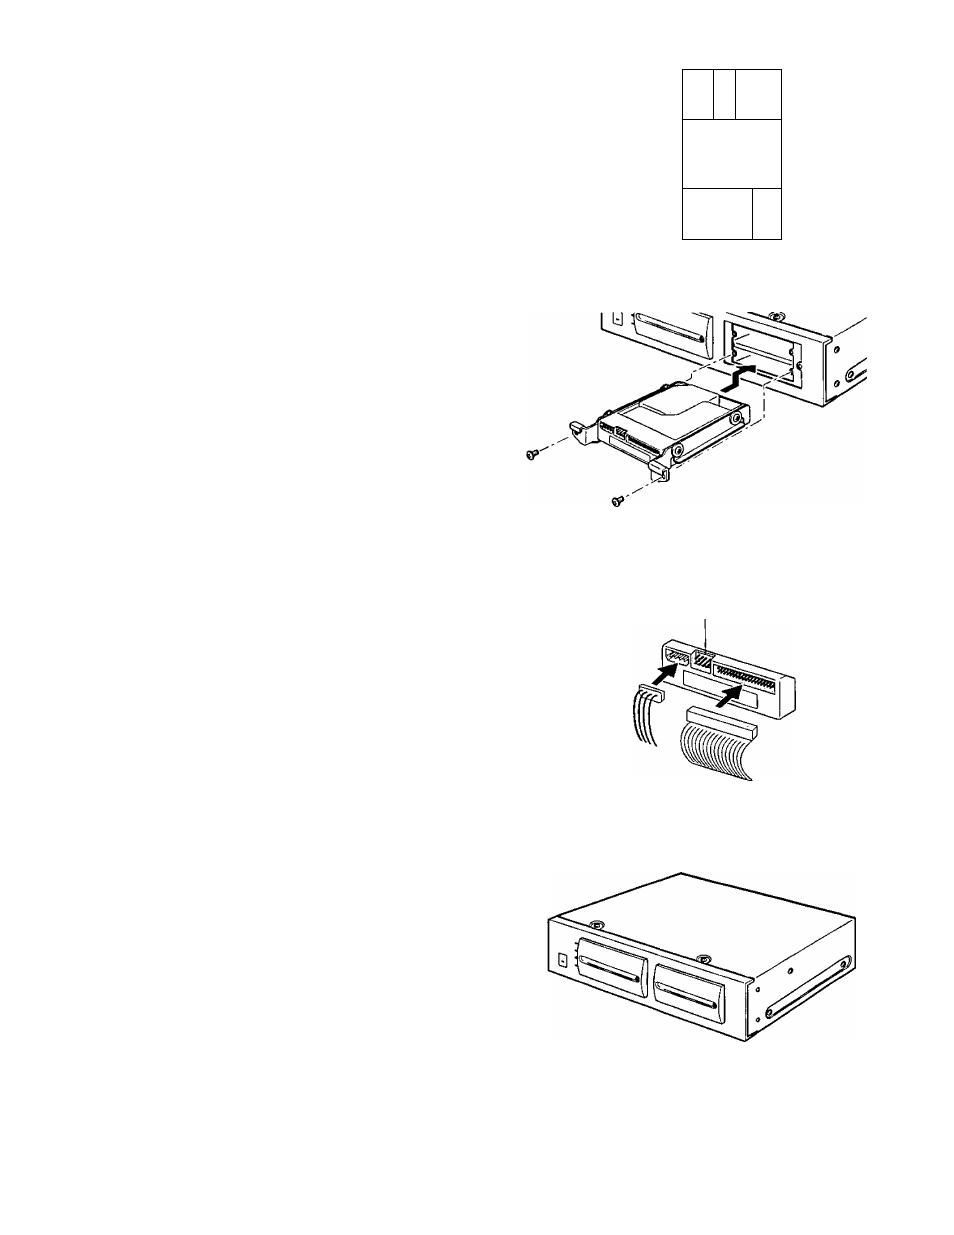
7
Place the HDD into the appropriate opening, then fix it
with 2 screws.
8
Plug the 2 connector harness to the installed HDD as
shown.
9
Repeat above steps for HDD #2 through #4.
Jumper Connector
10
Replace the front lid as before.
-
5
-