Mounting hdds, Hdi^#4 hdd #3, Hdd #2 hdd#1 – Panasonic WJ-HDE500 User Manual
Page 4
Attention! The text in this document has been recognized automatically. To view the original document, you can use the "Original mode".
Mounting HDDs
A maximum of 4 HDD units (locally procured) can be
mounted on one extension unit. This page describes
how to install #1 HDD. Repeat the same procedures as
#1 for #2 through #4 HDD.
The HDD units should be installed into the proper open
ings in order as shown. Never skip or reverse the posi
tion order of the HDD units.
1
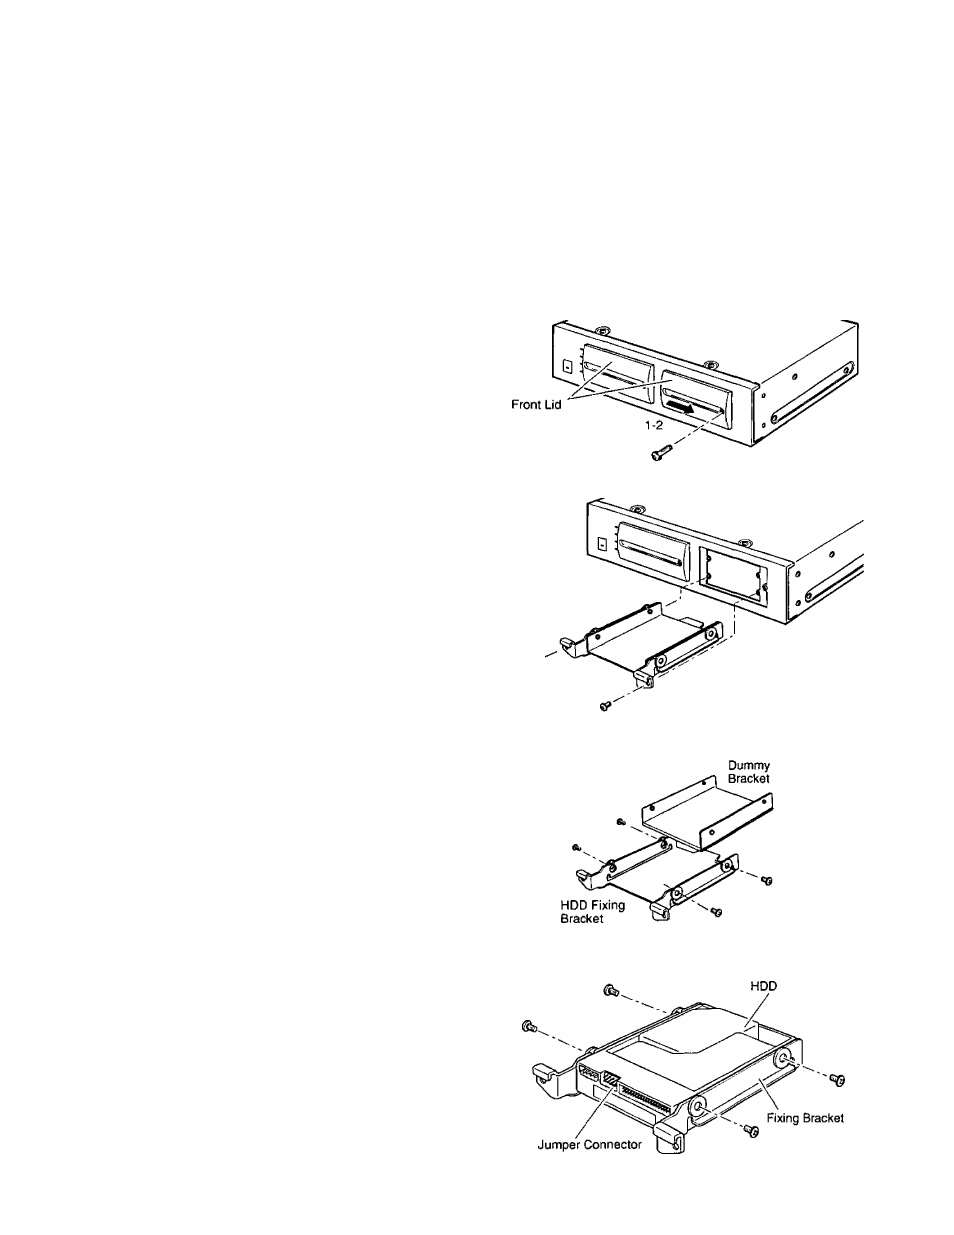
Remove the front lid.
1-1 Loosen the front lid fixing screw,
1-2 Slide the lid to the right and remove it.
2
Remove the HDD bracket #1.
2-1 Loosen 2 screws as shown.
2-2 Pull the bracket #1 out of the opening.
3
Disassemble the bracket #1.
Separate it into the fixing bracket and dummy bracket
by loosening 4 screws.
Keep the removed fixing bracket and 4 screws so that
they are to be used later.
4
Prepare an HDD unit.
HDD Positions Inside The Lid
HDI^#4
HDD #3
HDD #2
HDD#1
ХГГ
1-1
Q»"
5
Mount the HDD on the fixing bracket then fasten them
together with 4 screws.
-
4
-