Panasonic CW-C101MU User Manual
Page 14
Attention! The text in this document has been recognized automatically. To view the original document, you can use the "Original mode".
5
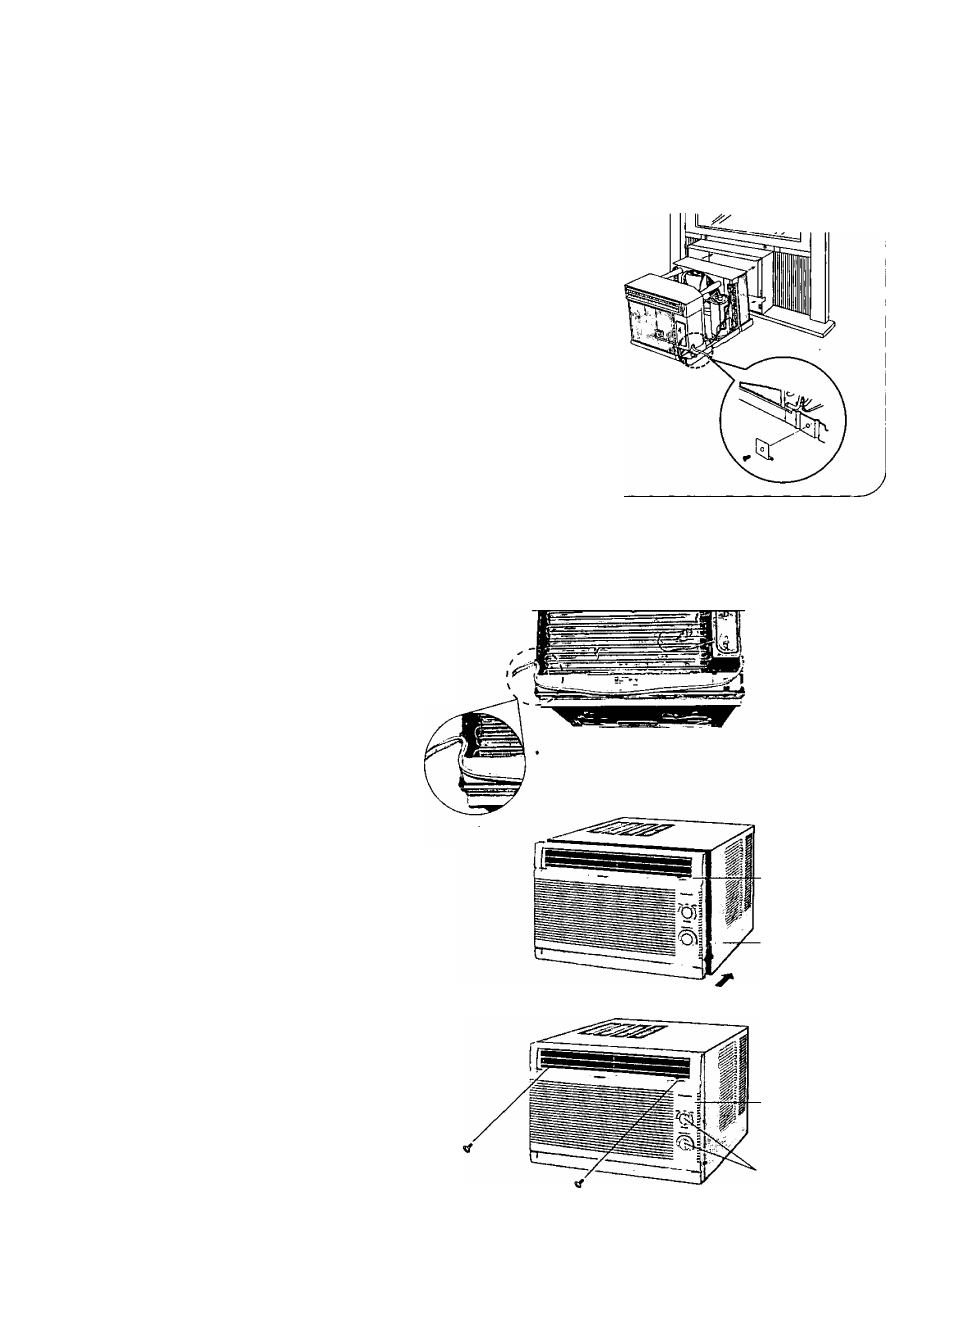
Chassis Installation Into The Cabinet
Instalación Del Chasis Dentro De La Caja
Window sash
Hoja móvil
1. Slide the chassis into the cabinet. Reinstall the chassis locking bracket
into its original position (Inside the cabinet) and retighten the screw.
2. Fix the chassis grounding screw to the original position.
1. Deslize el chasis dentro de la caja. Reinstale las ménsulas de retención
del chasis en su posición original (dentro de la caja) y ajuste bien los
tornillos.
2. Fije el tornillo de puesta a tierra del chasis en su posición original.
6
Installation of the Front Grille
Instalación del la Rejilla Frontal
1
.
1
.
Depending on the location of the AC outlet, route
the AC cord to either left or right side while
installing the front grille.
Dependiendo de la ubicación de la toma
de CA, dirija el cable hacia la derecha o
izquierda mientras instala la rejilla frontal.
2. Place the front grille to the cabinet first.
2. Primero, ponga la rejilla frontal en la caja.
3. Push the grille (bottom) until it snaps into place.
3. Empuje la rejilla (parte inferior) hasta que encaje
en su lugar.
This figure shows
the AC cord routed
to the left side
Esta figura muestra
el cable de CA
dirijida hacia la
izquierda
Front grille
Rejilla frontal
Cabinet
caja
4. Secure the front grille to the main chassis using
the screws provided.
4. Asegure la rejilla frontal a el chasis haciendo uso
de los tornillos provistos.
5. Fix the knobs to the front grille.
5. Ajuste las perillas en la rejilla frontal.
Front grille
Rejilla frontal
Knobs
Perillas
14