Installation instructions – Kidde KN-COPP-3 (900-0100) User Manual
Page 13
Wall Mounted Alarm
Installation tips for power cord models:
The power cord option provides more flexibility in mounting locations
and allows the alarm to be easily installed at eye level.
For a wall-mounted unit, you will need to pull out the removable
adapter and power cord.
To install:
1. Follow steps 1 through 3 in the previous
section under “To Rotate the Adapter.”
2. With the adapter removed, pull the power
cord out of the cord storage, remove the
twist tie, and extend the power cord.
3. With the power cord extended, press the
last few inches of the power cord into the
cord recess. Gently pull the cord at the
bottom of the cord recess until the cord
becomes taught and lays flat in cord recess.
4. Carefully replace the back door. Insure
the “latches” on all four corners of the
door are lined up, then press the door
securely into place.
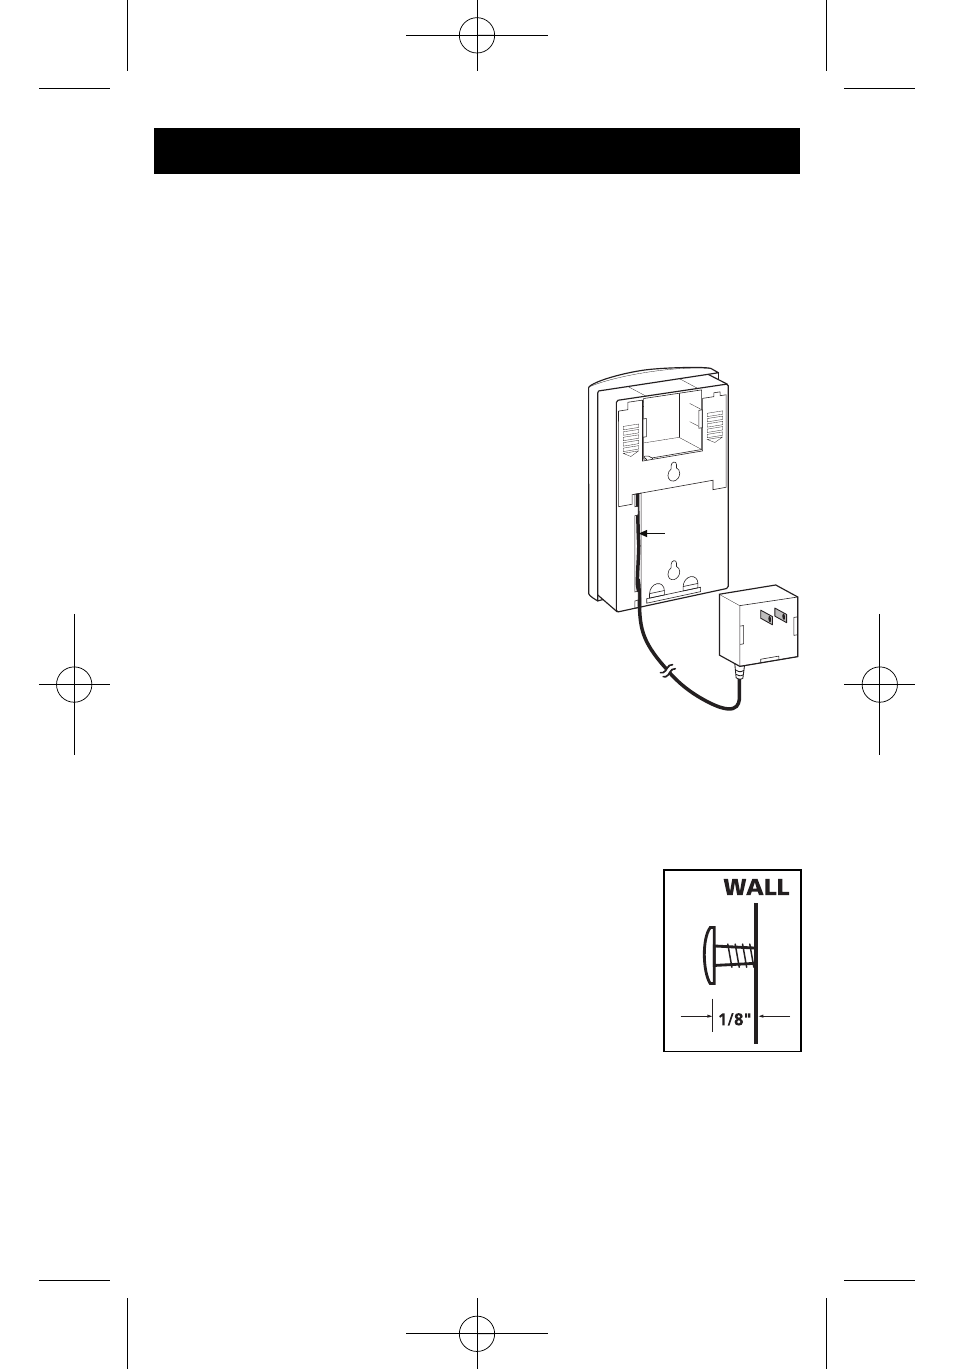
5. Mark the location for the two mounting holes on the wall spaced
vertically 2 5/8" apart.
6. If you are mounting the alarm in plaster board or
drywall, drill a 3/16" hole into the wall and insert
the plastic anchors provided. Install the two screws
provided into the wall or wall anchors until the
screw head is approximately 1/8" from the wall.
7. Hook the unit over the screw head and into the
keyhole in back of the unit.
8. Plug the adapter into an unswitched wall socket.
Table Top Alarm
You can use your Kidde CO alarm as a table top unit. Follow steps 1 thru 3
above. Instead of mounting the unit to a wall, pull out the slide support and
place in a location that is easily visible. Be sure the alarm is no more than 3 ft
from the floor. The alarm does not have to be within 3 ft from the floor to
detect CO, but at this height it is less likely to sustain damage from a fall.
4. Installation Instructions
Cord
Recess
Back of alarm when
used as a wall mount unit
Screw Head
Distance
from Wall
810-1219 Rev E_EN_V2.qxd:_ 2012.12.12 11:35 AM Page 13