Vernier Centripetal Force Apparatus User Manual
Page 5
9
Dual-Range Force Sensor attached to frame, and with screw end of Swivel Assembly
attached. Vertical adjustment screw on the right.
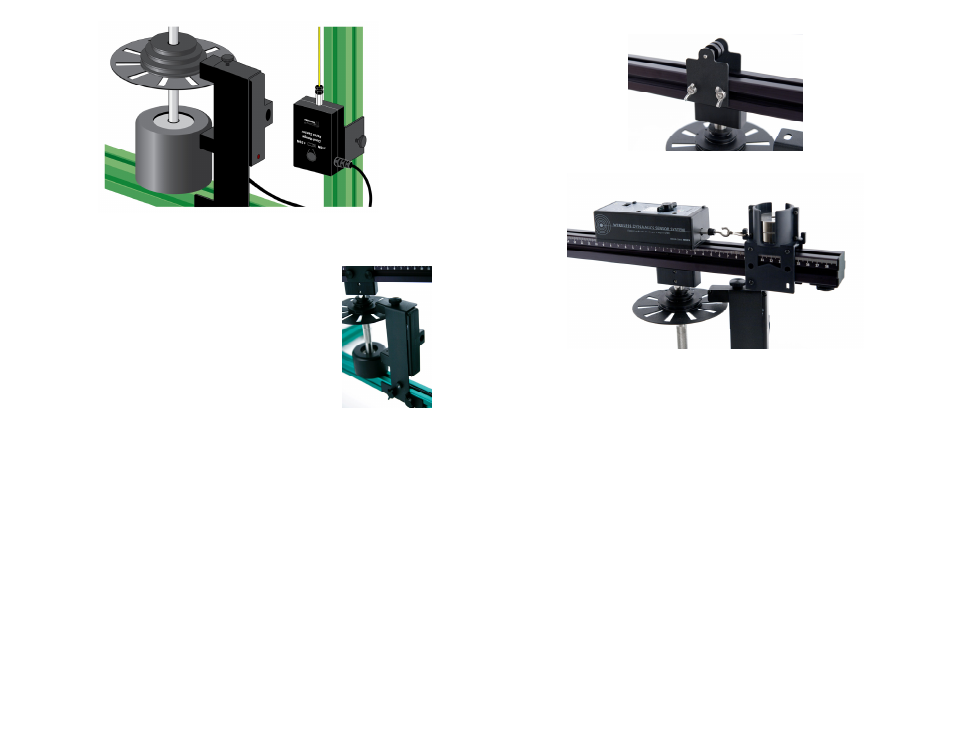
Attaching a Photogate
A photogate can be attached to the Vernier Photogate
Bracket, which is positioned next to the Encoder mounted on
the Rotating Shaft. Follow these assembly instructions:
1. Locate the Photogate Bracket on the lower horizontal
piece of the frame.
2. Secure the photogate into the stand with the
1/4 x 20 mounting screw. In this position the photogate
beam will be interrupted by the Encoder Wheel.
Attaching a Wireless Dynamic Sensor System (WDSS)
The WDSS can be used instead of the Dual-Range Force Sensor, and attaches to the
horizontal rotating beam. Follow these assembly instructions:
1. On the middle of the Rotating Beam, you’ll find a Pulley Guide used when the
Swivel Assembly is connected to the Dual-Range Force Sensor. Loosen the wing
nuts on the pulley and remove them from the beam.
2. Attach the Sliding Carriage to the Rotating Beam if it is not already attached.
3. Remove the end piece and the Counterbalance Carriage if it is mounted on the
Rotating Beam.
4. Attach the WDSS mounting screw and T-nut to the WDSS, slide the WDSS onto
the Rotating Beam so that the hook end is adjacent to the Sliding Carriage.
5. Attach the small end of the WDSS clip to the hook end of the WDSS.
6. Clip the other end of the WDSS clip to the Sliding Carriage.
7. Move the Sliding Carriage to the desired radius. Pull the WDSS tight and secure
it to the beam with its mounting screw.
10
Removable Pulley Guide on Rotating Beam
WDSS attached to beam and Sliding Carriage
Note: The beam is not perfectly balanced when using a WDSS, because the
Counterbalance Carriage cannot be placed directly opposite the Sliding Carriage.
The shaft and bearing are sufficiently rigid such that a small imbalance will not
affect results.
Data-Collection Interface and Software Compatibility
Data collection with the CFA is possible with the following combinations of
interfaces and software.
Logger Pro 3 Use this computer program with LabQuest
®
2, LabQuest,
LabQuest Mini, and LabPro
®
.
LabQuest App Use this program with LabQuest 2 or original LabQuest, when
LabQuest 2 or original LabQuest is used as a standalone device.
DataQuest App Use this application with TI-Nspire™ Technology and the
TI-Nspire™ Lab Cradle.
LabVIEW™ National Instruments LabVIEW™ software is a graphical
programming language sold by National Instruments. It is used with SensorDAQ
and the sensors that are compatible with the CFA. Contact Vernier for more
information concerning compatibility.