Cleaning the coffee brewer, Cleaning the glass decanter, Liquid level probe – Wilbur Curtis ALPHA 6GTN User Manual
Page 7
7
Cleaning the Coffee Brewer
Regular cleaning and preventive maintenance is essential to keep your coffee brewer looking and working like new.
For cleaning, prepare a mild solution of dish washing detergent and warm water.
CAUTION – Do not use cleansers, bleach liquids, powders or any other substance containing chlorine. These
products promote corrosion and will pit the stainless steel. USE OF THESE PRODUCTS WILL VOID THE
WARRANTY.
1. Wipe exterior surfaces with a cloth soaked with cleaning solution. Scrub off dried coffee spots, spills, and coffee
grounds.
2. Remove the brew cone and wash it in a sing using the cleaning solution Brush
inside the brew cone with cleaning solution.
3. Scrub the sprayhead area with a cleaner soaked cloth.
4.
Rinse the sprayhead area with a water soaked cloth, removing any residual detergent. Dry
with a clean cloth.
5. Rinse and dry the brew cone.
6. Rub the outside cabinet surfaces with a stainless steel polish to protect the metal.
Cleaning the Glass Decanter
Curtis glass decanters are dish-washer safe. Coffee decanters may be hand washed.
1. Prepare a mild solution of detergent and warm water.
2. Immerse the decanter in detergent solution and clean with a sponge brush.
3. Thoroughly rinse out the glass decanter with clean warm water.
4. Dry the decanter.
WARNING – To Avoid Damage or Injury
l
Do not boil dry or heat pot when empty.
l
Do not clean with materials that scratch.
l
Do not use gas flame or range top of any kind.
l
Do not pour towards people.
l
Do not carry two decanters in one hand.
l
Clean only with mild detergent or an urn cleaning solution specifically intended for coffee decanters.
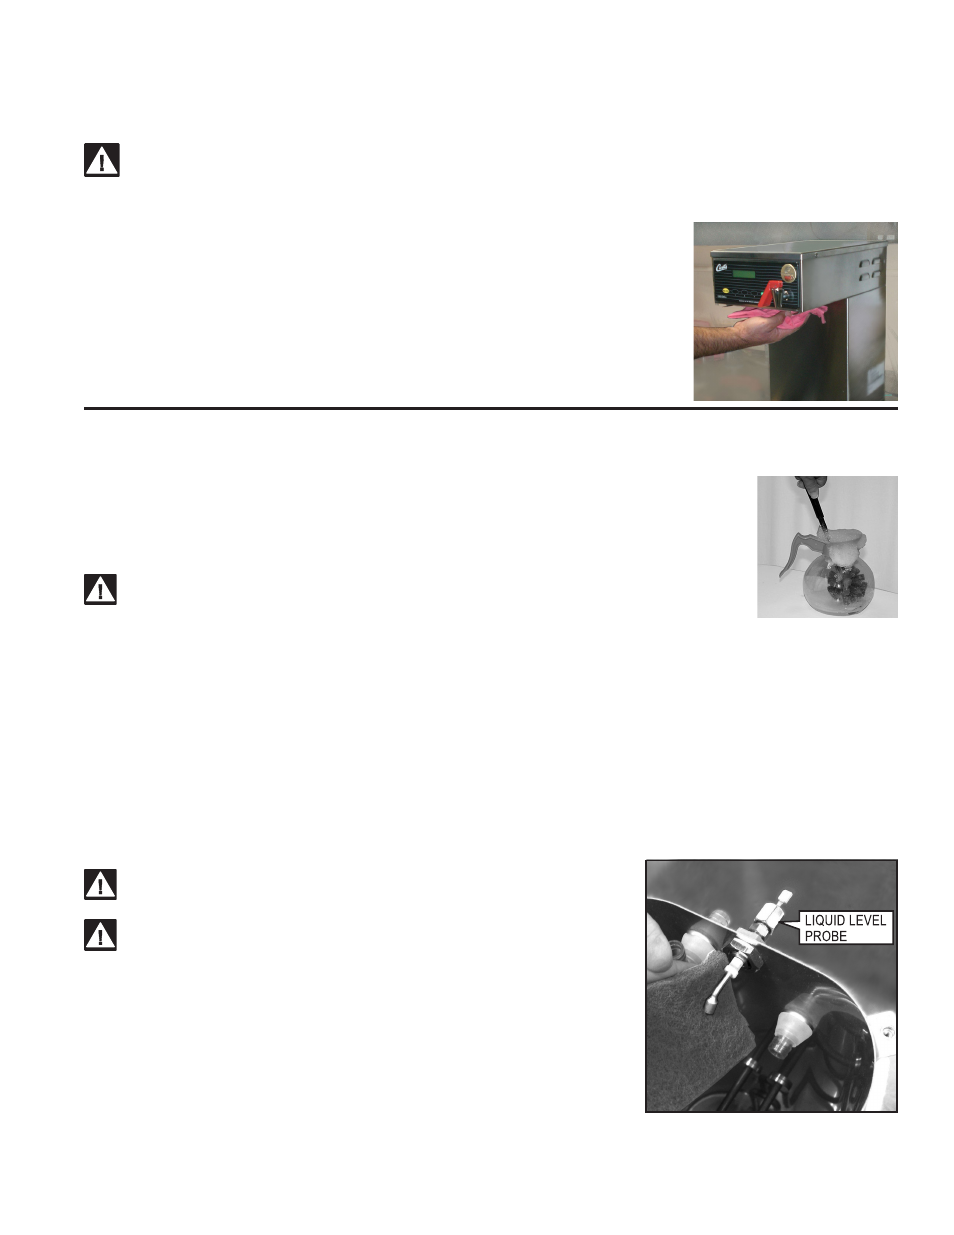
Liquid Level Probe
Cleaning intervals for the probe are to be determined by the user or the service tech based on water conditions. The
use of water filters, or the type of water filter that is being used can impact the service interval. Intervals can be from
one month to several years, however, replacing rather than cleaning the probe is preferable.
WARNING: Disconnect electrical power before removing access panels!
CAUTION: This procedure involves working with hot water and hot sur-
faces!
1. Unplug the power cord and shut off the water line.
2. Remove the top cover of the unit. Locate the top of the tank and remove the
cover.
3. Drain the tank to a level about 3” below the tip of the probe.
4. Allow some time for the probe to cool before working on the brewer.
5. Clean the tip of the probe using a Scotch-Brite
TM
scuff pad.
6. If a residual white layer is still visible on the probe, remove the probe and soak it in vinegar or a scale removing
chemical. Repeat this step until the white layer is removed.