Casio CELVIANO AP-200 User Manual
Page 27
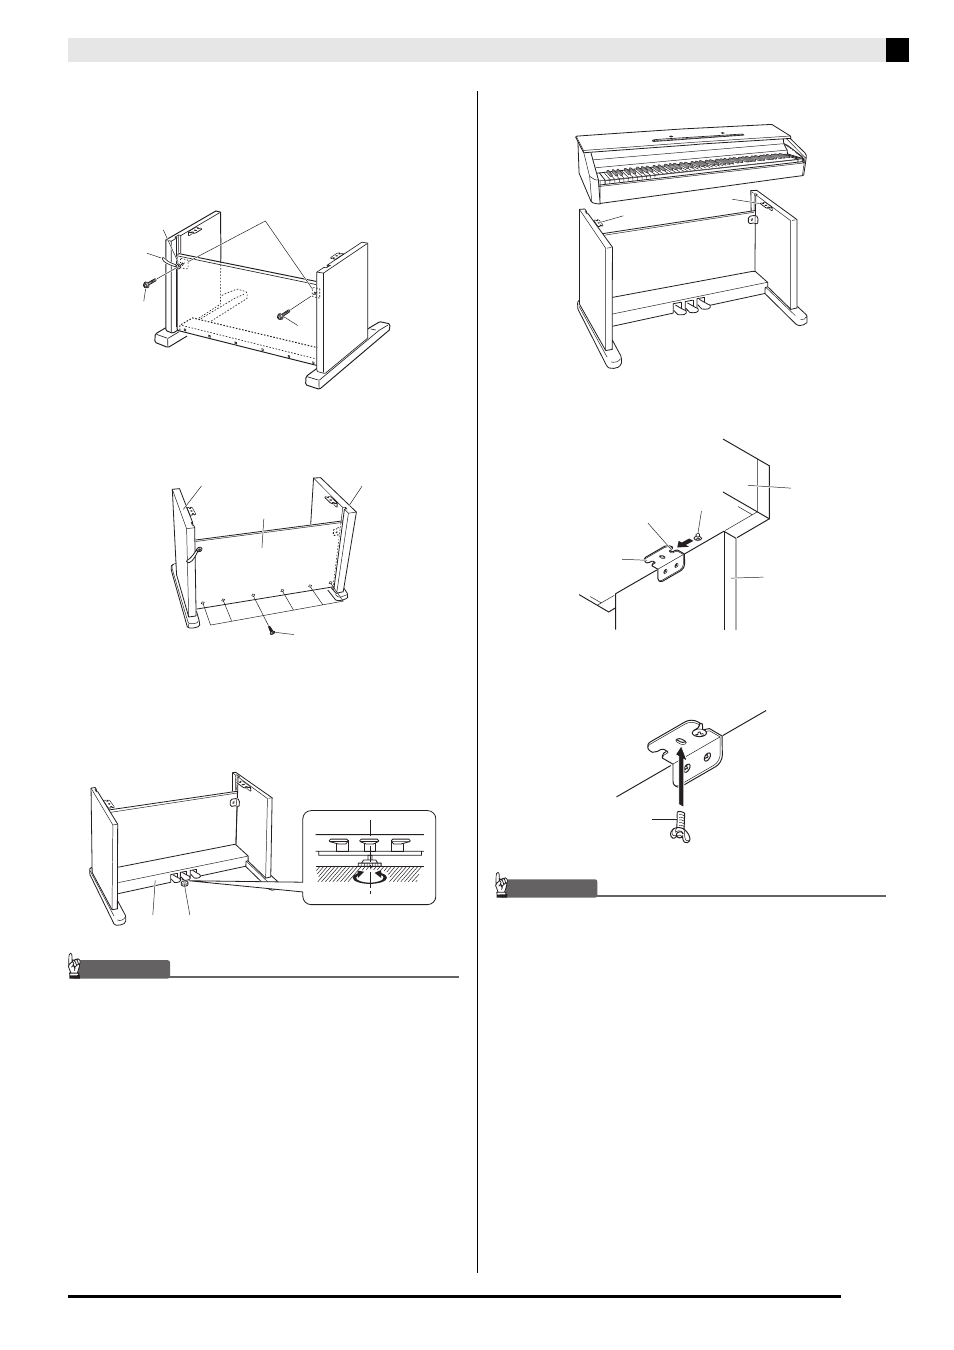
Assembling the Stand
E-25
3.
Use the two screws I to secure the top left
and right edges of the back panel C to the
brackets 5 of side panels A and B.
•
At location 6, slip the G clip onto to the I screw
before installing the screw.
4.
Next, secure the bottom of the back panel C
with the six F screws.
5.
Adjust the height adjustment screw 7 to
provide support so crosspiece D does not
bow downwards when the pedals are
pressed.
IMPORTANT!
• Pressing the pedals without adjusting height adjustment
screw 7 can result in damage to crosspiece D. Always
make sure you adjust height adjustment screw 7 before
operating the pedals.
6.
Place the piano onto the stand.
•
At this time the screws on the bottom of the piano 8
should hook into the cutouts in the stand brackets 9.
7.
Use the two H butterfly bolts to secure the
piano to the stand.
IMPORTANT!
• The butterfly bolts keep the piano from slipping off the
stand. Never use the piano without the butterfly bolts
installed.
5
I
I
6
G
C
F
A
B
7
D
9
9
9
8
Bracket cutout
Back of piano
Stand side panel
H