Step 3, Fit the receiver collar, Receiver collar led – function and response – Petsafe ST-70, 70 m Basic Remote Trainer User Manual
Page 9
www.petsafe.net 9
DE
NL
IT
FR
ES
EN
To Turn the Receiver Collar On and Off
Using the Test Light Tool or a coin, turn the battery module until the on symbol ( | ) or off
symbol ( O ) aligns with the triangle symbol on the Receiver Collar. Note: To extend the life
of the batteries, turn the Receiver Collar off when it is not in use.
Important: If the Receiver Collar is left on continuously, the maximum battery life will
be 10 days.
Receiver Collar LED – Function and Response
Function
LED Light Response
Turn unit on
LED fl ashes 1 time and beeps
Any Remote Transmitter button pressed
On for length of button press
Low battery condition
LED fl ashes 3 times every 5 seconds
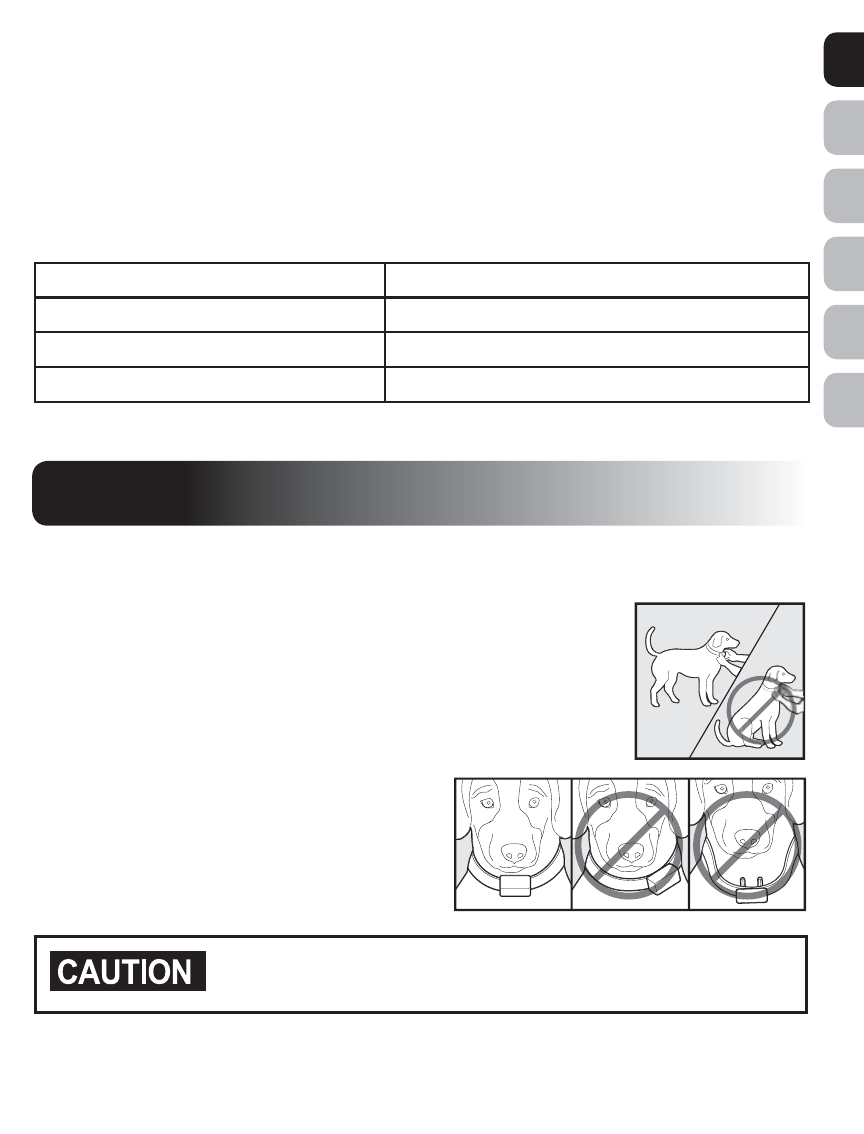
Fit the Receiver Collar
Important: The proper fi t and placement of your Receiver Collar is
important for effective operation. The Contact Points must have direct
contact with your dog’s skin on the underside of his neck.
To assure a proper fi t, please follow these steps:
1. Make sure that the Receiver Collar is turned off.
2. Start with your dog standing comfortably (3A).
3. Place the Receiver Collar on your dog’s neck
close to the ears. Centre the Contact Points
underneath your dog’s neck, touching the skin
(3B). Note: It is sometimes necessary to trim
the hair around the Contact Points to make
sure that contact is consistent.
Do not shave the pet’s neck as this may increase the risk of
skin irritation.
STEP 3
3A
3B
3B