Fig 5 fig 4 – PDR Mounts MDWM50 User Manual
Page 3
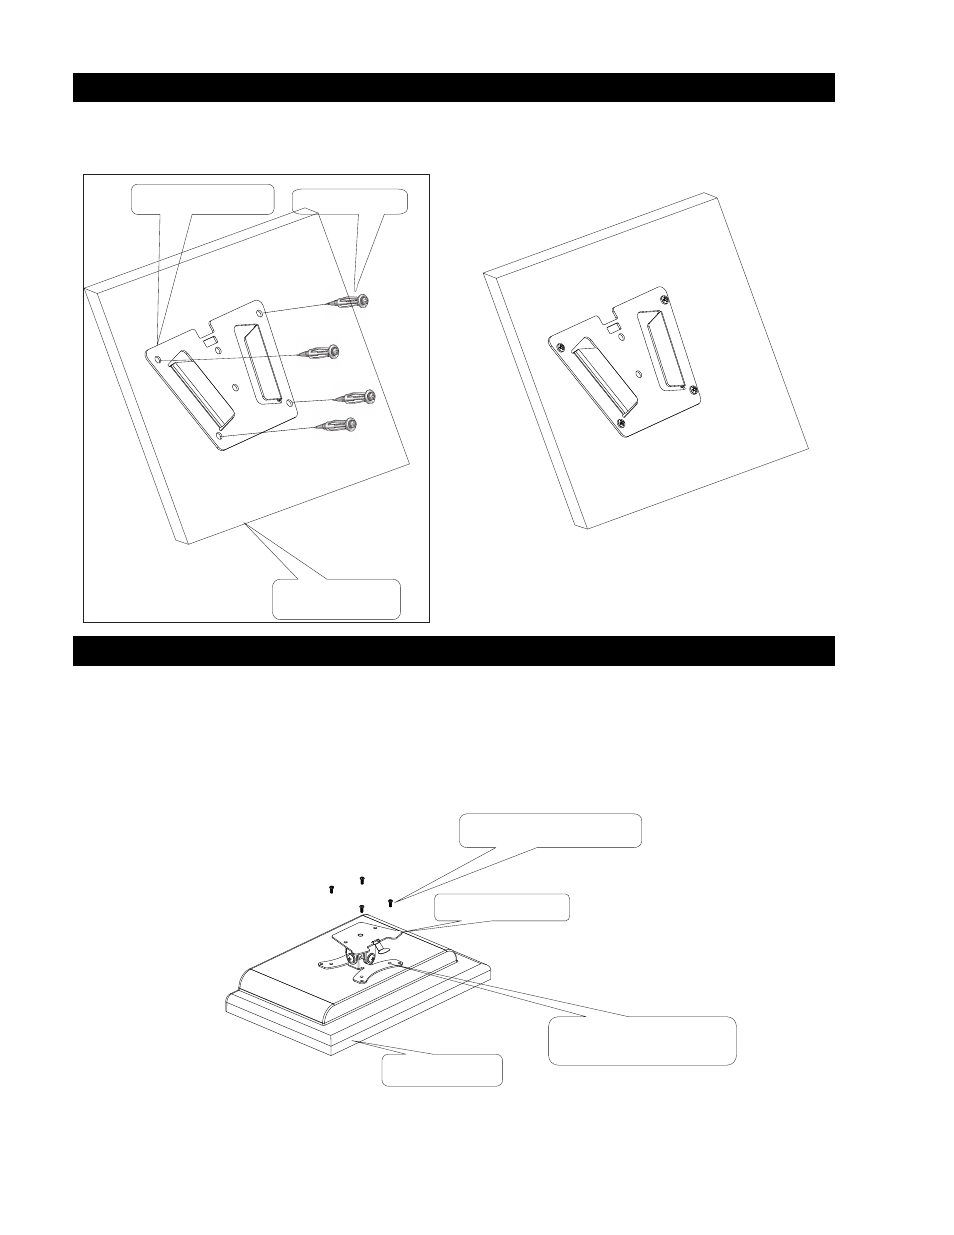
1 FASTENING THE MOUNTING PLATE TO THE WALL
NOTE: Do not over tighten the bracket mounting screws as damage to the monitors internal mounting threads could occur.
3
Locate the best viewing angle for the monitor, and using the 4 wall anchors supplied, attach the mounting
bracket to the wall. Place the narrow end of the plate facing downward. Alternate hardware may be required if
attaching to a solid surface.. See
fig 3 and fig 4
2 ATTACH THE MOUNT TO THE MONITOR
Fig 5
Fig 4
Lay the monitor on a soft surface ,face down, and attach the mount using 75mm or 100mm VESA hole
pattern and the 4 screws supplied. See
fig 5 ( note top of monitor)
Mounting surface
½”wall board
Mounting plate
Wall anchors
M o u n t i n g s c r e w s
Top of Monitor
75mm & 100mm
Vesa hole pattern
Bayonet plate