Assembly instructions 4/5, Step 6, Step 7 – Home Styles 5527-10 User Manual
Page 5
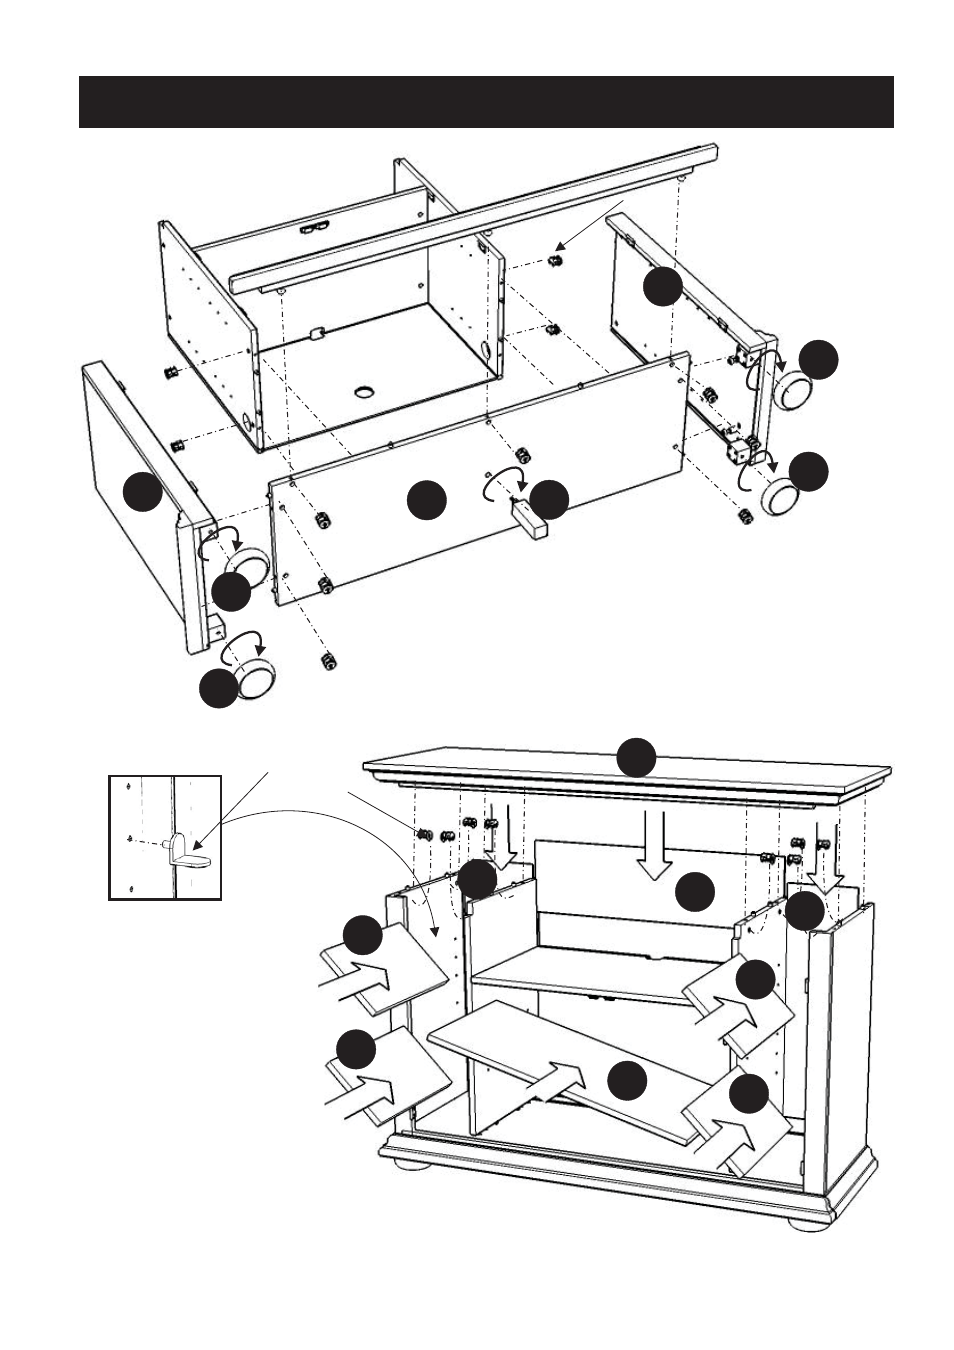
STEP 6
Assembly Instructions 4/5
Cam Lock
Attach Base (I) to the unit with Cam Locks.
Attach Side Panel (B) and (C) to the unit with Cam Locks,
then attach the plinth unit to the unit with Cam Locks.
Tighten up Legs (R) and (S) in the pre-drilled holes of unit as shown.
I
B
S
R
R
R
R
C
A
Adjustable Pin
Cam Lock
STEP 7
Slide Back Panels
(J) and (K) into place.
Place Top (A) onto
the unit, using
Cam Locks.
Insert Adjustable Pins into
side panels and middle panels at the desired level. (See figure 4)
Place Shelves (L) and (M) into position.
L
J
K
M
M
M
M
K
Figure 4