Assembly instructions 3/5, Step 3 step 4, Step 5 – Home Styles 5527-10 User Manual
Page 4
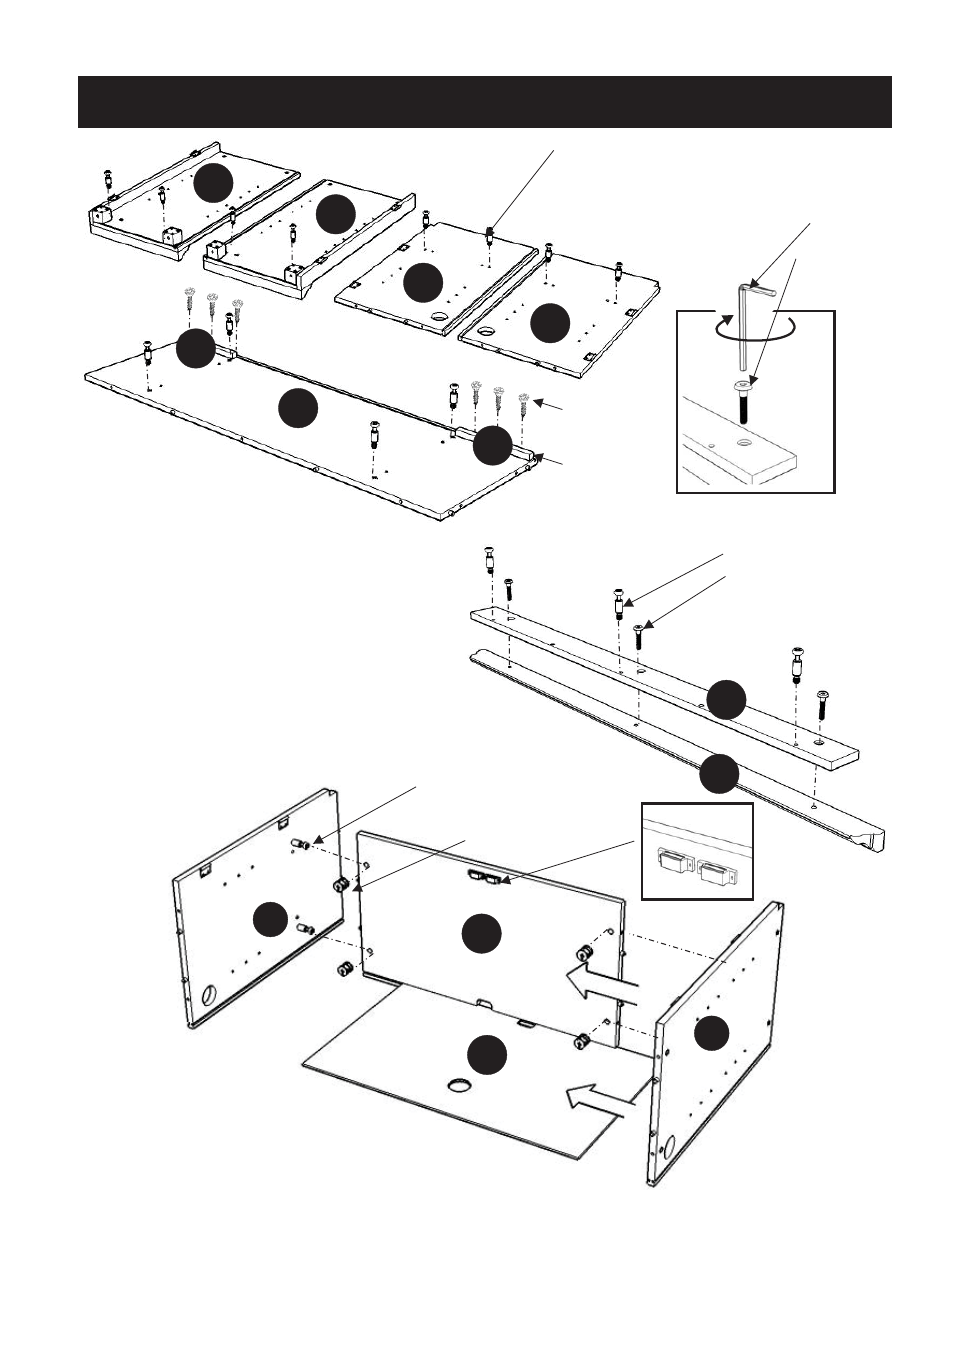
Assembly Instructions 3/5
STEP 3
STEP 4
B
E
D
I
C
Attach 2X Wood Blocks (V) to Base (I) by using Wood Screws for
Wood Block into the pre-drilled holes.
Insert Cam Lock Screws into
the pre-drilled holes of Side Panel (B) and (C),
Middle Panel (D) and (E), Base (I).
T
U
Cam Lock Screw
Head Cap Bolt
Head Cap Bolt
Cam Lock Screw
Figure 3
Hex Wrench
D
E
Cam Lock Screw
Cam Lock
G
F
STEP 5
Attach 2X Magnets to Fixed Shelf (F) by using
Wood Screws (short) in the pre-drilled holes.
Attach Fixed Shelf (F) to Middle Panel (D) with Cam Locks, then slide Back Panel (G)
into position.
Attach Middle Panel (E) to the unit with Cam Locks.
Magnet
Attach Support Plinth (T) to Plinth (U)
using Head Cap Bolts. (See figure 3)
Insert Cam Lock Screws
into the pre-drilled
holes of
Support
Plinth (T).
V
V
Wood Screw
for Wood Block
Wood Block