Assembly instructions 4/4, Step 5 – Home Styles 5536-09 User Manual
Page 4
Assembly Instructions 4/4
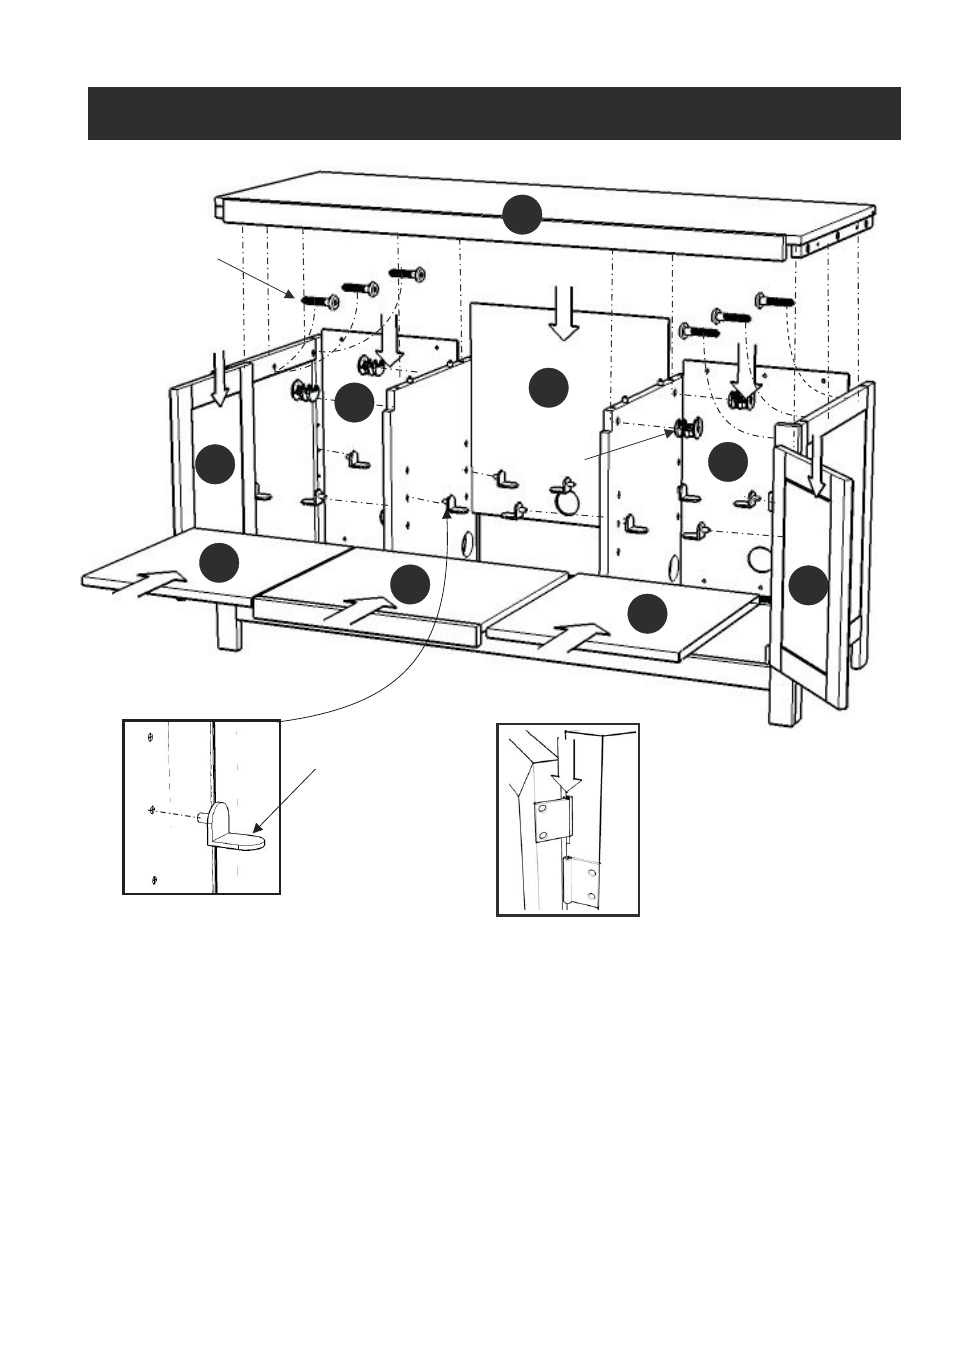
Figure 4
J
K
G
G
F
H
H
I
A
Head Cap Bolt
Cam Lock
Adjustable Pin
Figure 3
Slide Back Panels (H) and (I) into place.
Place Top (A) onto the unit using Head Cap Bolts and Cam Locks.
Insert Adjustable Pins into side panels and middle panels at the desired level (see Figure 3).
Place Shelves (G) and (F) into position.
Attach Doors (J) and (K) by sliding the door lift hinges into the side panels lift hinges.
(see Figure 4)
STEP 5
Note: The height of Top (A) can be adjusted slightly when tightening the Head Cap Bolts
so that Top (A) is flush with the Side Panels.