Vintage Cellars Platinum Fully Ducted User Manual
Platinum split unit specific installation guide, Package contents, Evaporator preparation
Page 1
(1) Split System Owners Manual
(1) Unit Specific Installation Guide
(1) Warranty Registration Card
(1) 50 ft. Bottle Probe
(1) Remote Keypad
(1) 50 ft. Keypad Communication Cable
(2) Black Strain Relief
(10) 6-32 3/8” Phillips Pan Head Screw
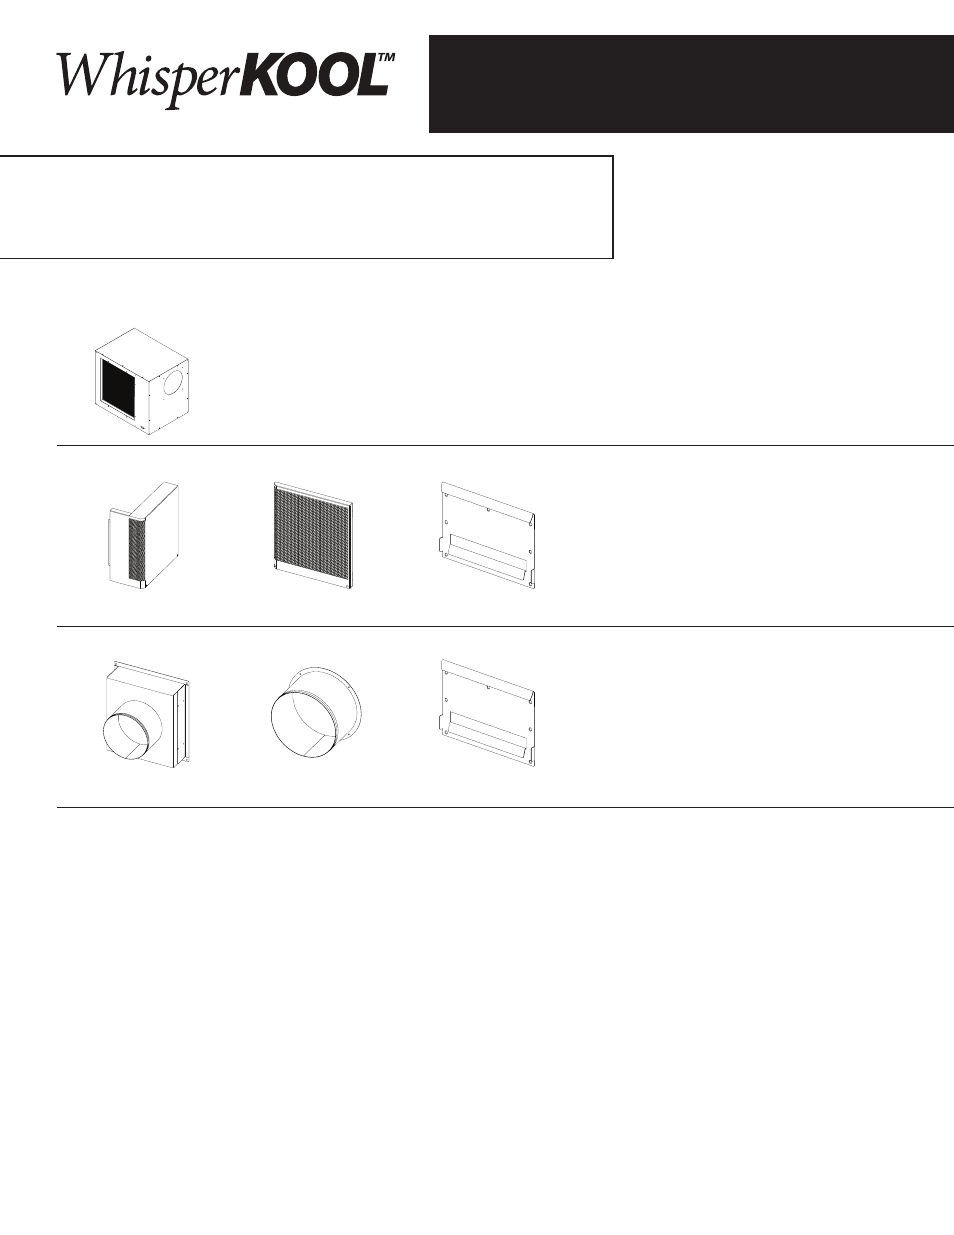
Package contents
PLatInUM sPLIt
UnIt sPecIFIc InstaLLatIon gUIDe
To be used wiTh The
sPLiT sYsTeM owNeRs MANuAL
The Coolest Thing In Wine Storage
(1) Platinum Split
Evaporator Unit
(1) Installation Kit which includes:
(7) #14 2” Phillips Pan Head Screw
(1) 3/8” Drain Tube Connector
(1) 10 ft. 3/8” Drain Line
(1) 10 ½” piece of 1/4” copper tubing
(1) 10 ½” piece of 3/8” copper tubing
(1) 1/4” copper coupling
(1) 3/8” copper coupling
(1) 1/4” sight glass
(1) 1/4” filter drier
(1) Side Grille
(1) 8” Return Air Plenum
(1) Filter Grille
(1)Supply Air Collar
(1) Mounting Bracket
(1) Mounting Bracket
Required tools
•
Drill w/Phillips Bit
•
5/32” Drill Bit
•
Phillips Screwdriver
•
Tape Measure
•
Brazing Torch
•
Drywall Saw
•
Ladder
•
Level
•
Pliers
Wall-Mount accessory kit
Ducted accessory kit
Main evaporator Box
(1) Split System Owners Manual
(1) Unit Specific Installation Guide
(1) Warranty Registration Card
(1) 12 ft. Bottle Probe
(10) 6-32 3/8” Phillips Pan Head Screw
(1) Black Strain Relief
1. With the unit unpacked, remove caps from the rear copper lines. - DO NOT DISCARD
2. Place both the 3/8 and 1/4 copper couplings on the exposed lines.
3. Insert the supplied 10” copper lines into the couplings.
note: Place a wet rag around the copper tubes near the rubber grommet located at the rear of the evaporator
housing. Be sure to clear the power cord and drain line from brazing area.
4. Braze each lines coupling and 10” copper line extension. - This is a good point to check for leaks.
5. Place the caps removed in step 1 onto the ends of the lines to avoid debris from entering the line set.
6. Insert brass drain line connector into the drain line at the rear of the unit.
7. Connect the 10 foot drain line to the opposite side of the connector.
8. Now remove the (8) Phillips head screws holding the side panel on the supply side of the unit, set side panel and screws aside.
9. With the panel removed locate the bottle probe connector inside the unit.
10. Insert bottle probe connector through the opening on the rear panel.
11. Connect the bottle probe connectors and place the connection back in side the housing.
12. Install the supplied strain relief onto the probe wire outside of the unit (give 1-2” of slack inside of the unit). Now simply insert
the strain relief into the probe line hole.
13. Set unit aside.
eVaPoRatoR PRePaRatIon
•
Pencil
•
2nd Person
(optional)