Water dispenser shut off, Task light, Drain grid and drip cup – Thetford 2117 Series Water Dispenser User Manual
Page 3
Owner’s Manual 3
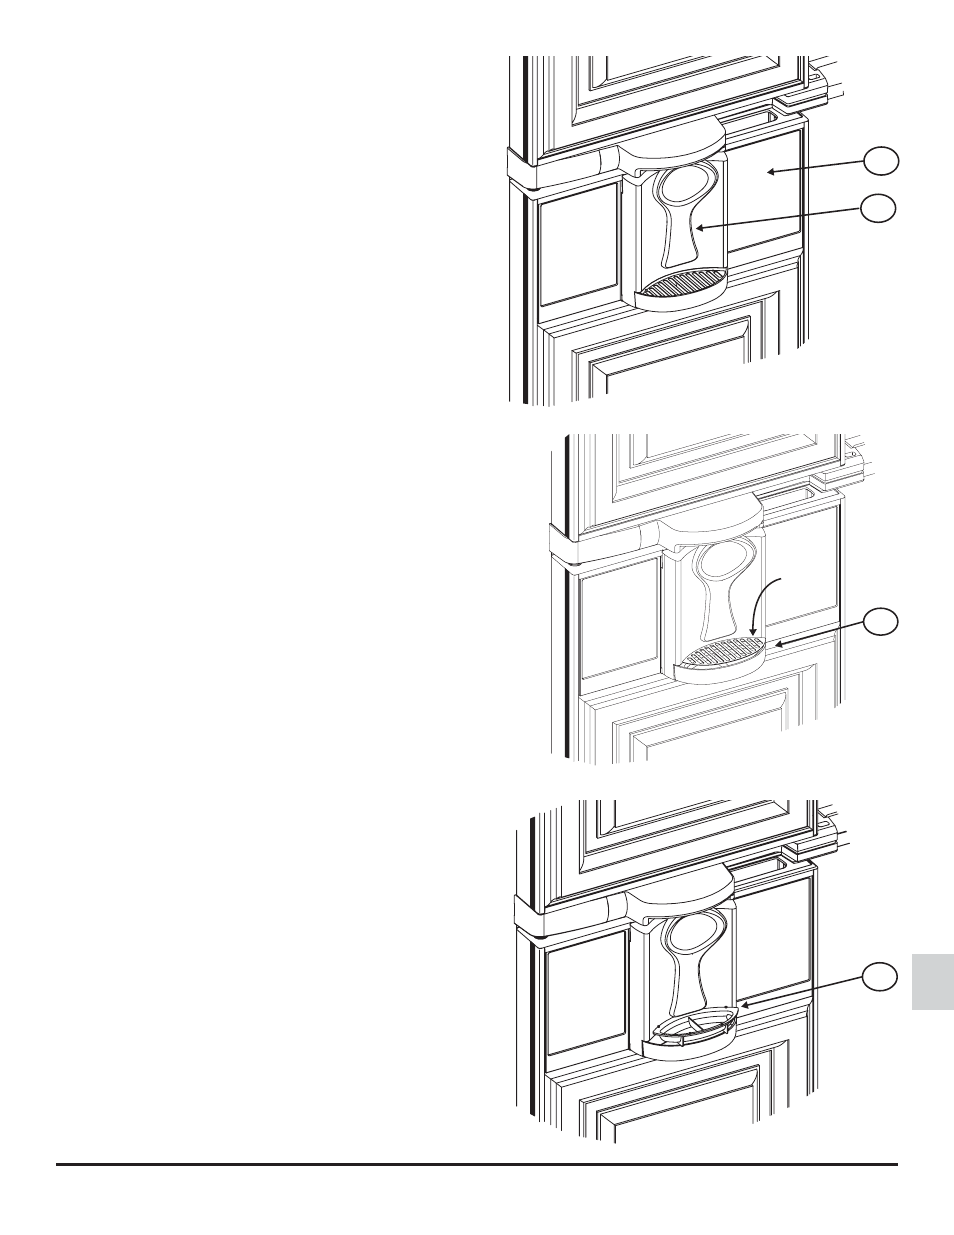
4. Push in and hold the dispenser arm [189] until the water flows
out in a steady stream and does not sputter (See Art01817).
NOTE: This may take a minute for the built-in reservoir to fill for the
first time and to eliminate the air from the system. You
should discard and not use the first several glasses of
water from the dispenser. New plumbing connections and/
or impurities in the water supply line from the first use or
after winterizing can cause the first glasses of water to be
discolored or have an odd flavor.
5. Release the paddle to stop the water flow.
6. Remove the glass from below the dispenser nozzle.
Continued operation:
1. Allow the water in the dispenser to cool before using the dis-
penser.
- The cooling time will vary with the supply water temperature.
- A complete refill of the built-in reservoir will take longer
2. Make sure that the air inside the refrigerator can freely circulate around
the water reservoir which is located at the rear of the fresh food compart-
ment.
NOTE: Do not stack food tightly in front of the water reservoir. If the air
inside the refrigerator can not circulate around the water reservoir,
the water in the dispenser will not cool correctly. Do not set hot
food against the front of the water reservoir.
3. Hold a glass below the dispenser nozzle.
4. Push in and hold the dispenser arm to start the water flow.
5. Release the paddle to stop the water flow.
6. Remove the glass from below the dispenser nozzle.
Water dispenser shut off:
If the water dispenser does not shut off when you release the paddle:
- Push the refrigerator ON/OFF button to turn the refrigerator off.
- See the “Troubleshooting” section of these instructions to find the
cause of the problem.
Task light:
The task light comes on whenever the water dispenser is on.
Drain grid and drip cup:
The drain grid and drip cup are located below the water dispenser
arm.
To remove the drain grid [191], push down on the center of the rear
edge of the drain grid to raise up the front edge so you can grasp it
(See Art01818).
To remove the drip cup [192], grasp the handle area inside the drip
cup and lift it out of the well (See Art01819).
189
190
Art01817
Art01818
191
Art01819
192