Headlamp alignment – Symtech CVA3 EZ User Manual
Page 7
7
wheels, to achieve equal measurements, more than one
eccentric axle change may be required.
Note the number on the floor slope gauge and record that number along with the bay
designate on floor slope sticker provided. Repeat procedure for other bays and record.
NOTE: After measurements have been taken, remove laser and store in a secure place
3.3 VEHICLE PREPARATION
•
Remove ice or mud from under the fenders.
•
Set the tire inflation to the values recommended by the manufacturer.
•
See that there is no load in the vehicle unusual to normal driving conditions.
•
Check vehicle springs for sag or broken leafs.
•
Check function of any automatic leveling systems and specific manufacturers instructions
pertaining to vehicle preparation for headlamp alignment.
•
Clean lenses, check for bulb burnout, broken mechanical aiming pads, moisture in lens and
proper beam switching.
•
Stabilize suspension by rocking vehicle sideways.
4. HEADLAMP ALIGNMENT
4.1 ALIGNMENT OF OPTICAL HEAD TO VEHICLE
Place the CVA 3
EZ
in front of the first headlamp to be aligned.
Once the CVA 3
EZ
is in place, the lens of the optical head should
be approximately 12 inches (+/- 6 inches) from the face of the
headlamp.
Set the floor slope of the eccentric wheel for the bay in which the
vehicle has been parked.
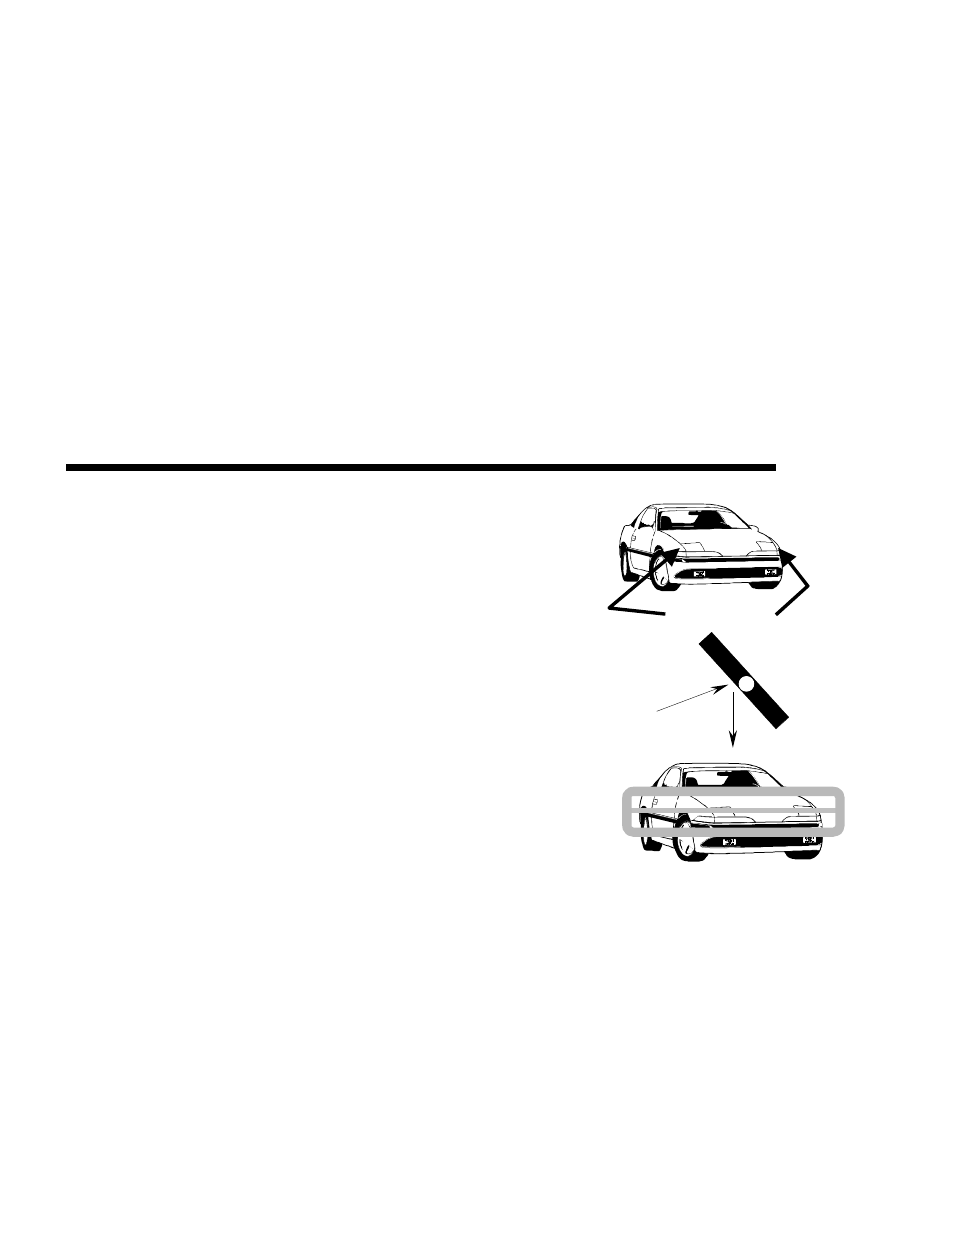
Rotate the vehicle alignment mirror so that the reflection of the front
of the vehicle can be seen in the mirror. Locate two (2) common
points on or under the hood to align the line in the mirror on.
NOTE: Points can be hood stops, radiator supports, points of
fender, etc.
While looking at the mirror, align the line of the sighting unit on the
two common points by rotating the optical head.
The CVA 3
EZ
is now aligned with the vehicle. Repeat the
alignment process for each lamp.
4.2 CENTERING on the HEADLAMP
Turn headlamps on. Move optical head up, or down to the center of the
headlamp. Position of center of the headlamp is approximate; a
±
2
allowance is acceptable.
TRICK: A method to determining if position is greater than 2 is by observing
the Visual Assist meter for highest reading while moving CVA
3
EZ
left/right and up/down in front of the headlamp to be aligned.
4.3 SELECTING HEADLAMP PATTERN
Not all headlamps are created alike and different vehicles
may have different design patterns. To be certain of the
lamp pattern, a designate is located on the lamp at the
bottom of the lens. Patterns of lamps that may be aligned
with the CVA 3
EZ
are;
Common Points
MIRROR