Install the third column element, Installing the push-in scale – Seca 274 band_1 User Manual
Page 49
Before you get started … • 49
English
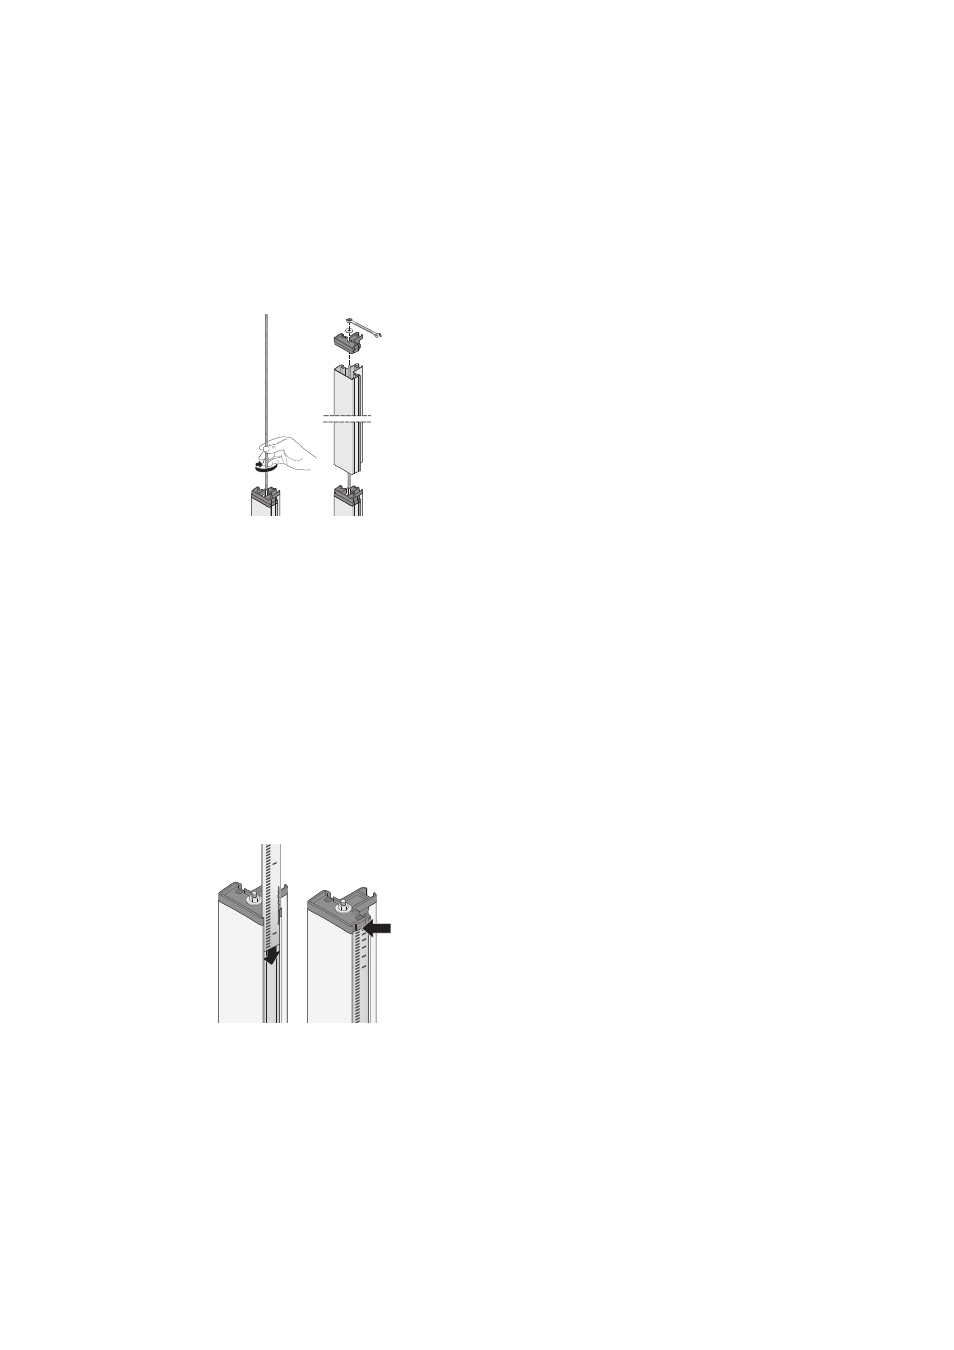
Install the third column
element
To connect the column elements, proceed as follows:
1. Screw a threaded rod hand-tight into the elongated
nut of the second column element.
2. Push the column element over the threaded rod
onto the upright connector of the second column
ELEMENT.
3. Position the end cap on the second column
element so that the threaded rod protrudes from
the hole of the end cap.
4. Place the plain washer on the free end of the
threaded rod.
5. Place the nut on the free end of the threaded rod.
6. Tighten the nut.
7. Place the decorative cap on the nut.
Installing the push-in
scale
ATTENTION!
Incorrect measurements due to installation
errors
If the push-in scale is installed incorrectly the
head slide cannot determine any usable
readings.
− Align the push-in scale so that the printing
remains visible when the scale is pushed into
the groove.
− Align the push-in scale so that the area which
shows the product number forms the bottom
end.
− Ensure that the push-in scale latches into
position under the end cap.
♦ Push the push-on scale into the groove in the side
of the column elements until the scale latches into
position under the end cap.