Modern AG Tilting Grader Blade User Manual
Page 6
6 - C2 tilting Grader Blade
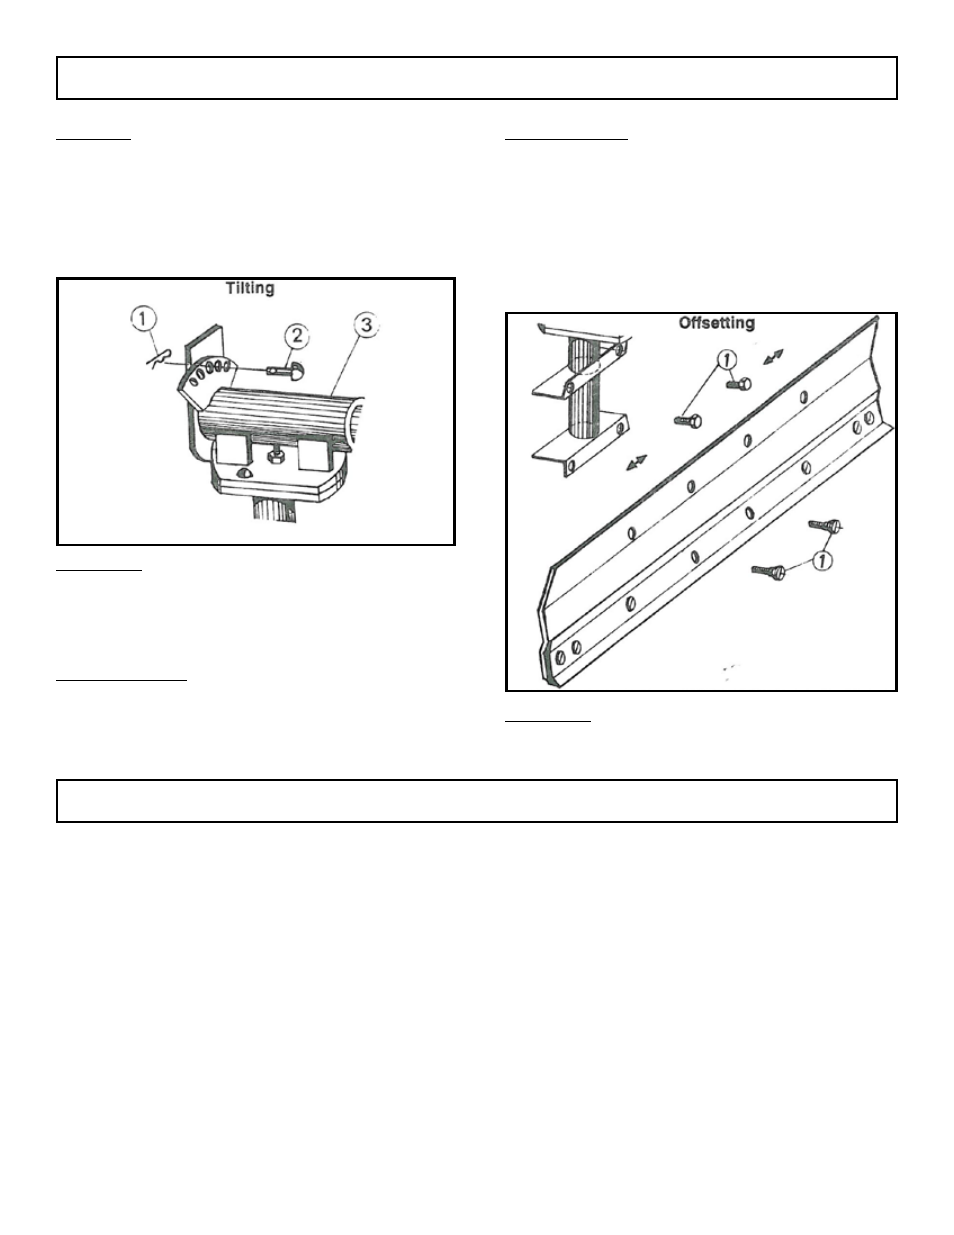
tiltiNG
The blade may be tilted a few degrees by remov-
ing spring pin (1) and index pin (2) and rotate
main frame (3) to desired angle. Replace pins (1, 2).
(Figure 3)
BACk FilliNG
For back filling ditches, or trenches, reverse the
blade as explained in REvERSiNG thE BlADE.
OFFSEttiNG
the blade me be offset 12” either to the right or left.
to offset the blade to the right, use two left holes;
and to offset the left use two right holes. Remove
the four bolts (1) from main frame and relocated
moldboard either right or left 12” to align with ex-
isting holes. torque 1/2 nuts to 55 foot pounds and
5/8 nuts to 170 foot pounds. (Figure 4)
CUttiNG EDGE
For reversing the cutting edge, remove the 5/8”
plow bolts. Remove the cutting edge from mold-
board and reinstall with the sharp edge down. Re-
place it when both edges are worn.
BOltS
Keep all the bolts tight at all times by checking
them periodically. Replace the bolts only with those
having the same marks on the heads as an original
bolt.
CAUtiON:
It is very important to tighten the bolts to specified
torque. Carelessness may result in bolt breakage
and/or damage to the implement.
PREvENt RUSt
Sand areas where paint is chipped and repaint to
prevent rust.
OPERAtiNG SECtiON
MAiNtENANCE SECtiON
FiGURE 3
FiGURE 4