Warning, Luxury-lift, Power recliner assembly instructions luxury-lift – La-Z-Boy Luxury-Lift Power Recliner User Manual
Page 5: Power recliner assembly instructions, 10 f
F
IGURE
8
F
IGURE
10
F
IGURE
9
Black Nonwoven Flap
with Fastening Tape
F
IGURE
7
Back Heating Pad
Connection
Back Massage
Connection
Back Seat
Spring Rail
Black Nonwoven Flap
with Fastening Tape
Inner Body Back Panel
Luxury-Lift
®
Power Recliner
Assembly Instructions
Luxury-Lift
®
Power Recliner
Assembly Instructions
(Assembly Instructions Continued)
9
8
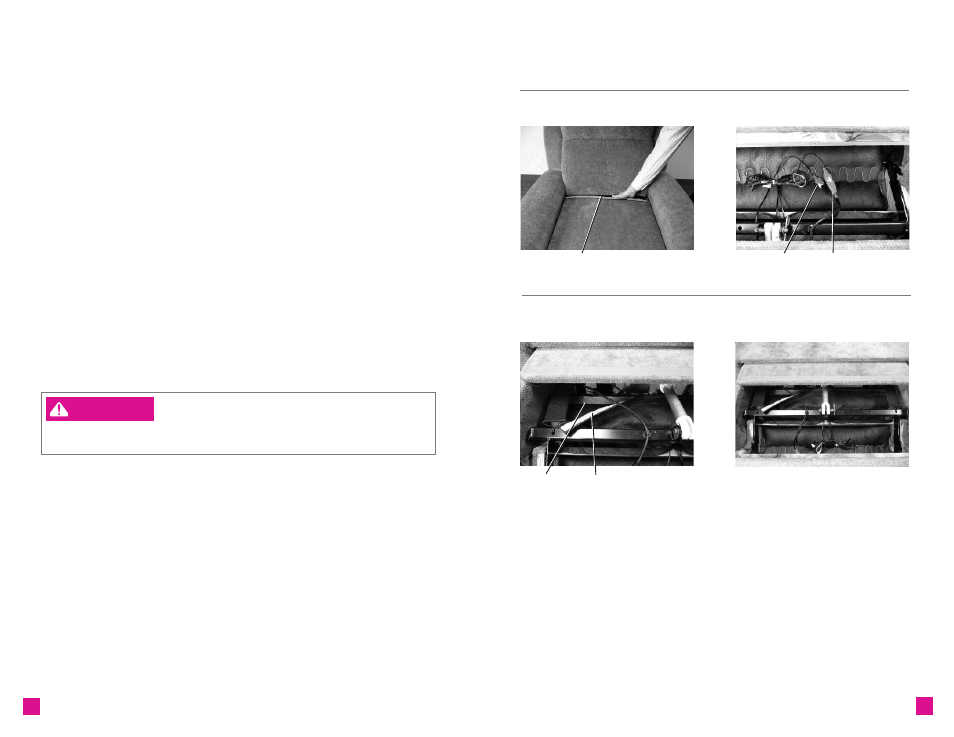
6. From the front of the chair, push the black nonwoven flap with fastening tape, between the seat
and the back, toward the back of the chair (F
IGURE
7).
7. Gently roll the chair forward to rest on the front arms. Lift the back upholstery cover to access the
connectors (only applies to 1HL and 1ML styles).
•
If assembling a 1ML style, proceed to step 8.
•
If assembling a 1HL style, proceed to step 9.
•
If assembling a 1LF style, proceed to step 10.
8. Connect the green, 6-pin back massage connectors (only applies to 1ML styles).
•
Align the clips on the green connectors and push the connectors together until they lock (F
IGURE
8).
9. Connect the black and the red, 2-pin back heating pad connectors (only applies to 1HL and 1ML styles).
•
Align the clips on the black connector and the red connector and push the connectors together
until they lock (F
IGURE
8).
10. Attach the black nonwoven flap to the back seat spring rail, to form a pocket between the seat
and the back that prevents objects from falling into the mechanism.
•
Locate the fastening tape on the black nonwoven flap and the fastening tape
on the back seat spring rail (F
IGURE
9).
•
Attach the black nonwoven flap to the back seat spring rail by pressing the fastening tape together,
working from the center out (F
IGURE
10).
•
Lift the elastic bands to connect the ends of the fastening tape.
– To reduce the risk of serious injury:
• Provide a clear path for operation of the back and legrest. Place tables and area rugs
at a distance to allow the legrest to fully extend without rubbing or interference.
WARNING
11. Gently roll the chair back on to the base. Choose a location for the lift chair that is close
to an electrical outlet.
(1ML shown)
(1ML shown)
(1ML shown)