Add2-lvds, Installation guide – Kontron ADD2-LVDS-DUAL-Internal User Manual
Page 9
ADD2-LVDS
KTD-00711-D
Public User Manual
Date: 2008-09-16
Page 9 of 13
Installation Guide
Cable kit
Available Cable Kits:
821155 Open End LVDS Cable 1080mm
821514 Cable for Sharp LQ121S1LG41
821515 Open End LVDS Cable 540mm
821517 LVDS Cable 2x40p conn 405 mm
821518 Cable for AUO G121SN01
821520 Cable for LG.Philips LM150X8
820971 LDI Evaluation
820972 Cable Samsung LTM201U1-L01
820973 Cable for Sharp LQ201U1LW01
Available module:
820975 LDI Module (integrated part of 820971, 820972 and 820973)
PWR connection/LDI use
Depending on the connected type(s) of display(s) the PWR must be connected and/or LDI(s) must be used.
Se tables below
PWR LDI
used
LCDVCC
Backlight
connected
3.3V
5V
5 – 30V
12V
5 – 30V
no no
<1A
0
0
<2.2A
(*)
0
yes no
<1A
<1A
0
<2.2A
0
no yes
<1A
0
<4A
<2.2A
(*)
<4A
yes yes
<1A
<1A
<4A
<2.2A
<4A
(*) Maximum 4A for both display systems
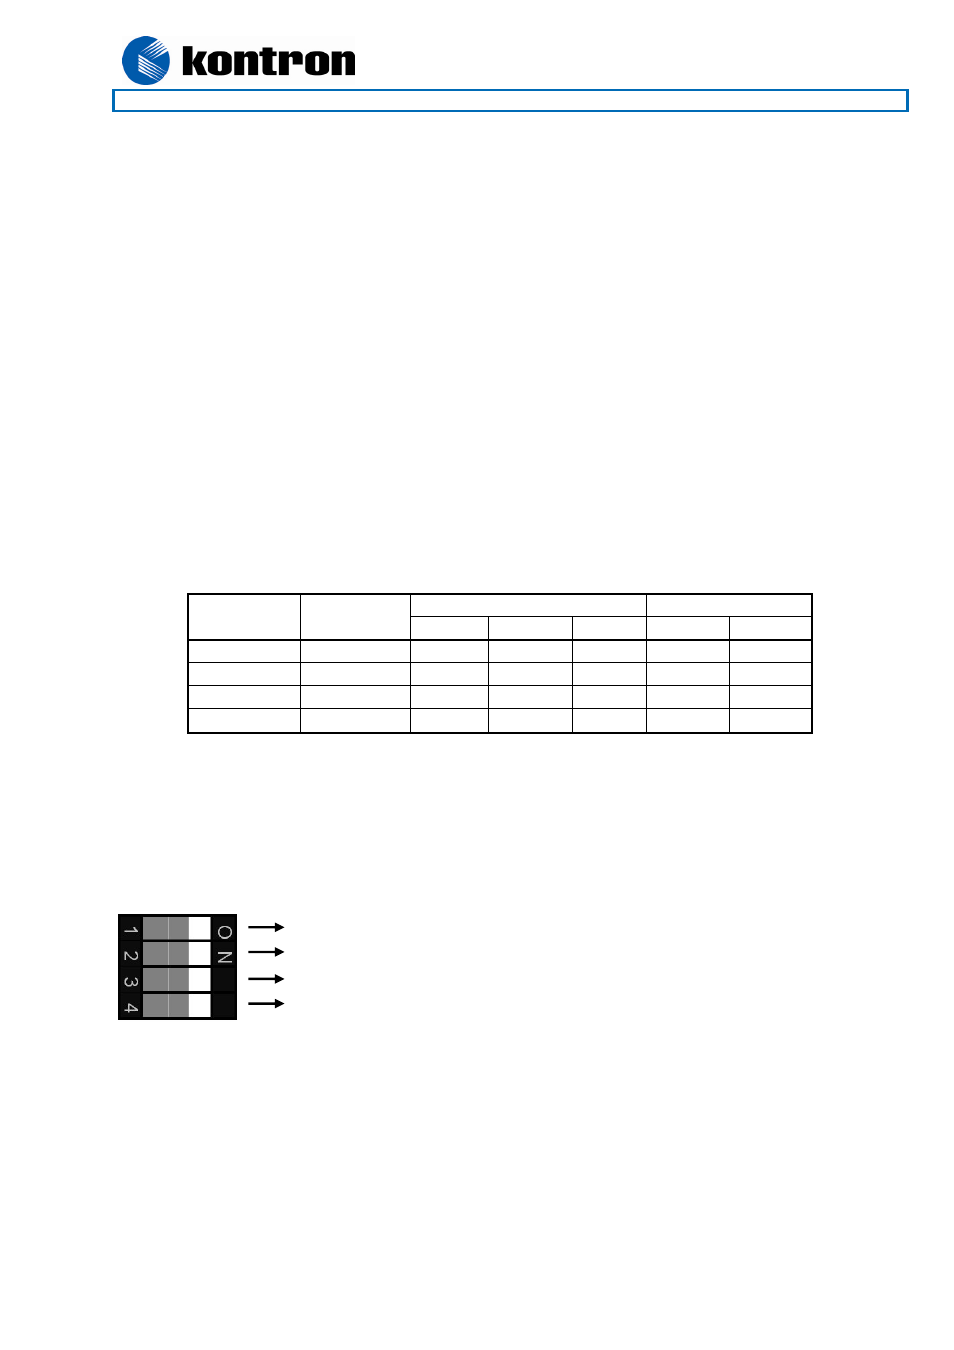
DIP-Switch settings
Dip-SW contains 4 switches SW1 – SW4, which are used to configure LCDVCC and Backlight control signal.
Remove the foil before changing the position of the Dip-Switches.
WARNING: Default position of the switches is ON-position. If connected display requires 3.3V as
LCDVCC then make sure the relevant Dip-Switch (1 or 2) is in the Off position (LCDVCC = 3.3V).
Mounting
The 3 holes for fixing the ADD2-LVDS card is recommend to be used.
Off/On => J1 LCDVCC power = 3.3V/5V
Off/On => J2 LCDVCC power = 3.3V/5V
Off/On => J1 BKLON signal active Low/High
Off/On => J2 BKLON signal active Low/High