Just Better Deep Vacuum Pump Cartridge User Manual
Just Better Pumps
Cartridge kit also contains 2
new O-rings, 1 cover gasket
and shaft seal. Before replacing
cartridge, be thoroughly familiar
with Replacing Pump
Cartridge procedures.
You will need the following tools:
Hammer
Medium Screwdriver
5/32" and/or 1/8" and 3/16"
Allen Wrench
11/16" Socket Head
3/8" or 7/16" Wrench or socket
Thread sealant
Vaseline or grease
DRAIN OIL
REMOVING MOTOR
1. Stand pump on oil cover. If
pumps has foot mounting
bracket, remove unit by loos-
ening foot screws.
(FIG. 1)
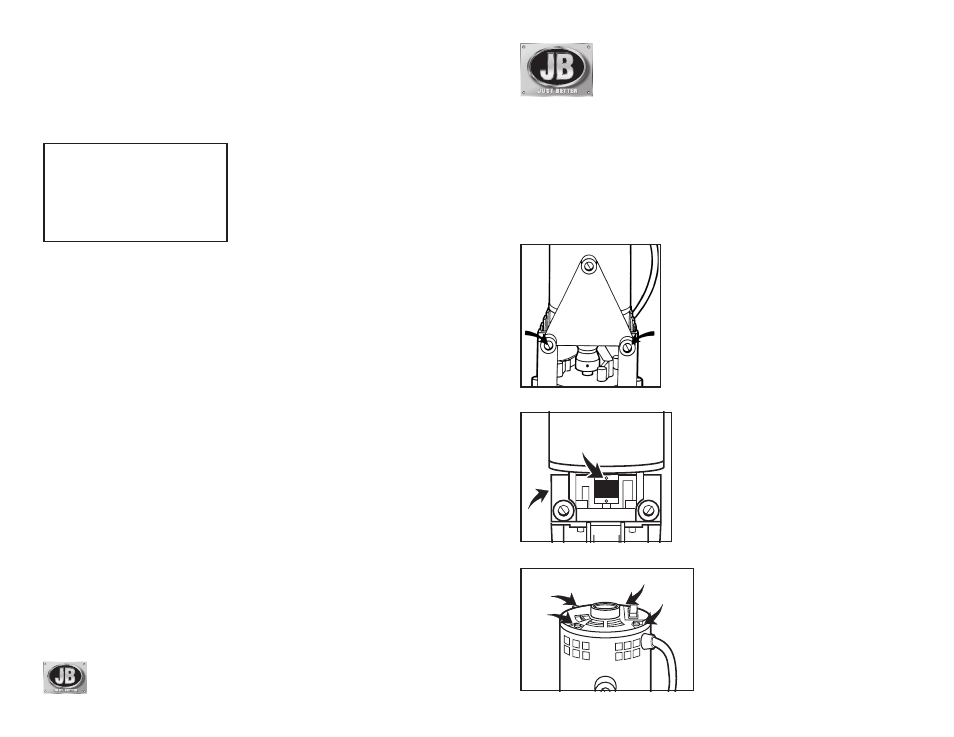
2. Turn coupling until setscrews
are facing you. With 5/32" or
1/8" Allen wrench (depending
on model) loosen setscrew on
motor shaft. (FIG. 2) Loosen
four (4) motor thru bolts (FIG.
3). Remove motor. DO NOT
REMOVE BOLTS FROM MO-
TOR AT ANY TIME.
If old cartridge is frozen, i.e.
coupler will not turn, remove
oil cover (FIG. 4) and four (4)
cartridge bolts (FIG. 5). By
turning cartridge, coupler will
rotate into position.
3. Loosen setscrews on coupler
and remove coupling.
(FIG. 2)
© 2008 J/B Industries, Inc.
Form #10086-308/1M
Printed in U.S.A.
JB INDUSTRIES
Aurora, IL 60507 U.S.A.
Part # Replacement For
D10043
DV-42 obsolete
D10086
DV-3 & DV-85C obsolete
D10087
DV-85 obsolete
D10128
DV-5 & DV-127 obsolete
D10143
DV-142 (4 Digit Serial No.) obsolete
PR-202
DV-85N
PR-203
DV-142N
PR-204
DV-200N
PR-212
DV-42N
PR-214
DV-285N
PR-302
DV-85N (Manufactured after January, 2000)
PR-303
DV-142N (Manufactured after January, 2000)
PR-304
DV-200N (Manufactured after January, 2000)
PR-305
DV-42N (Manufactured after January, 2000)
PR-314
DV-285N (Manufactured after January, 2000)
NOTE: Instructions pertain to
all pump series. Pump
styles may vary from il-
lustrations.
REPLACING MOTOR
1. With pump standing on oil
cover, rotate coupling so set
screws are facing trap assem-
bly opening. Re-install motor
while aligning flat side of motor
shaft with set screw.
IMPORTANT
ASSEMBLE IN THIS ORDER
a. Tighten four (4) motor screws
and then
b. Tightened coupler set screw
on motor shaft.
2. Re-install foot mounting bracket
and rubber feet.
Should you need further assistance call our toll
free Technical Service number 1-800-323-0811.
Visit our web site at: www.jbind.com
E-mail: [email protected]
Loosen 4 Motor Bolts. Lift Motor Off.
(Do Not Remove Bolts)
Trap
Loosen Coupler
Setscrew
On Motor Shaft
FIG. 1
(Models
with Foot
Mounting
Bracket
only)
FIG. 2
FIG. 3
Replacement Instructions
for Deep Vacuum Pump Cartridge
BEFORE OPERATING
1. Be sure pump switch is in “Off”
position and plug in.
2. Open oil drain and intake cap.
While pump is running, im-
mediately place 2 or 3 ounces
of fresh oil into intake and run
pump for 3 or 4 seconds. Re-
peat procedure at least 2 times.
Allow oil to drain out.
3. Close oil drain and replace
intake cap.
4. Fill with fresh FastVac Deep
Vacuum Pump oil to top edge of
oil level line. For those pumps
without line, the correct level is
1/8" below top of sight glass.
Replace oil fill plug.
5. Run Vacuum Test.
Trap
Loosen Coupler
Setscrew
On Motor Shaft