Home Legend Solid Click User Manual
Page 5
Doc. ID: 127
Rev: 2
Effective: 2/24/2014
Page | 5
Pre-install Activities
• Subfloors should be in clean condition.
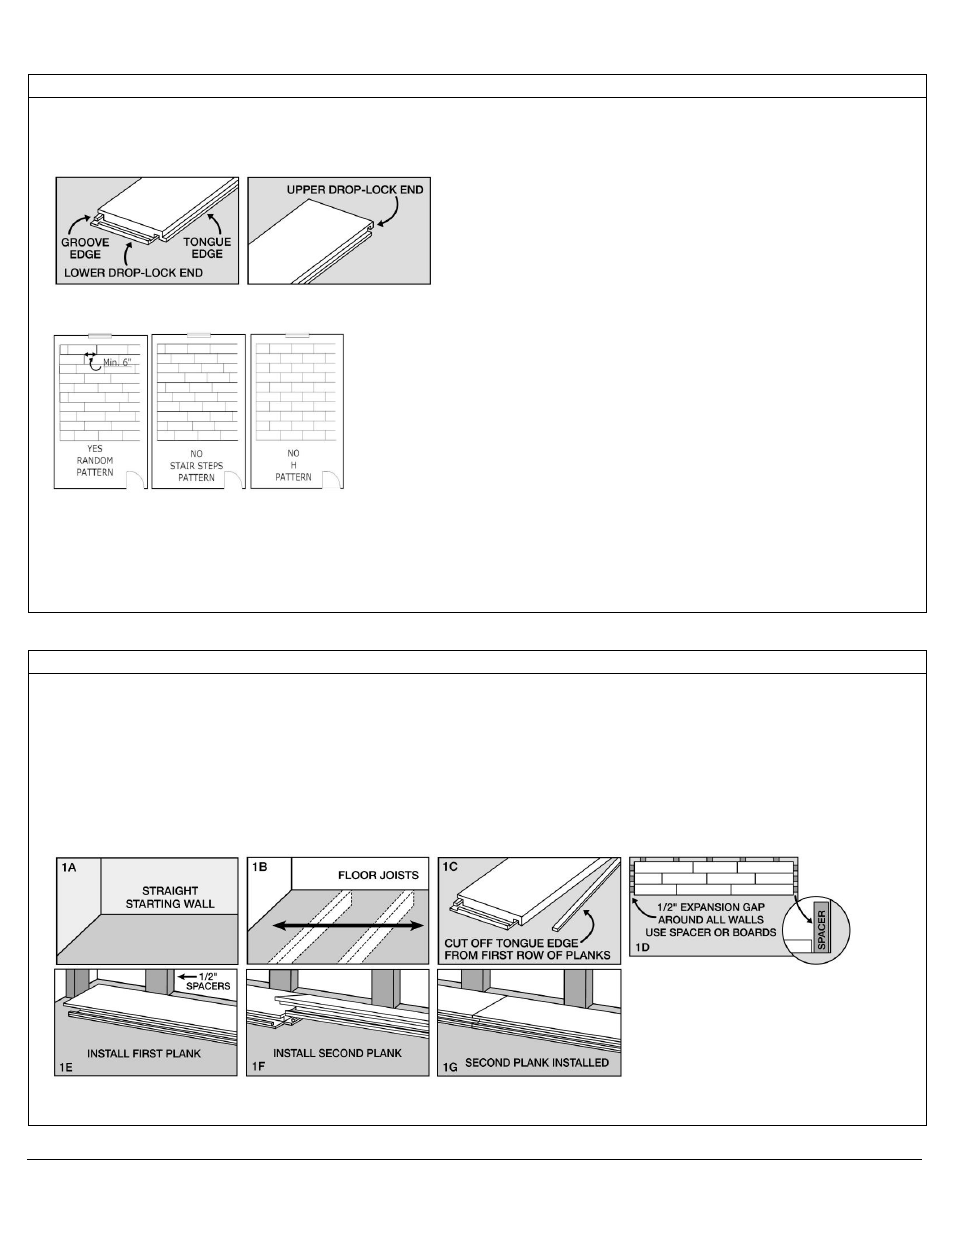
• Understand the parts of the locking part of the flooring plank. The tongue is the thinner extension coming out of the side of the
planks. The groove is the wider extension coming out of the other side of the floor plank. The ends do not have tongue and groove.
There is an upper drop-lock end on one side and a lower-drop lock end on the other side.
• Lay out several cartons. Randomly rack planks to ensure good color and shade mixture and end joint spacing. Minimum end stagger
is 6”. Inspect plank quality and grading.
• Lay out trim moldings in advance and find planks whose shade closely matches. Set these aside for future use.
• Remove existing base, shoe molding or threshold carefully. They can be used to cover the 1/2” expansion gap left around the edge of
the room.
• Undercut doors and casings using a handsaw laid flat on a piece of scrap flooring.
• Install moisture barrier on concrete. On wood if needed. For concrete, let the moisture barrier run up the wall a bit before cutting to
size and tape all seams. For wood, cut the moisture barrier 1 inch or less from the wall, overlap seams and fasten to keep it in place.
Floating Installation
Step 1 – Install the First Row
• When possible, begin installation from the straightest wall. It is usually the longest outside wall. If possible, install the floor
perpendicular to the floor joists.
• Cut off the tongue from the first row planks.
• Allow 1/2” expansion gap between plank and the walls. Use spacers or board.
• Place the first plank with the groove sides facing away from the walls.
• Place the upper drop-lock end of the second plank on the lower drop-lock end of the first plank. The ends do not click lock. Maintain
straight edge along the rows.
• Continue placing the succeeding planks to complete the row.