Care and cleaning – Gastroback 42439 Gourmet Tea Advanced Automatic User Manual
Page 18
42
standby mode
When the appliance is plugged into a wall outlet, the LCD screen will illuminate for 3 mi-
nutes before entering standby mode. When in standby mode, the LCD screen will cease to
illuminate.
To re-activate the appliance out of standby mode, press any button, except the HOT WATER/
Cancel or TEA/Cancel button on the Power Base. The LCD screen will re-illuminate. Pressing
either the HOT WATER/Cancel or TEA/Cancel button will start the respective operation
immediately.
moving the tea basket when not in the brewing cycle
After the brewing cycle is complete, you may wish to lower the tea basket again for extra
infusion to produce a stronger tasting tea. To do this, press and hold the BASKET button for
2 seconds. The button surround will flash and the tea basket will automatically lower to the
bottom of the glass jug. Once the desired strength has been reached, press and hold the
BASKET button for 2 seconds. The button surround will flash and the Tea Basket will automa-
tically rise to the top of the glass jug.
note: If the glass jug is removed from the power base and the tea basket is in the lowered
position, it will automatically return to the top upon return of the glass jug to the power base.
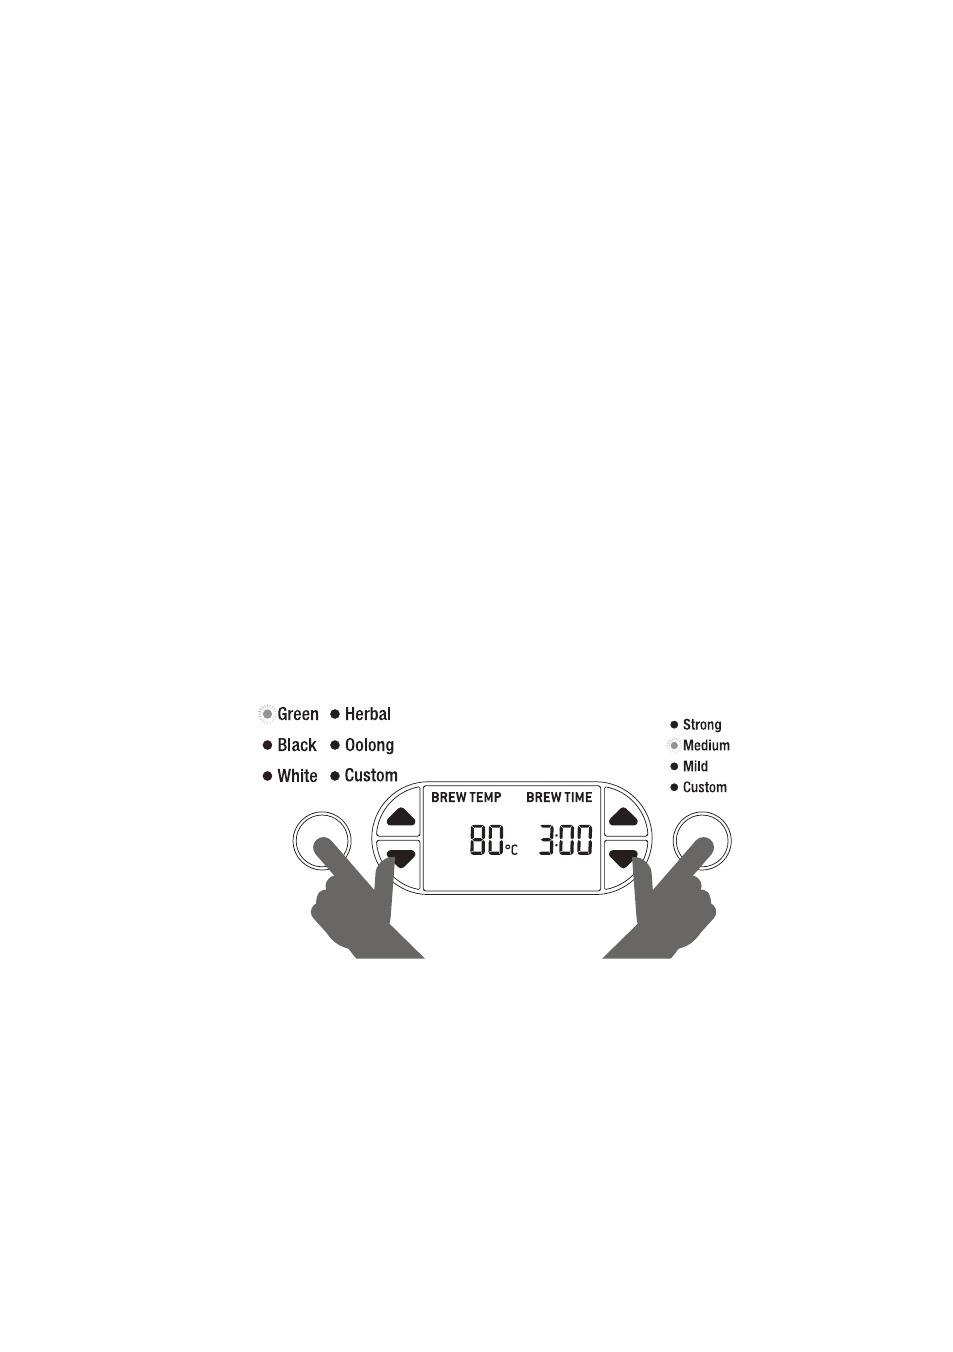
temperature conversion (°c to °F)
The temperature reading on the appliance is preset to Celsius but can be converted to
Fahrenheit. Simultaneously press and hold the TEA TYPE and TEA STRENGTH buttons for 2
seconds. The corresponding ‚°C‘ or ‚°F‘ symbol will be displayed on the LCD screen.
note: Once the Celsius default has been changed to Fahrenheit and one tea brewing or
water heating cycle has been activated, the Fahrenheit setting will remain in the memory of
the appliance until you change it.
care and cleaninG
Ensure the appliance is turned OFF by pressing the TEA/Cancel button (when brewing tea)
or the HOT WATER/Cancel button (when heating water) on the power base. The appliance
is OFF when the button surround illumination goes out. Remove the power plug from the
wall outlet.
note: Allow all parts of the appliance to cool completely before disassembling and clea-
ning.
PRESS & HOLD
FOR 2 SECONDS