Elecraft W2 Watt-meter Manual User Manual
Page 9
9
Tools Required
1. #0 and #1 size Phillips screwdrivers. Use the screwdriver that best fits the screw in each step. To avoid
damaging screws and nuts, a power screwdriver is not recommended.
2. Needle-nose pliers.
The following tools are strongly recommended:
1. ESD wrist strap.
2. Static dissipating work pad.
Assembly Procedure
Before starting construction, do a complete inventory, comparing the parts in your kit with the parts list in
Appendix A, to familiarize yourself with all of the parts and to ensure the kit is complete.. If any parts are
missing contact Elecraft for a replacement (see Customer Service and Support, page 3).
Display Unit Assembly
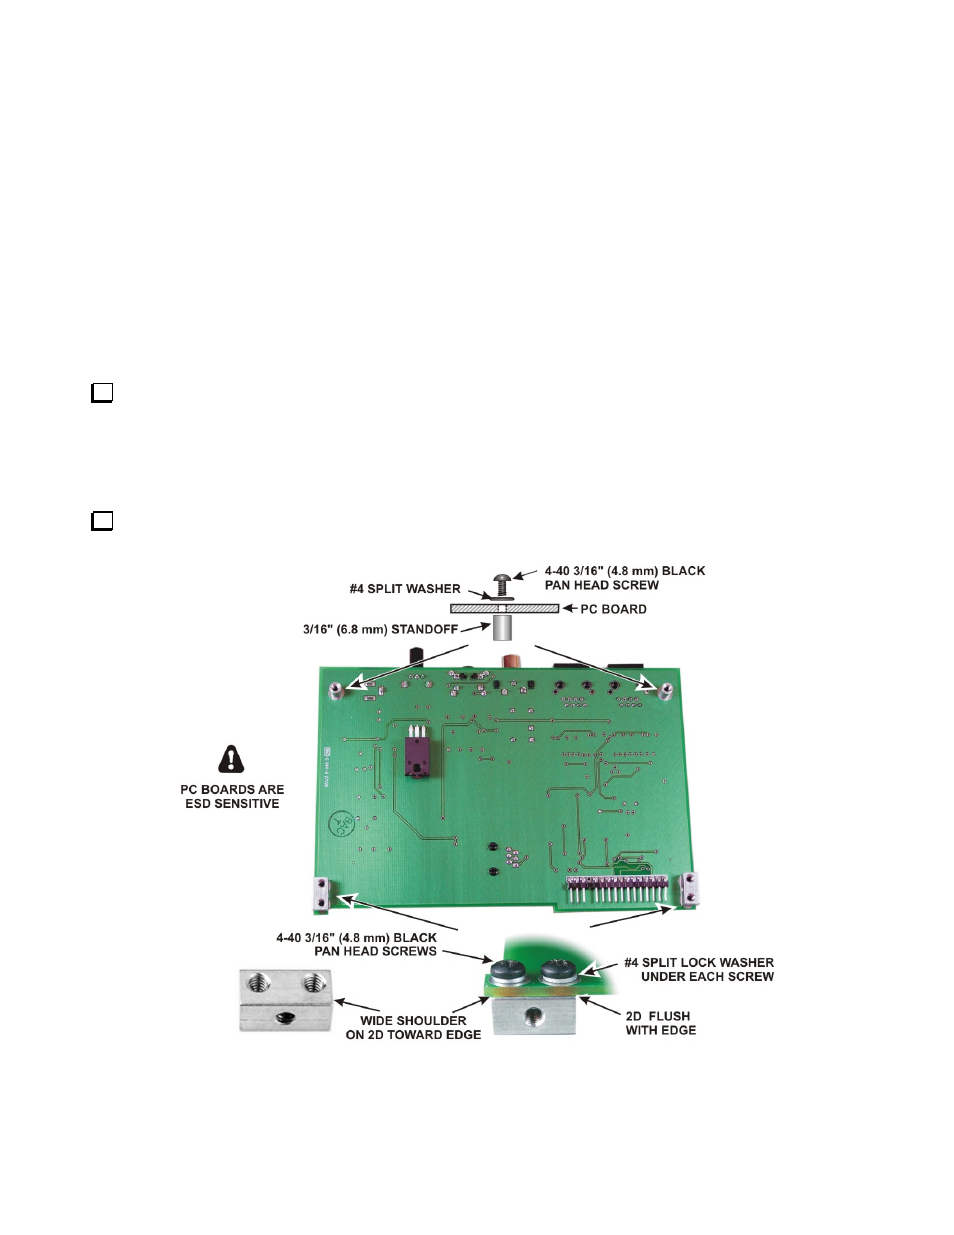
Mount two standoffs and two 2D fasteners on the bottom of the main board as shown in Figure 1.
Figure 1. Installing Hardware on Main Board.