Appendix c – power on modification – Elecraft W2 Watt-meter Manual User Manual
Page 26
26
Appendix C – Power On Modification
With this modification the W2 will turn on when 12VDC is applied without pressing the POWER button. The
modification involves soldering a short wire jumper onto the main circuit board. Only the top cover need be
removed to install the jumper.
Important Operating Notes for Modified Units
1. Pressing the POWER button will turn the unit off, but not on. If you press the POWER button, you
must remove and reapply 12VDC to turn the unit on.
2. To prepare the W2 to download new firmware, hold the SENSOR button while applying 12VDC
power. When you release the SENSOR button, the green 1 LED should blink, indicating the W2 is
ready to receive new firmware.
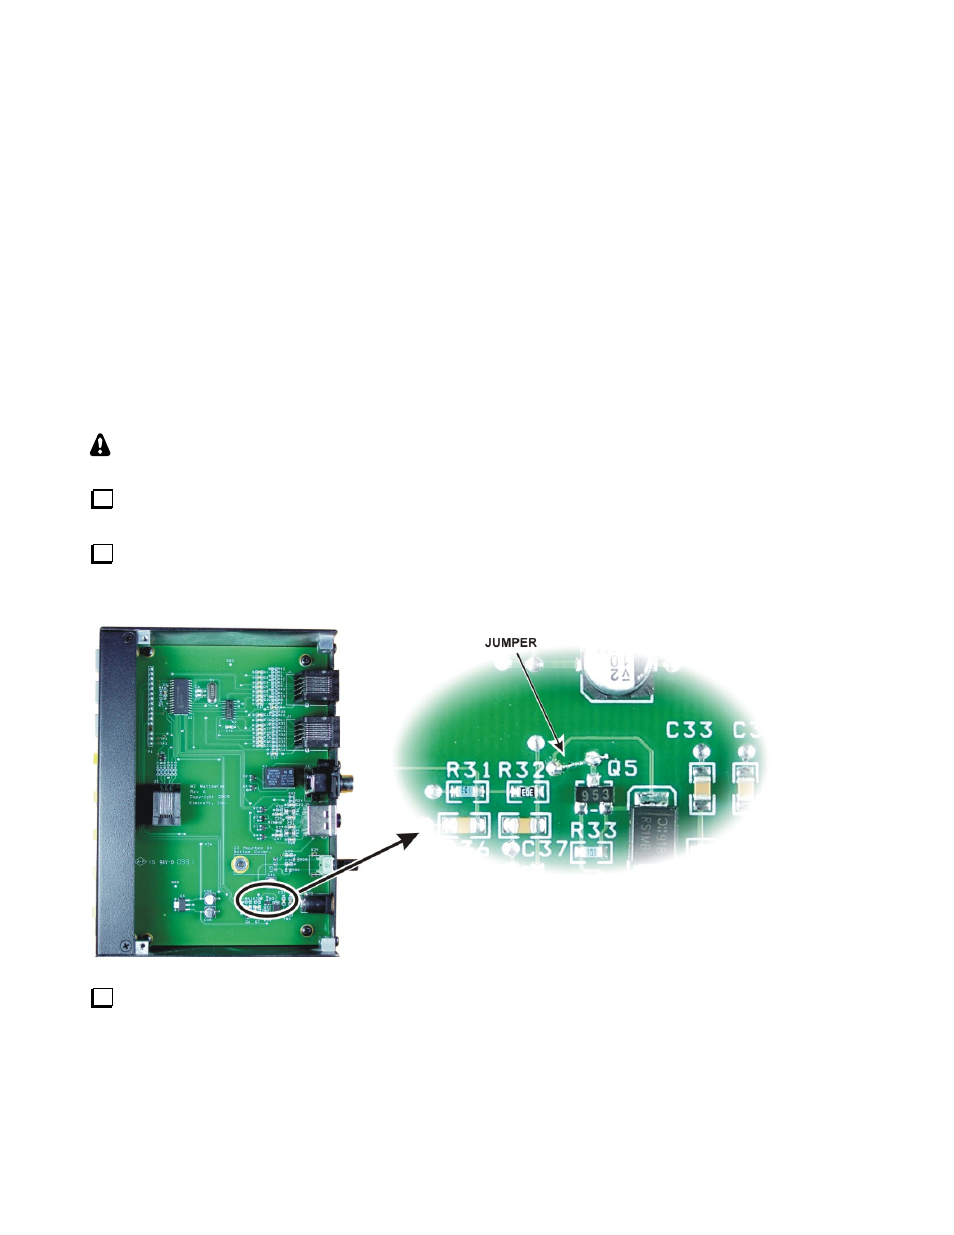
Installing the Jumper
Observe ESD precautions when working inside your W2. Wear an ESD wrist strap or touch
an unpainted, metal ground frequently while working. Use an ESD-safe soldering iron.
Remove the W2 top cover. It is held in place by two flat head screws on top and two pan head
screws on the back.
Install the jumper as shown below. It is not necessary to put the jumper through the pads.
Recommend you solder the jumper across the top of the pads as shown. Be sure you don’t create a
solder bridge to the end of R32.
Replace the top cover. Be sure you replace all four screws.