EFCO WV410 User Manual
Page 15
EFCO CORPORATION 2/2014 PART NO. Y007
Page
15
of
21
WV410 WINDOW - INSTALLATION INSTRUCTIONS
Section VIII – Window Installation
B. Dual Window Installation
Step 7
Install the male portion 9837 of the mullion over the shear blocks and snap into the female
portion of the mullion. Attach the male mullion half to the shear blocks with (1) SPC6 fastener at
each end. See Figure 15 on page 13.
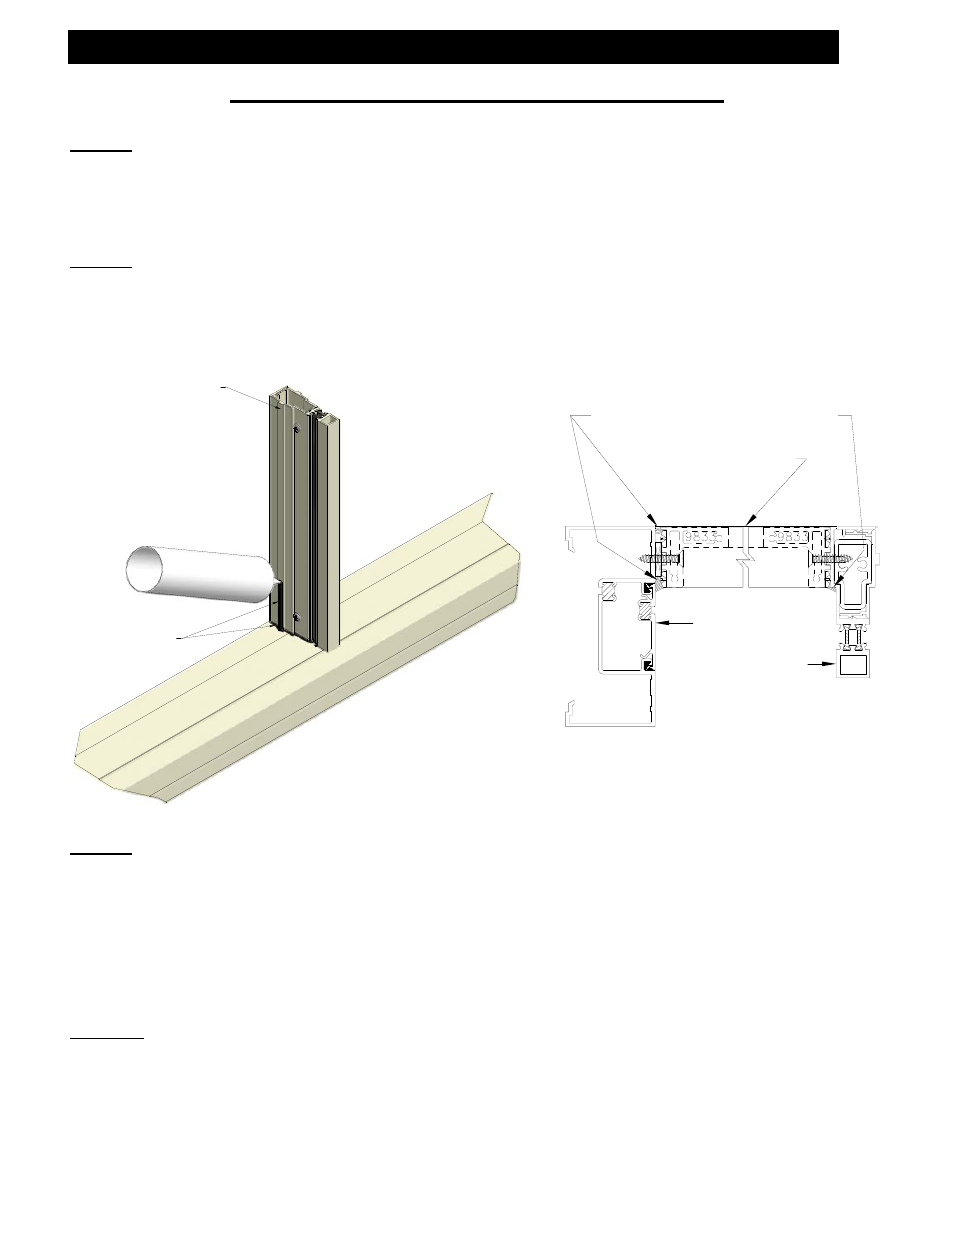
Step 8
NOTE: Do not complete this step unless you are prepared to install the window into the prepared
openings. Seal around the top and bottom edge of the mullion. Additionally, apply a continuous
bead of sealant along the mullion at the interlock location at both sides of the mullion as shown in
Figures 16 and 17.
Mullion interlock
Sealant
Step 9
The WV410 frame installation may now be completed. Both WV410 frames are installed by
inserting the windows into the openings at the jamb sides and sliding them toward the mullion.
Position the WV410 frames tight against the interlock of the mullion and shim into place with one
(1) HN91 shim at the top, bottom, and extreme jambs at each fastener location. Refer to Steps 1
through 3 on pages 11 and 12 for the recommended fastener locations. No shims are required at
the mullion anchor locations.
Step 10
After the WV410 frames have been installed, seal the exterior perimeter joint between the WV410
frame and the storefront frame and the mullion. At the interior of the storefront jamb, seal the
joint between the WV410 frame and the storefront frame. No additional sealant is required at the
interior surface of the mullions. See Figure 17.
JAMB
MULLION
INTERIOR
HEAD, JAMB, & SILL
TYPICAL SEAL AT THE
Figure 16
Figure 17
* Drawings on this page are not to scale.