Copernicus TEC700 User Manual
Page 7
TEC700 - Version D - Released December 16, 2014 - Copernicus Educational Products Inc.
7
Power Strip
1x
A
1
You will need:
(Not to Scale)
Actual Size:
M3 x 12mm
2x
M3 Lock Washer
2x
B
Flat Washer
2x
C
M3 Wing Nut
2x
D
TM
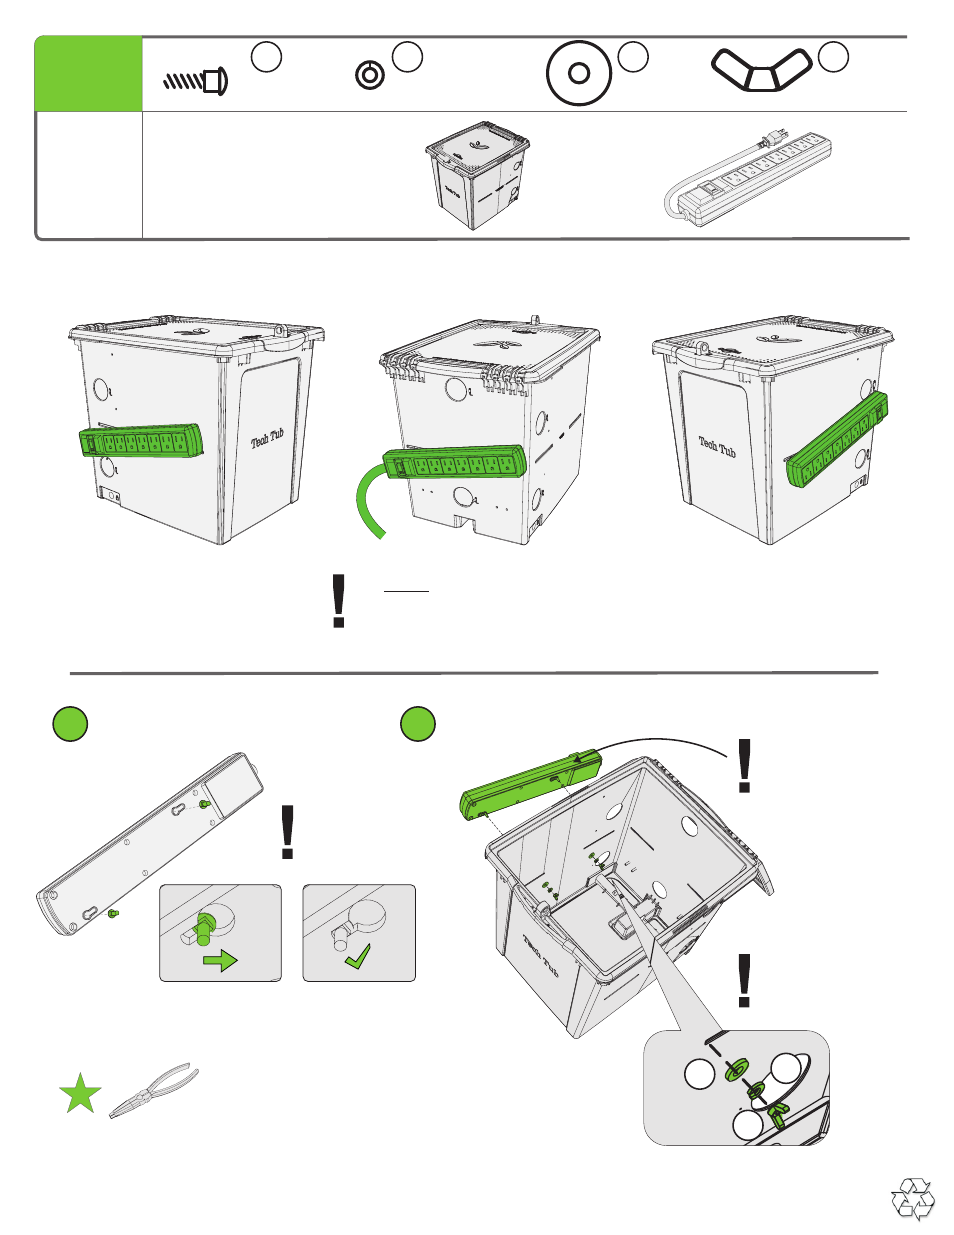
Install Hardware on Power Strip and Mount to Tech Tub
Right
Back
Left
TM
Tech Tub
1x
You MUST assemble the power strip on
back face if you are using your Tech Tub™
with TEC714 & TEC728 carts.
Choose the side you would like to mount the power strip on
Tighten bolts
once in place
1
2
Install screws in power strip
Install power strip to the Tech Tub™
Make sure outlet
cable end if pointed
towards the back of
the Tech Tub™
It may take some force to fit the
screw head into the keyhole slot.
Use pliers to help slide the screw
head into the keyhole slot.
Tighten fully
C
D
B