Installation instructions – Code 3 WingMan with TriCore or Torus for 2011 Caprice User Manual
Page 3
3
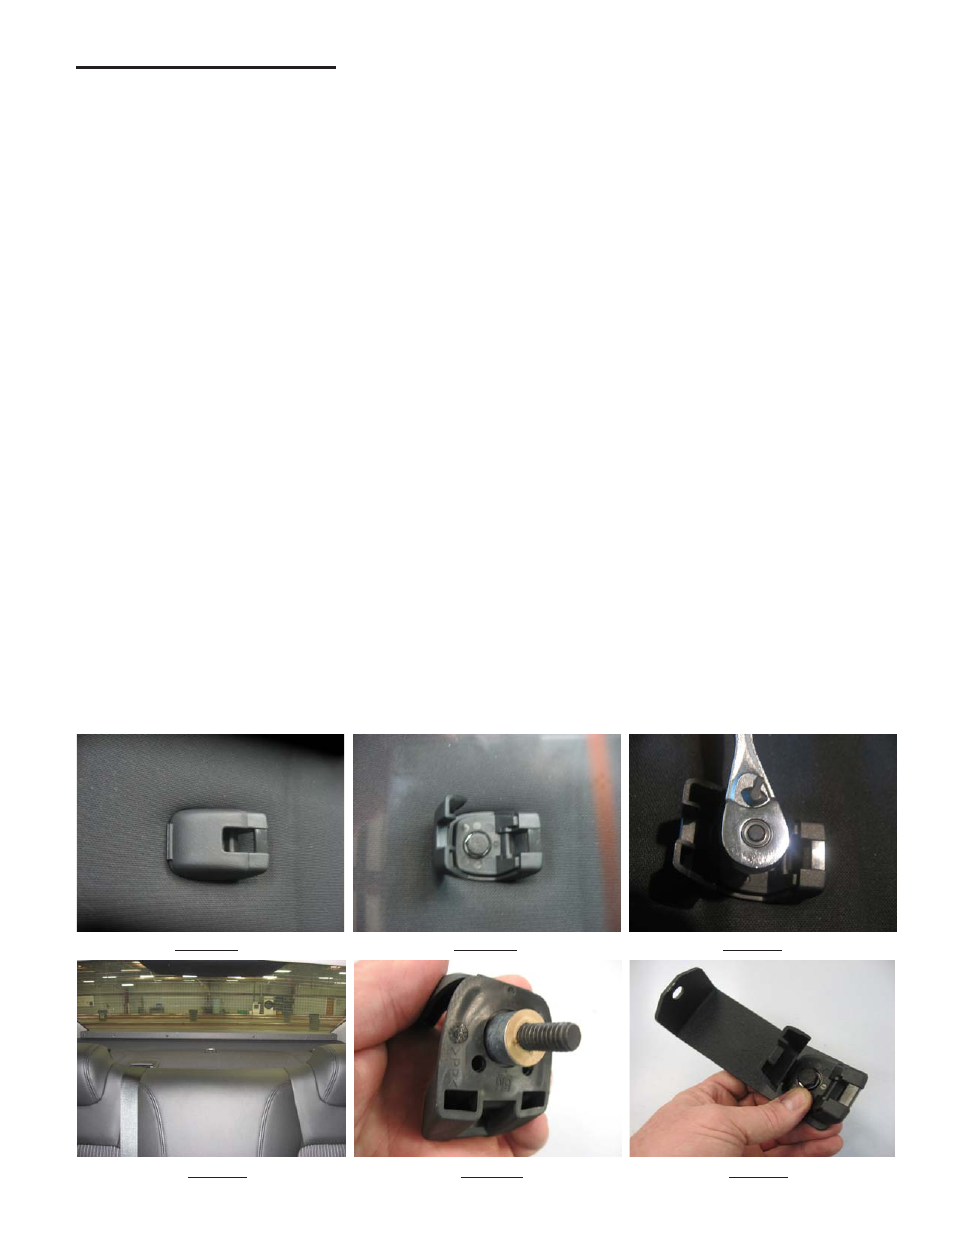
FIGURE 1 FIGURE 2 FIGURE 3
Installation Instructions
Step 1
Locate the vehicle's Driver and Passenger outer plastic child restraint brackets in the rear package tray area behind the rear seat and
open the hinged bolt covers (see Figures 1 and 2).
Step 2
Remove the 8mm child restraint mounting bolts with a 1/2" SAE or 13mm metric wrench (see Figure 3). Do not remove the steel
spacer and the cardboard washer from the brackets.
Step 3
Position the WingMan in the rear package tray area (see Figure 4) to determine the desired routing of the cable into the trunk or
where ever the final location of the cable is to be. Note: The best and safest cable routing is to drill a clearance hole for the cable directly
through the sheet metal and the interior fabric of the package tray area from inside the trunk of the vehicle directly in line with the
cable exit of the WingMan. This keeps the cable out of a passengers reach Note: Move the WingMan out of the way temporarily and
make sure any OEM wiring is out of the way so you don't damage the WingMan or the wiring when drilling the cable clearance hole!
Route the cable through the hole, pull the slack out of the cable, and reposition the WingMan before going to the next step.
Step 4
Push the steel spacer & the cardboard washer down tight against the vehicle's plastic child restraint brackets as shown in Figure 5.
Step 6
Position the vehicle's plastic child restraint brackets on the supplied WingMan Mounting Brackets as shown in Figure 6. Note: on the
short version of the Caprice WingMan, the mounting brackets are "L" shaped and are driver and passenger side specific as can be
seen in the exploded Parts List view on page 7 of this manual. All of the installation steps are the same for both versions.
Step 7
Position the WingMan Mounting Brackets with the vehicle's plastic child restraint brackets and thread the vehicle's 8mm child restraint
bolt back into the existing hole in the vehicle as shown in Figure 7. Leave the bolts slightly loose at this time.
Step 8
Thread the supplied 1/4"-20 screws and internal tooth lock washers through the slots in the WingMan Mounting Brackets and into the
WingMan's Outer Panel as shown in Figure 8. Thread the screw in until there is very little slack between the WingMan Mounting Brackets and
the WingMan Outer Panel but do not tighten the screws at this time.
Step-9
Center the WingMan in the rear window while pushing it back into position to seal the gasket against the rear window glass. Tighten
the vehicle's 8mm child restraint bolt with a 1/2" SAE or 13mm metric wrench as (See Figure 9).
Step-10
Tighten the 1/4"-20 screws with a phillips screwdriver as shown in Figure 10.
Step-11
Snap the hinged bolt covers closed on the vehicle's plastic child restraint brackets (See Figure 11).
FIGURE 4 FIGURE 5 FIGURE 6