Step 4 mounting the supervisor – Code 3 SuperVisor TL for 2007 Ford Expedition User Manual
Page 4
Step 4 Mounting the SuperVisor
®
The cable can either be routed across the top of the SuperVisor and down the door post or up under the headliner at the center of the
vehicle and then across and down behind the plastic door post cover (whichever is preferable). Note: To Route the cable above the
headliner and down behind the door post covers, refer to the service manual for the Ford Expedition for detailed instructions
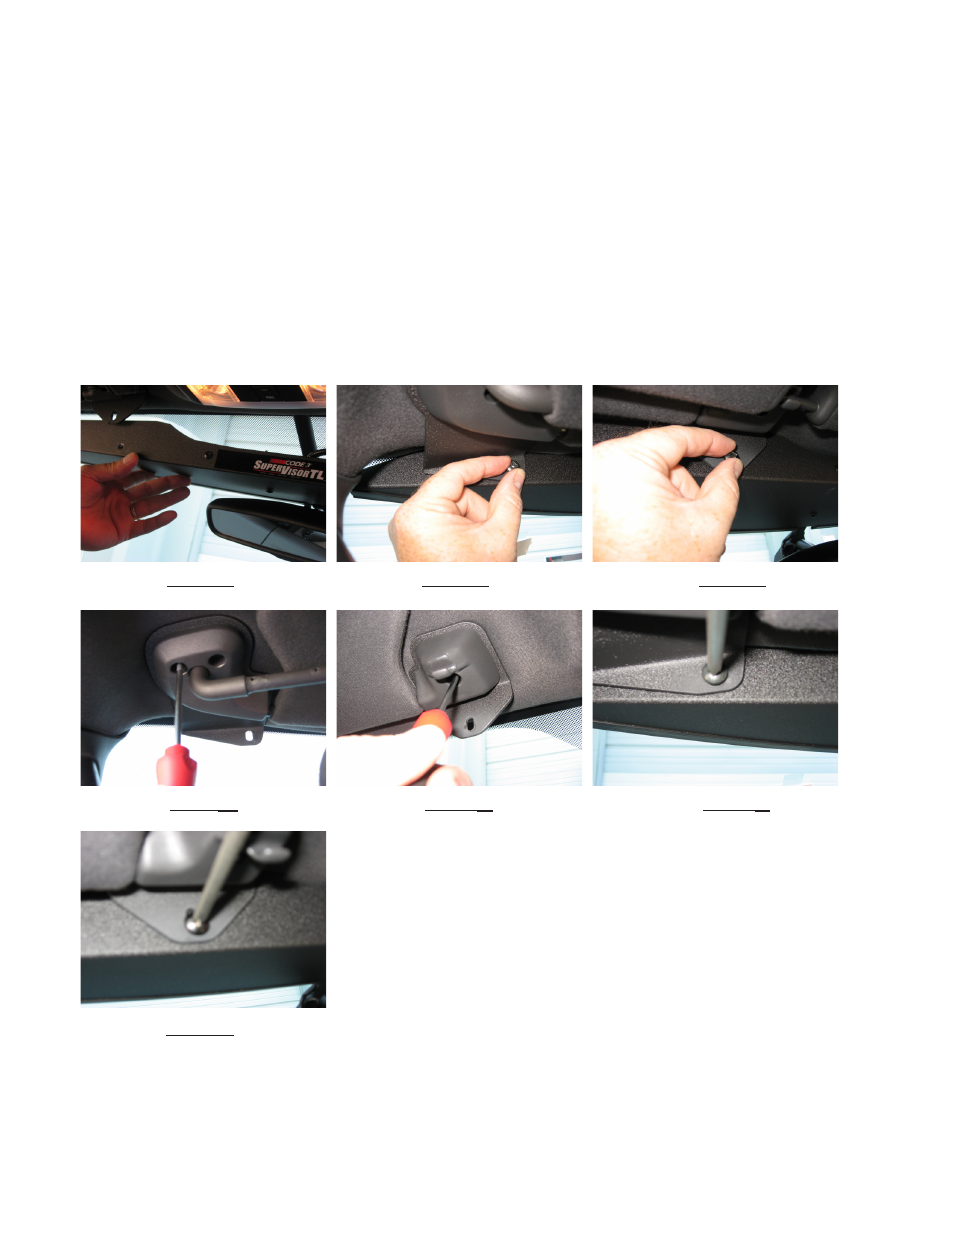
as to how to remove the door post cover to gain access to route the cable. Once all four sun visor brackets are attached, and the
cable is routed, the SuperVisor is ready to be installed. Tilt the rear view mirror down as far out of the way as possible. Carefully move
the SuperVisor into position above the rear view mirror by tilting one end up as shown in Figure 10, then swing the other end up into
position being very careful not to scratch the plastic corner post covers. Line up the mounting holes in the outer mounting brackets with
the threaded holes in the SuperVisor and thread the supplied 1/4"-20 bolts and internal tooth lock washers into the SuperVisor's Outer
Panel (see Figure 11). Line up the mounting holes in the inner mounting brackets with the threaded holes in the SuperVisor and loosely
thread the supplied 1/4"-20 bolts and internal tooth lock washers into the holes in the SuperVisor's Outer Panel as shown in Figure 12.
Carefully tighten the three Torx screws in each of the two outer pivot brackets by tightening each screw a little at a time (see Figure 13).
Note: Tightening the three screws each a little at a time helps prevent cracking the OEM plastic pivot bracket. Tighten the two Torx
screws in the center inner mounting brackets (see Figure 14). Tighten the two 1/4-20 bolts in the Outer Mounting Brackets (see Figure
15). While pushing up firmly on the SuperVisor's Outer Panel to close up the gaps as much as possible between the SuperVisor's outer
panel and the vehicle's headliner fabric, tighten the two 1/4-20 bolts at the inner mounting brackets (see Figure 16).
The bracket fasteners make excellent hard mounting points for radar guns and video
cameras, etc.
Caution: Drilling into the housing of the light bar could damage wiring or other internal
components.
FIgURE
10
FIgURE
11
FIgURE
12
FIgURE
13
FIgURE
14
FIgURE
15
4 5
FIgURE
16