Testing the headlight flasher, Model 960, Flash mode selection – Code 3 950 and 960 Flashers User Manual
Page 5
5
`@GGPX
G@AUÃCDBCÃ7@6H
#Ã6XBÃHDI
"Ã6HQÃAVT@
S@9
7G68F
7GV@
PS6IB@
XCDU@
W@CD8G@TÃCDBCÃ7@6HÃXDS@
UPÃW@CD8G@TÃGPXÃ7@6HÃXDS@ÃAPSÃIDBCUÃ9DT67G@ÃPIG`
SDBCUÃCDBCÃ7@6H
7SPXI
8VUÃC@S@
%$77(5<
Flash Mode Selection
The Model 950 or 960 flash mode is selected during installation by choosing how the orange and the white
control wires are connected as indicated in the list below.
Connect the user supplied switch between positive +12VDC and the orange and/or white
control wires of the flasher unit to get the desired flash.
Slow Wig/Wag (alternating) flash: Orange to switched +12VDC; White not used.
Fast Wig/Wag (alternating) flash: White to switched +12VDC; Orange not used.
Cycle Flash; Orange & White to switched +12VDC
Double check all of your connections then refer to the section on testing the flasher.
Testing the Headlight Flasher.
1)
Install a 20A fuse in the in-line fuse holder for Model 950 Flashers.
Install a 3A fuse in the in-line fuse holder for Model 960 Flashers.
2)
Turn ON the control switch. The high beam headlights should flash. The
pattern is dependent on flasher mode selected (see Flash Pattern Selection above).
3)
Turn ON the vehicle’s low beam headlights. The low beams should burn steady.
NOTE: If you connected the brown wire to the vehicle's low beam circuit, the headlight flasher will go off
when you turn on the low beams. If you want the high beams to continue to flash, DO NOT connect the
brown wire.
4)
Turn ON the vehicle’s high beams. The high beams should now be on and the headlight
flasher should be disabled.
If the flasher does not work according to the above description, recheck all of your connections.
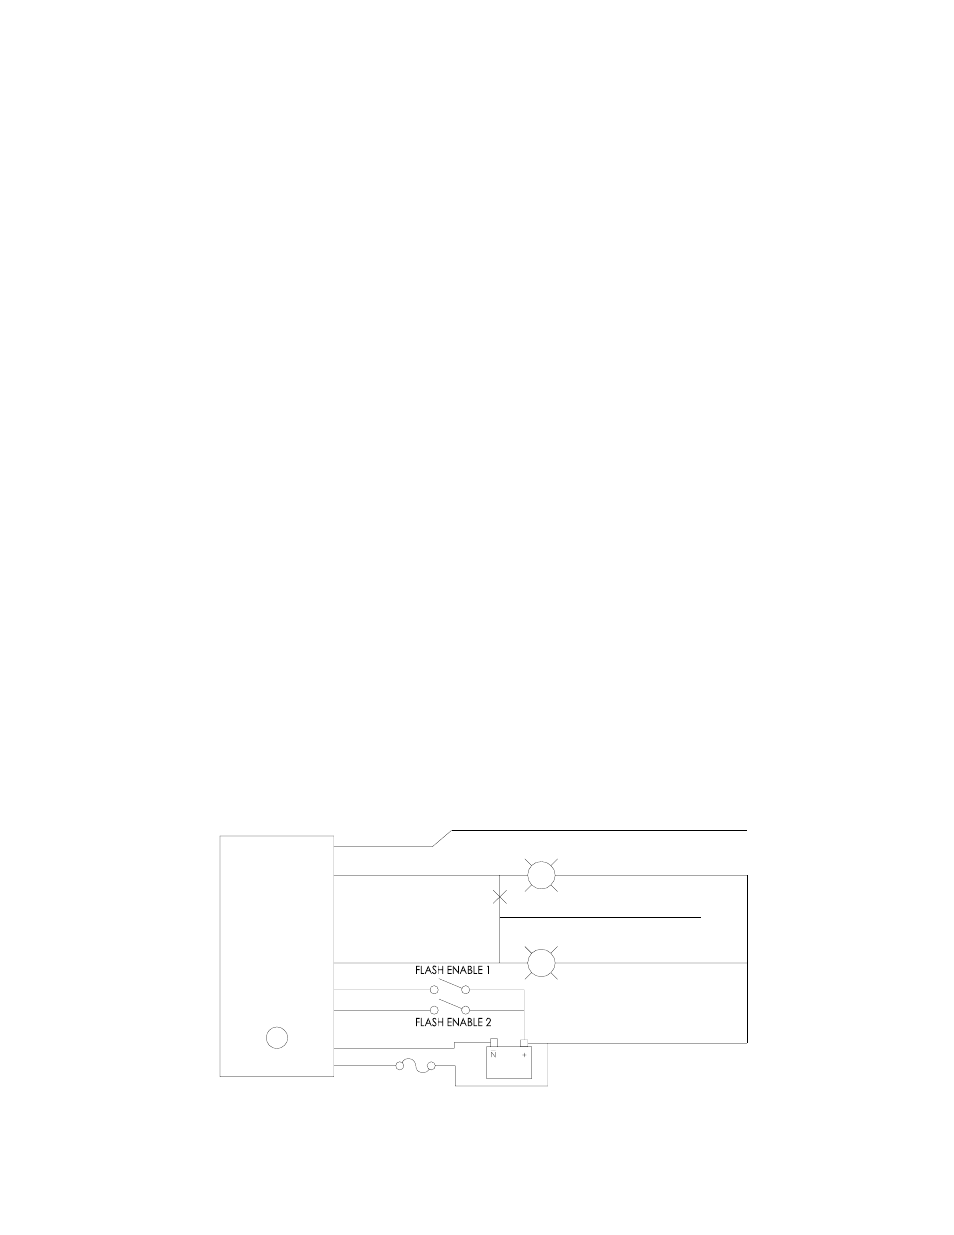
FIGURE 2: WIRING DIAGRAM FOR 960
HEADLIGHT FLASHER INSTALLATION
Model
960