Permanent - resilient mounting – Code 3 550 Series Beacon User Manual
Page 4
4
A Code 3 supplied magnetic mounting kit is available for field retrofit, if required. The lens and rotator
assembly must be removed so that the mounting hole is accessible for drilling. Use a #11 (.191") bit to
drill the mounting hole from inside the base. Drop the nylock nut into place. Assemble washer, screw
and magnet as shown in Figure 1 and attach to base.
Permanent - Resilient Mounting
Locate the Model 550
TM
Beacon on the highest possible level surface on the vehicle for the maximum
warning signal. CAUTION! When drilling into any vehicle surface, make sure that each side is free from
anything that could be damaged (i.e. electrical wires, fuel lines or vehicle upholstery). Remove the lens
and use the base as a template to mark the wiring and four mounting holes onto the area you wish to
mount the beacon. You must first use a #11 (.191") drill bit and drill out the four mounting holes, see
Figure 2. The two mounting holes closer to the edge of the base may be used when trying to fit an
existing hole pattern. Then, using the base as a template and a
3
/
8
" drill bit, drill wiring and mounting
holes. After drilling the holes, remove any burrs and install a rubber grommet before passing wires
through the wiring hole, apply sealant around wires to seal hole to prevent leakage.
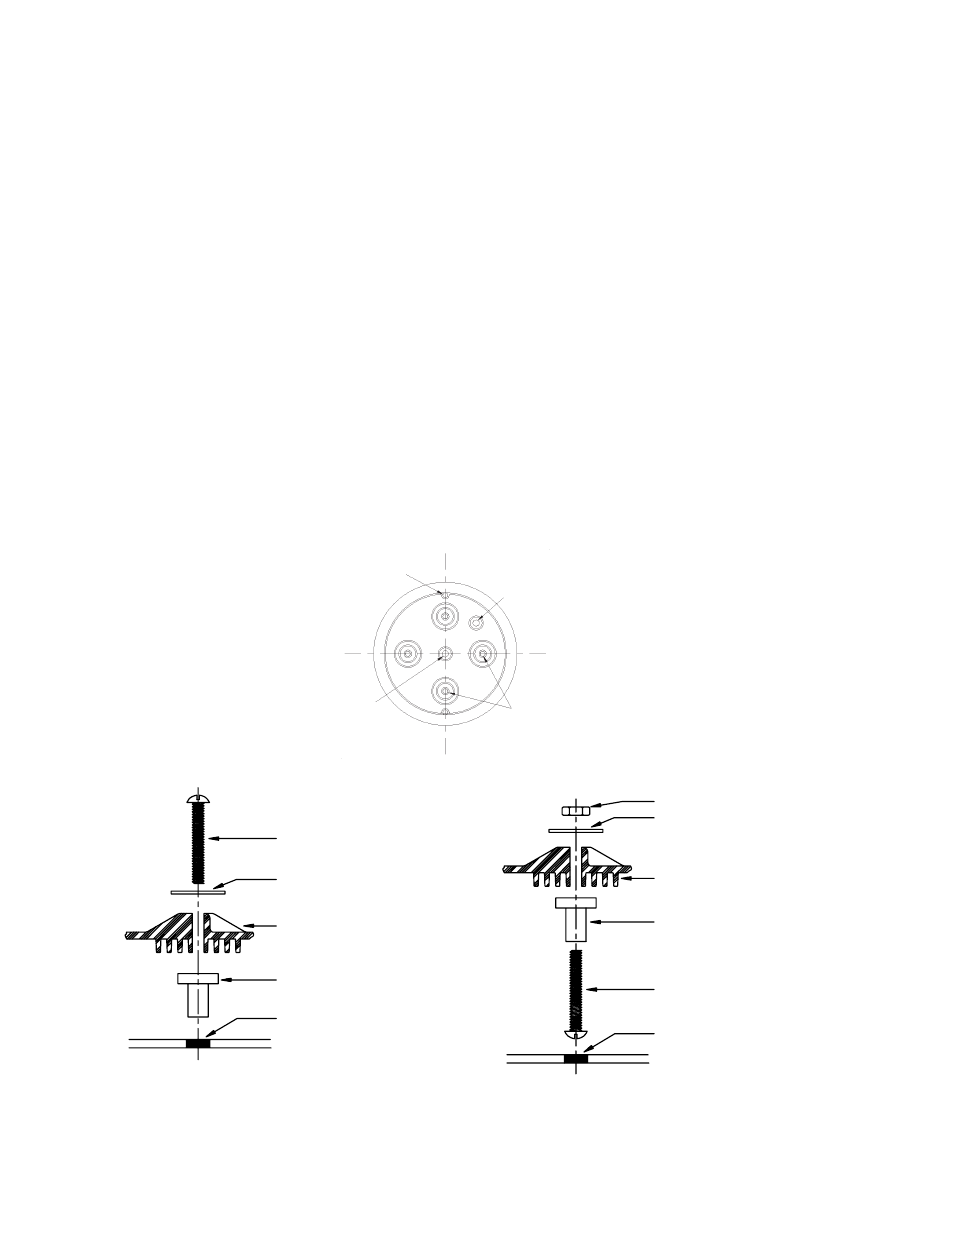
For permanent mounting, use user supplied hardware. For resilient mounting, use a factory available
Resilient Mounting Kit. See Figure 3 for mounting positions. The correctly installed rubber-threaded
insert is a watertight and shock-resistant mount which will increase the effectiveness and long life of the
product. Do not overtighten the screws! In applications where the screws protrude into the passenger
compartment, the screw can be reversed to minimize the risk of personal injury. See Figure 4. In this
configuration do not tighten the nut until all hardware is positioned properly.
FIGURE 2
Drain
& Vent
Standard
Mounting
Holes
Edge
Mounting
Holes
Aux.
Drain / Vent
Mounting Boss on
Beacon Base
#10-32 x 1
1
/
2
" Screw
#10 Screw Washer
3
/
8
" Rubber Threaded Insert
3
/
8
" Dia. Hole
#10 Screw Washer
#10-32 Nylock Nut
Mounting Boss on
Beacon Base
3
/
8
" Rubber Threaded Insert
#10-32 x 1
1
/
2
" Screw
3
/
8
" Dia. Hole
FIGURE 4
FIGURE 3