Troubleshooting – AVer 300AF user manual User Manual
Page 28
E-22
AV
e
r
M
e
d
ia
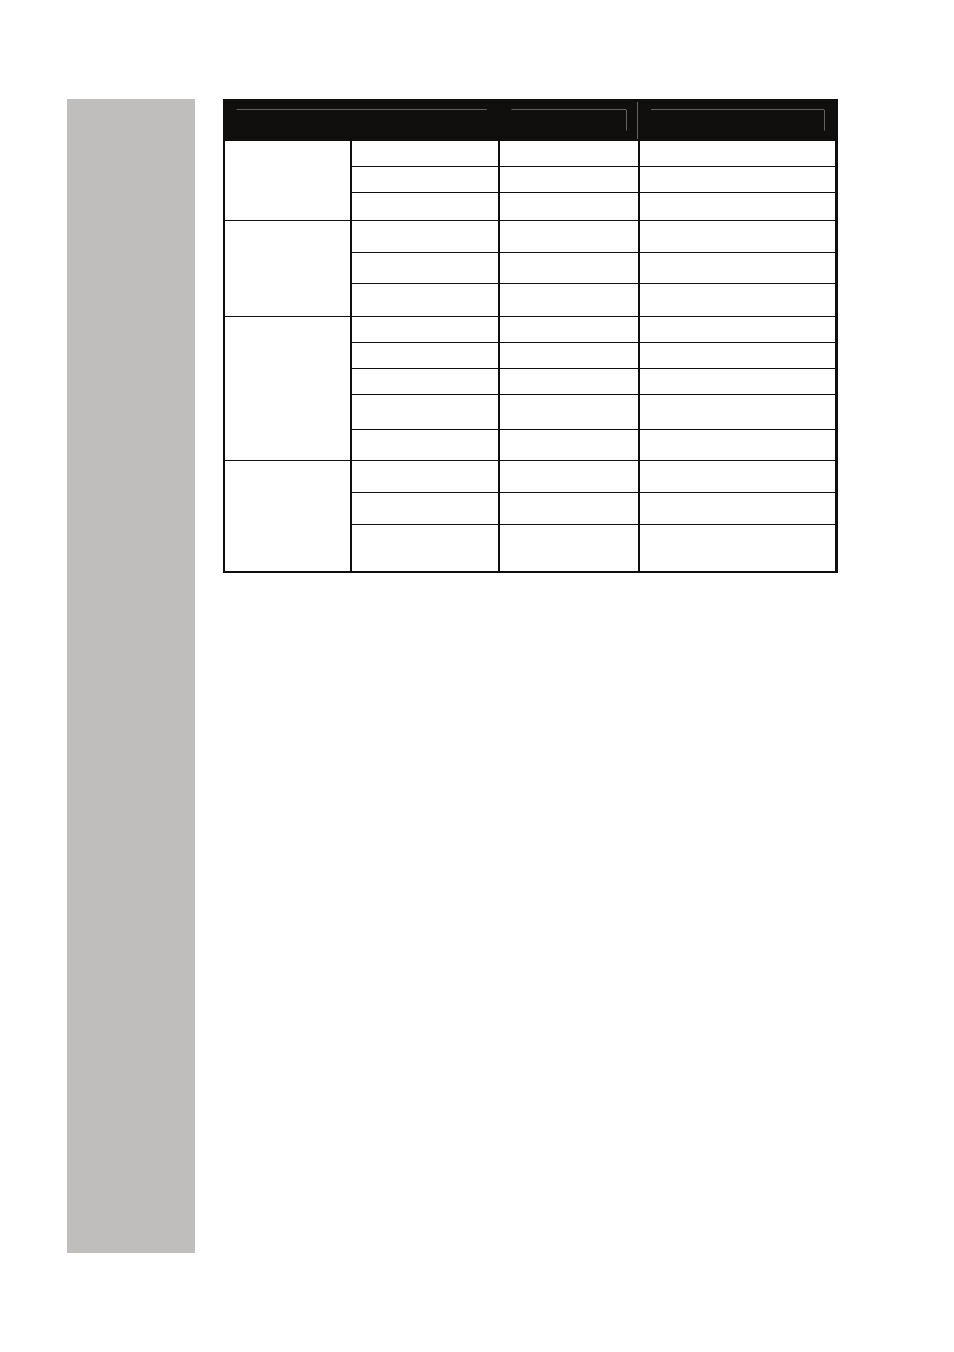
FUNCTION
DATA CODE
CHECKSUM CODE
IN 0x9A 0xEB
OUT 0x9C
0xED
ZOOM
ZOOM RESET
0x98 0xE9
AUTO FOCUS
0x97
0xE6
NEAR 0x9B
0xEA
FOCUS
FAR 0x99
0xE8
MENU 0x94
0xE5
UP 0x92 0xE3
DOWN 0x96
0xE7
RIGHT 0x95
0xE4
OSD
LEFT 0x93
0xE2
MIRROR 0x8B
0xFA
ROTATE 0x89
0xF8
EFFECT
COLOR / B.W /
NEGATIVE
0x86 0xF7
T
T
r
r
o
o
u
u
b
b
l
l
e
e
s
s
h
h
o
o
o
o
t
t
i
i
n
n
g
g
This section provides many useful tips on how to solve common
problems while using the AVerVision300AF.
There is no picture on the presentation screen.
1. Check all the connectors again as shown in this manual.
2. Check the on/off switch of the display output device.
3. Verify the setting of the display output device.
4. If you are presenting from a notebook or computer through the
display output device, please check and switch the document
camera source to PC Mode.
I have set up the AVerVision300AF and checked all the connections
as specified in the manual, but I cannot get a picture on the
preferred presentation screen.
1. Once the power cords are connected, the LED light turns RED as
standby mode. Simply switch the AVerVision300AF “ON" by pressing
the on/off switch until the LED light is blanking and turns GREEN.
2. The default camera display resolution setting is on 1024x768. If your
output device does not support this resolution; no image can be
projected. Simply press the MENU and RIGHT or LEFT button to the
increase or decrease the resolution setting.
3. If your display output device is TV or any analog device, make sure
the TV/RGB display switch is set to TV.
The picture on the presentation screen is distorted or the image is
blurry.
1. Reset all changed settings, if any, to the original manufacturer default
setting (Refer to the Menu Functions for more details and steps).