Avervision control, 1st control panel set, 2nd control panel set – AVer A+ Suite User Manual
Page 8
6
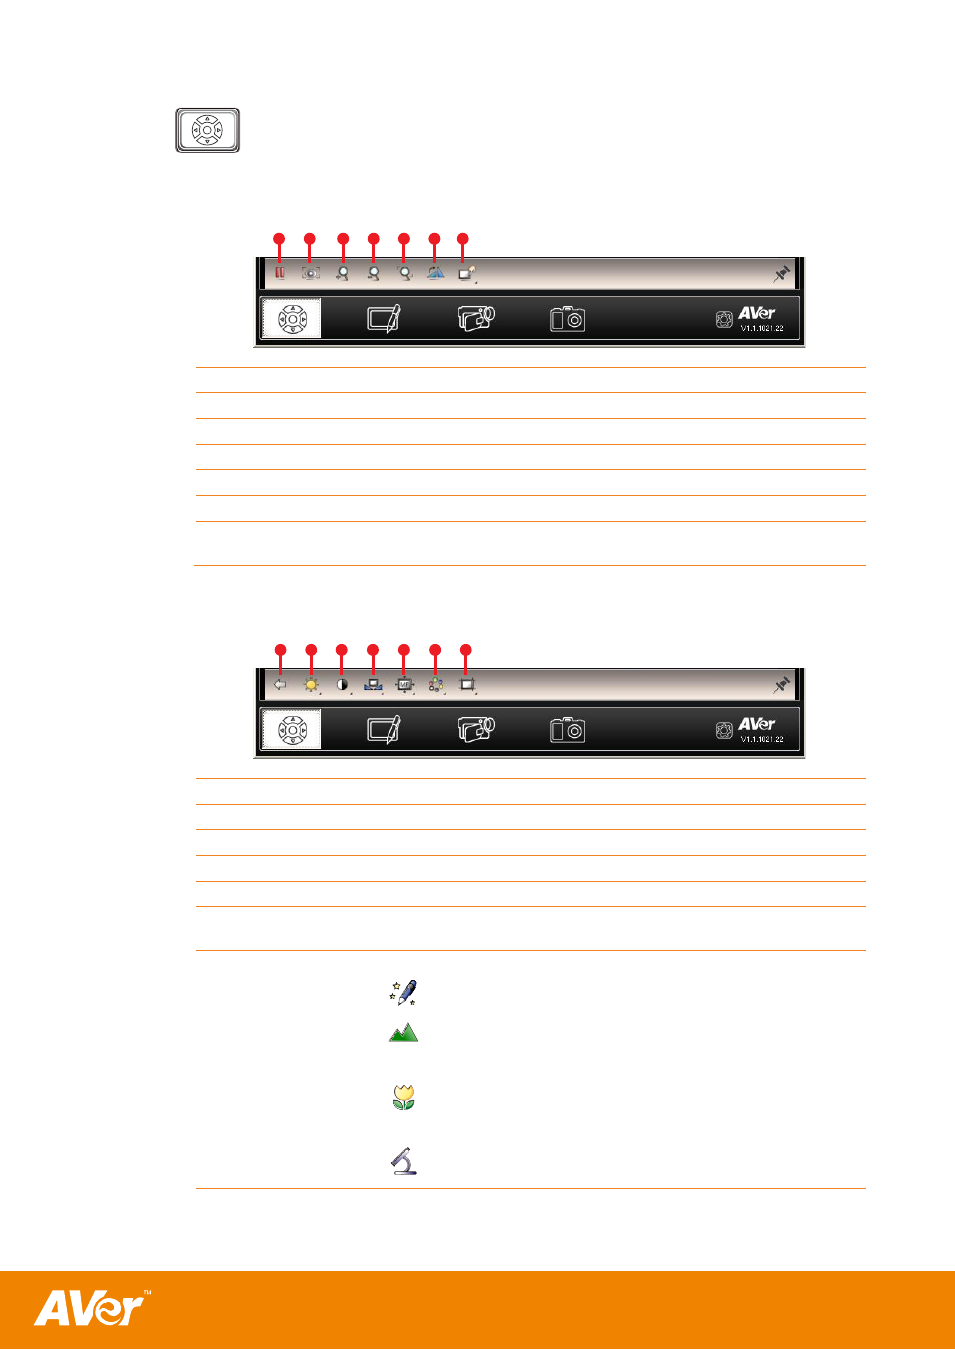
AVerVision Control
AVerVision Control has two (2) sets of command control panels for you to
operate and adjust the image display setting of your AVerVision visualizer.
1st Control Panel Set
(1) Pause
Pause or resume video stream.
(2) Auto focus
Adjust the focus automatically (selective models only).
(3) Zoom in
Increase the magnification level.
(4) Zoom out
Decrease the magnification level.
(5) Zoom reset
Return the zoom level to100%.
(6) Rotate
Rotate the image.
(7) Image adjustment Configure the picture setting of the AVerVision video screen. Click
to switch the command setting to Image adjustment control panel.
2nd Control Panel Set
(1) Return
Switch back to AVerVision Control panel.
(2) Brightness
Select the brightness level.
(3) Contrast
Select the contrast level.
(4) White balance
Manually select/automatically adjust the color temperature.
(5) Manual focus
Manually adjust the lens focus.
(6) Color effect
Convert the image to original color, monochrome (black & white)
or negative.
(7) Mode
Select from the various image display settings.
Text
-
adjust
the contrast along the edges making text
appear more visible.
Infinite
- set to view when subject is at least 55cm
away from the camera (selective models
only).
Macro
- set to view when object is only 5
– 20 cm
away from the camera (selective models
only).
Microscope - automatically adjust optical zoom for
microscopic viewing (selective models only).
(3)
(2)
(4)
(6) (7)
(1)
(5)
(3)
(2)
(4)
(6) (7)
(1)
(5)