Rear panel, Left panel – AVer F50HD user manual User Manual
Page 9
3
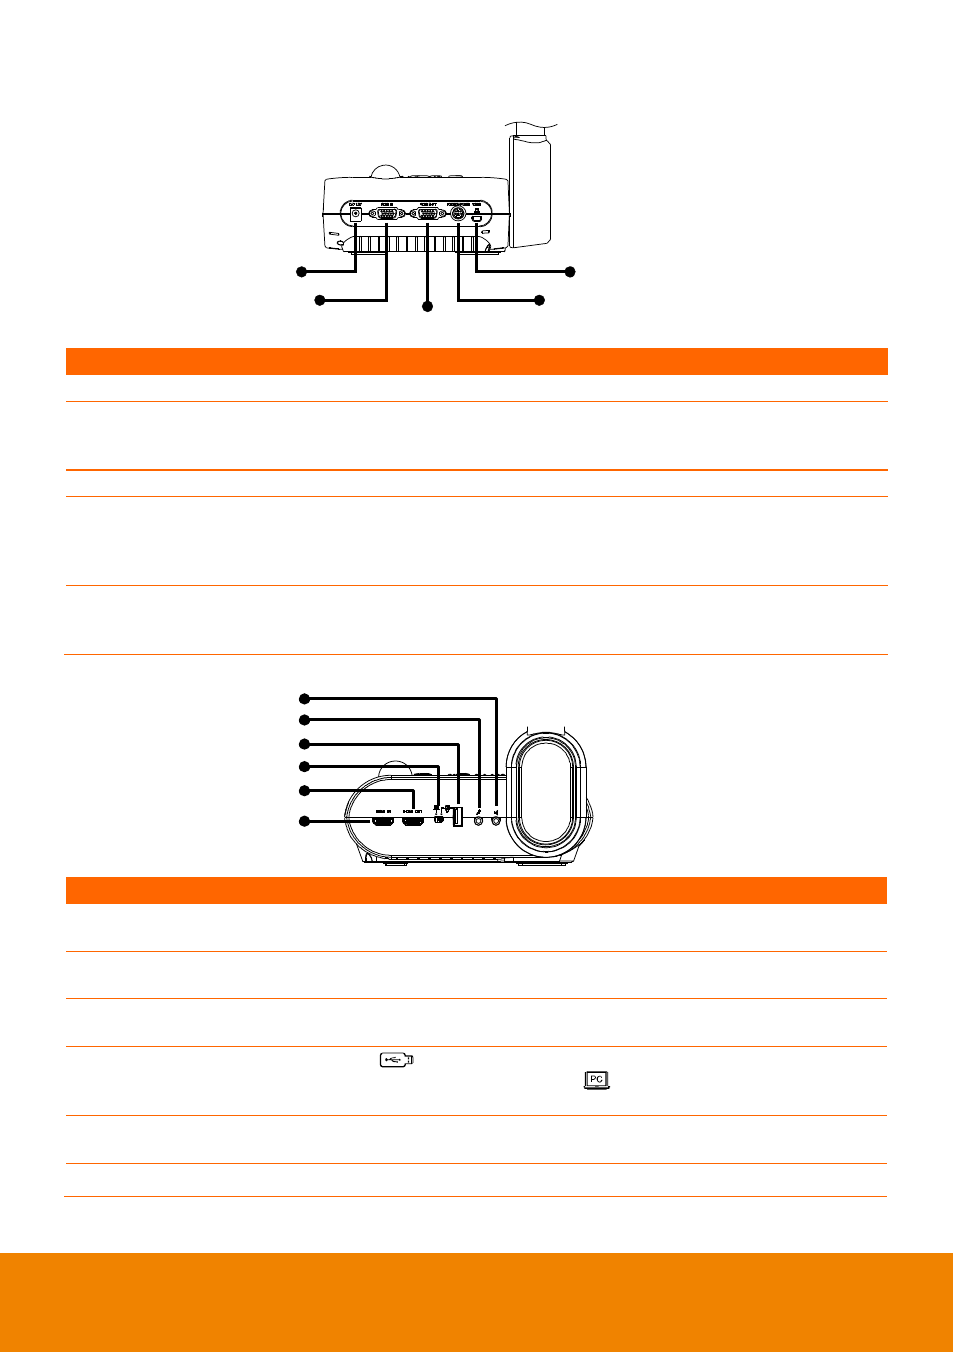
R e a r P a n e l
(5)
(4)
(2)
(1)
(3)
(fig. 1.3)
Name
Function
(1) DC12V
Connect the power adapter into this port.
(2) RGB INPUT port
Input the signal from a computer or other sources and pass it through
to the RGB OUT port only. Connect this port to the RGB/VGA output
port of a computer.
(3) RGB OUTPUT port
Connect the AVerVision F50HD to any display device with RGB cable.
(4) RS-232/CVBS port
Connect the supplied RS-232/CVBS cable into this port. The RCA jack
outputs the video signal from the camera to a TV or video equipment.
The RS-232 jack is used to connect to computer serial port or to any
control panel or for centralized control if desire.
(5) Mini USB port
Connect to a USB port of a computer with a USB cable and use
AVerVision F50HD as a USB camera or transfer the captured
images/videos from the memory source to computer.
L e ft P a n e l
(1)
(2)
(3)
(4)
(5)
(6)
(fig. 1.4)
Name
Function
(1) Speaker port
Connect to an amplified speaker to playback recorded audio & video
clip.
(2) MIC port
Connect a 3.5mm plug microphone. The built-in mic will be disabled
when an external MIC is connected to this port.
(3) USB port
Insert a USB flash drive save the images/video directly from the USB
flash drive or use a USB mouse to annotate.
(4) USB switch
Switch to
for audio video recording directly to a USB flash drive or
use a USB mouse to annotate and
when connecting AVerVision
F50HD to a computer using a USB cable from the rear USB port.
(5) HDMI Out port
Output the video signal from the main system on an LCD monitor or
LCD/DLP projector with HDMI interface using HDMI cable.
(6) HDMI In port
Connect an external HDMI source as an input via this port