11a 1c, 1b 1a, 5gasket installation – Alumax P-DR1WT-60 User Manual
Page 5
5
GASKET INSTALLATION
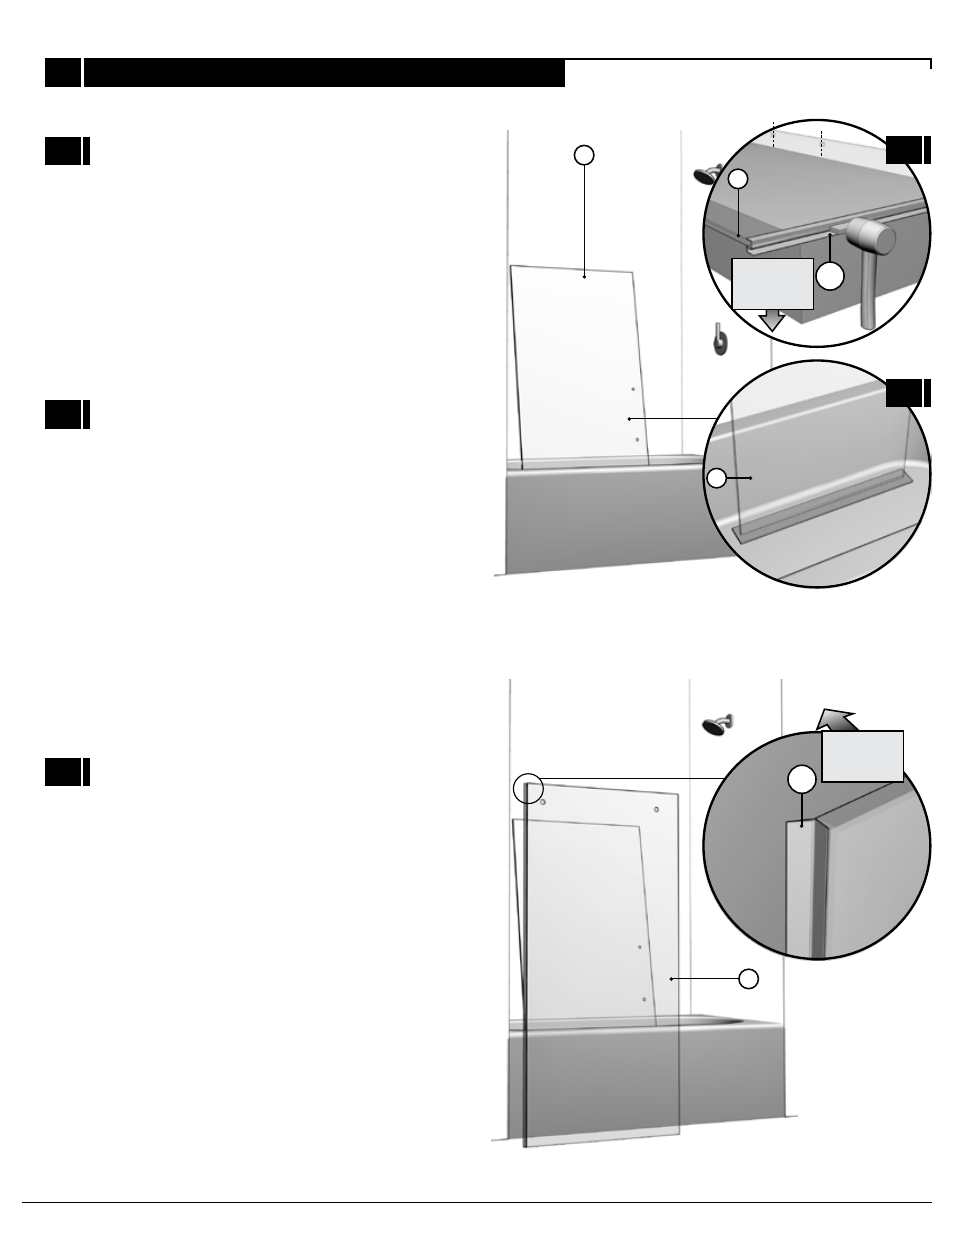
1
1A
1C
Place door panel (6) inside tub to simplify follow-
ing installation procedures. Ensure placing the
r
o
l
e
w
o
t
a
s
a
h
c
u
s
,
e
c
a
f
r
u
s
d
e
n
o
i
h
s
u
c
a
o
t
n
o
l
e
n
a
p
cardboard, to prevent damage either to the panel
or the tub.
Thoroughly clean the edge of the fixed panel (7).
Split the door gasket (9) in two and apply the
smaller half of the gasket to the edge of the fixed
panel.
Using the cardboard packaging box as platform,
install bottom door gasket (17) onto door panel
(6) using a block and a mallet. Notice the gasket
orientation.
1B
7
6
INTERIOR
SHOWER SIDE
10
17
6
6
1B
1A
INTERIOR
SHOWER SIDE
See also other documents in the category Alumax For Home:
- 300c (9 pages)
- 300cv (8 pages)
- 300d (9 pages)
- 338 (9 pages)
- 340 (9 pages)
- 340 Deluxe (9 pages)
- 390c Supplement (5 pages)
- 390cv Supplement (4 pages)
- 391 (12 pages)
- 392 (11 pages)
- 393 (11 pages)
- 394 (11 pages)
- 640S (8 pages)
- 640 (8 pages)
- 640D (7 pages)
- 641 Side Panel (6 pages)
- 694 (6 pages)
- 700c (7 pages)
- 733 (8 pages)
- 738 (8 pages)
- 738 Towel Bar (1 page)
- 740D (8 pages)
- 790c Supplement (4 pages)
- 791 (11 pages)
- 792 (12 pages)
- 793 (12 pages)
- 793 Buttress Supplement (1 page)
- 794 (11 pages)
- 794s (9 pages)
- 795 (10 pages)
- 890 (9 pages)
- 890c (8 pages)
- 1040 (9 pages)
- Deluxe Towel Bar (1 page)
- Transportation Latch (1 page)
- DesignLine Hinge (5 pages)
- P-DR1W-48-60 (14 pages)
- P-DR1W-72 (15 pages)
- P-DR2W-48-60-CRP (18 pages)
- P-DR2W-48-60-CW (19 pages)
- P-DR2W-72-CRP (19 pages)
- P-DR2W-72-CW (19 pages)
- P-DR3W-60 (32 pages)
- P-DRA1Y (16 pages)