Alumax 1050 User Manual
Page 6
Page 6 of 9
G03711095
11-4-14
4
6
NOTE: Obscure glass doors should be installed with
the rough surface of the glass to the exterior of the unit.
Deco or etched glass doors should be installed with the
patterned surface to the inside. The towel bar mounting
hole closest to to the edge of each glass panel should
be to the outside.
Determine the proper orientation of the door hanger brack-
ets [
G] to the glass door panels [H]. Fit four of the nylon
bushings [
I] into the 3/8" diameter holes in the top edge
of the door panels. Slide the four hanger brackets onto
the top edge of the panels until the countersunk holes
line up with the bushings. Secure the brackets to the
door panels with four 1/4"-20 x 5/8" [
J] flat head screws.
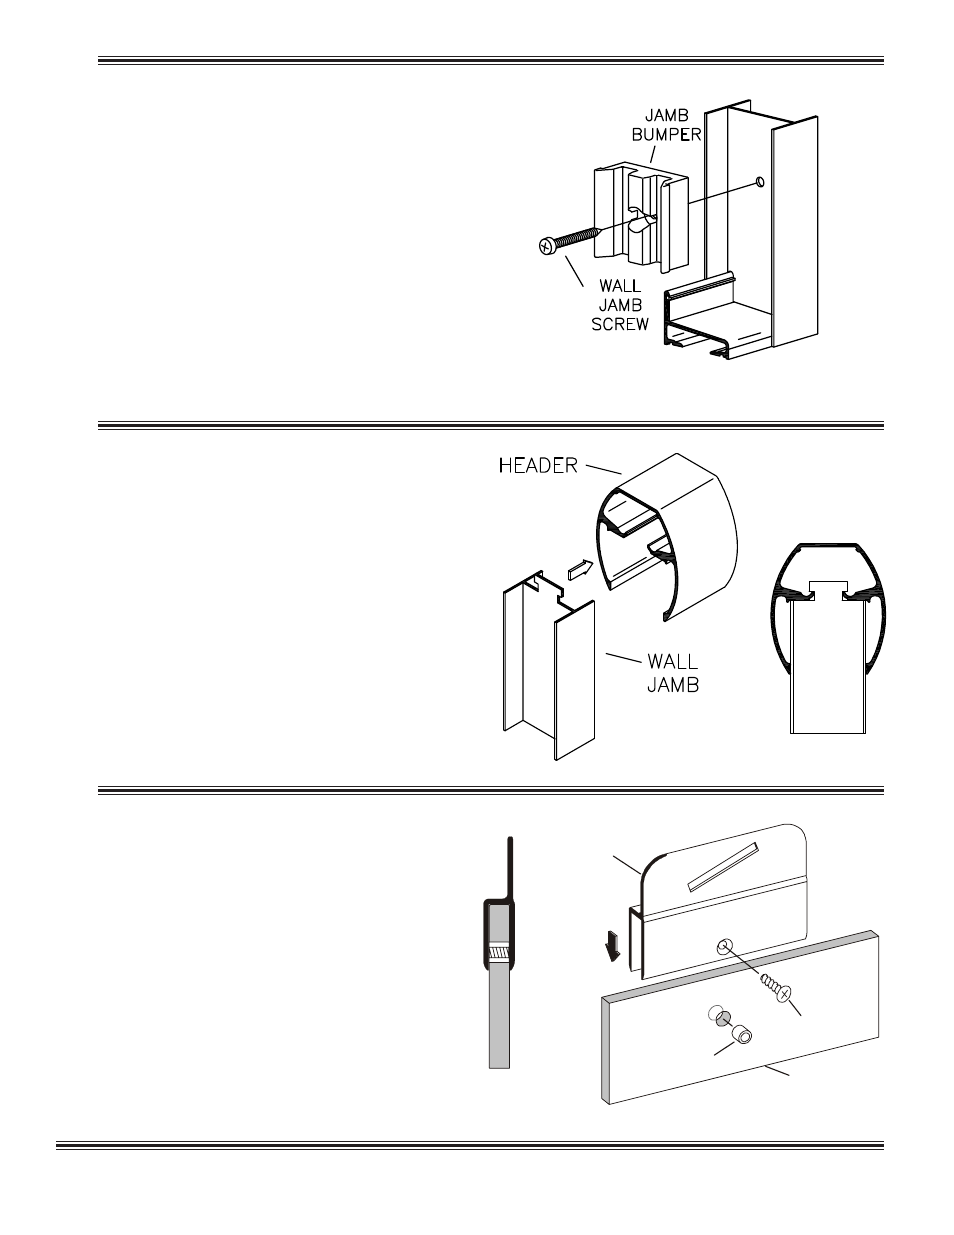
This bath enclosure is equipped with safety tee-
lock wall jambs. When installed properly the header is
permanently locked to the wall jambs and cannot be
accidently dislodged.
Measure the wall-to-wall opening at the top of the wall
jambs [
B] and cut the header [F] 1/16” short of this
dimension. Check the header for fit.
Slide the safety tee-lock of the unmounted wall jamb
into the header.
Holding the header [
F] at an angle, engage the end onto
the mounted wall jamb. Pivot the header into place,
then slide the loose wall jamb to the wall and press into
position on the tub track. Attach the loose wall jamb to
the wall per the instructions in step 4.
Replace one wall jamb [
A] and attach it to the wall
with three #8 x 1 1/2” truss head screws [
D]. The top
and bottom screws should go through a Jamb Bumper
[
E]. Check the jamb for plumb and tighten the screws.
Repeat for the other wall jamb.
Note: Do not over tighten the wall jamb screws.
5
FLAT HEAD
SCREW
DOOR
PANEL
NYLON
BUSHING
END
VIEW
HANGER
BRACKET