Adjustments – Craftsman 315.175130 User Manual
Page 8
Attention! The text in this document has been recognized automatically. To view the original document, you can use the "Original mode".
ADJUSTMENTS
DEPTH OF CUT ADJUSTMENTS
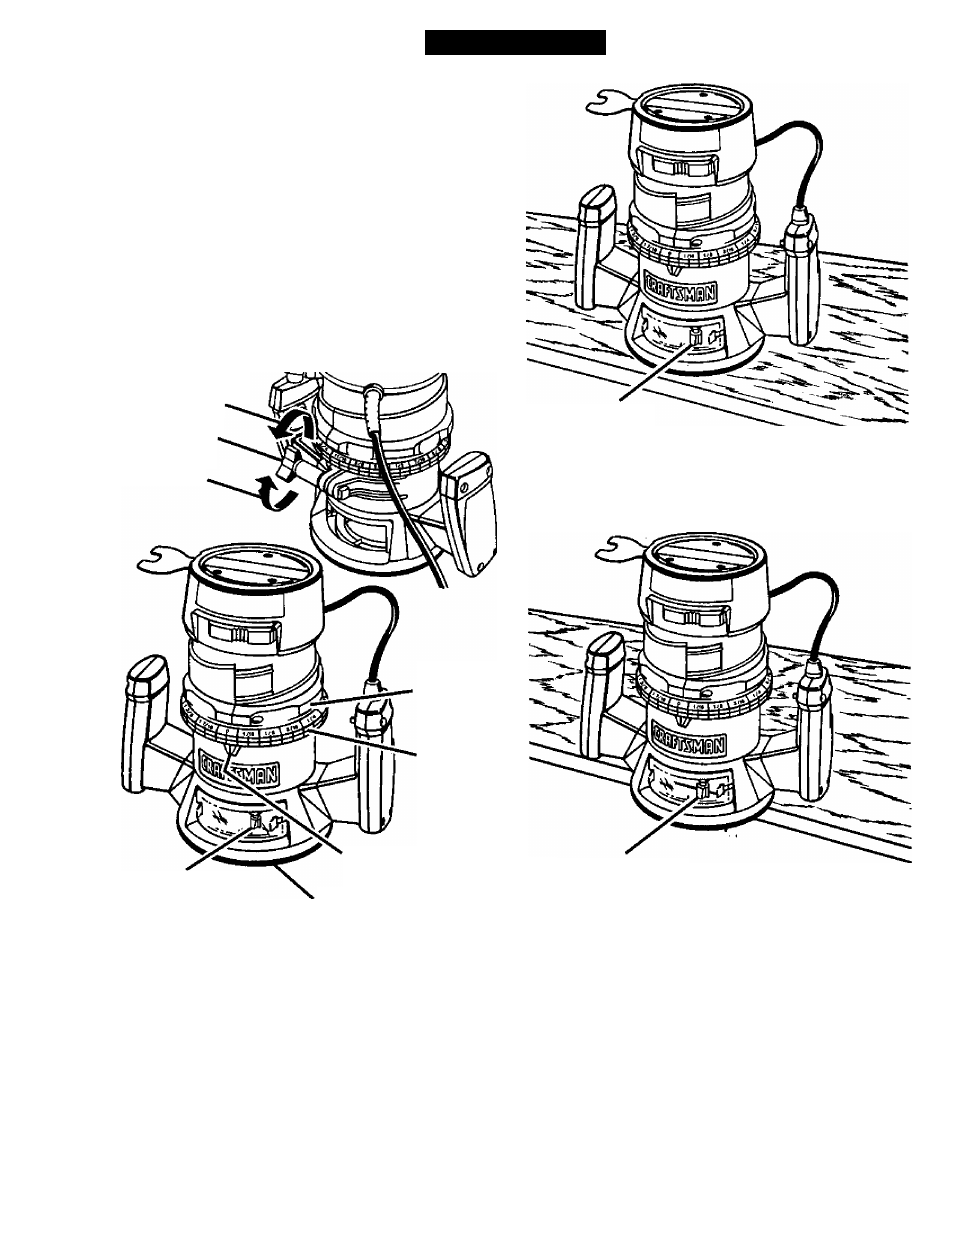
See Figures 4, 5, and 6.
We recommend that cuts be made at a depth not
exceeding 1/8 in. and that several passes be made to
reach depths of cut greater than 1/8 in.
■ Unplug your router.
A WARNING:
Failure to unplug your router could
result in accidental starting causing
serious injury.
■ Place your router on a flat surface, loosen locking
knob, and turn depth adjusting ring until cutter is
inside subbase.
See Figure 4.
TO
TIGHTEN
LOCKING
KNOB
TO
LOOSEN
DEPTH
ADJUSTING
RING
DEPTH
INDICATOR
RING
CUHER
INSIDE SUBBASE
INDICATOR
POINT
SUBBASE
Fig. 4
Turn depth adjusting ring until tip of cutter touches
flat surface. Turn the depth indicator ring until the
zero lines up with the indicator point on the base.
Note: The depth indicator ring is also a zero reset
indicator when setting cutter at zero depth of cut,
then it becomes the depth adjusting ring.
See Figure 5.
CUTTER AT ZERO
DEPTH OF CUT
Fig. 5
Position your router so that the cutter can extend
below the subbase for desired depth setting.
See Figure 6.
CUHER EXTENDED
BELOW SUBBASE
Fig. 6
Turn the depth adjusting ring to obtain the desired
depth of cut. The distance the cutter moves can be
read on the depth adjusting ring. Each mark on the
depth adjusting ring indicates 1/16 inch change in
depth setting. Indicator point is located on the
base.
Tighten locking knob securely before operating
router.