Ring maintenance – Craftsman 580.768040 User Manual
Page 12
Attention! The text in this document has been recognized automatically. To view the original document, you can use the "Original mode".
Insert wire into no22le and turn back
and forth to clear obstruction.
Remove additional debris by back flushing water
supply through wand. Back flush between 30 to 60
seconds. Turn wand to stream spray and move
nozzle from low to high pressure while flushing.
•
Reinstall nozzie into wand. EX) NOT overtighten.
•
Reconnect wand extension to spray gun.
•
Reconnect the water supply, turn ON the water,
and start the engine.
• Test the cleaning system by-operafihg'with’ nozzle
in the high and the low pressure positions.
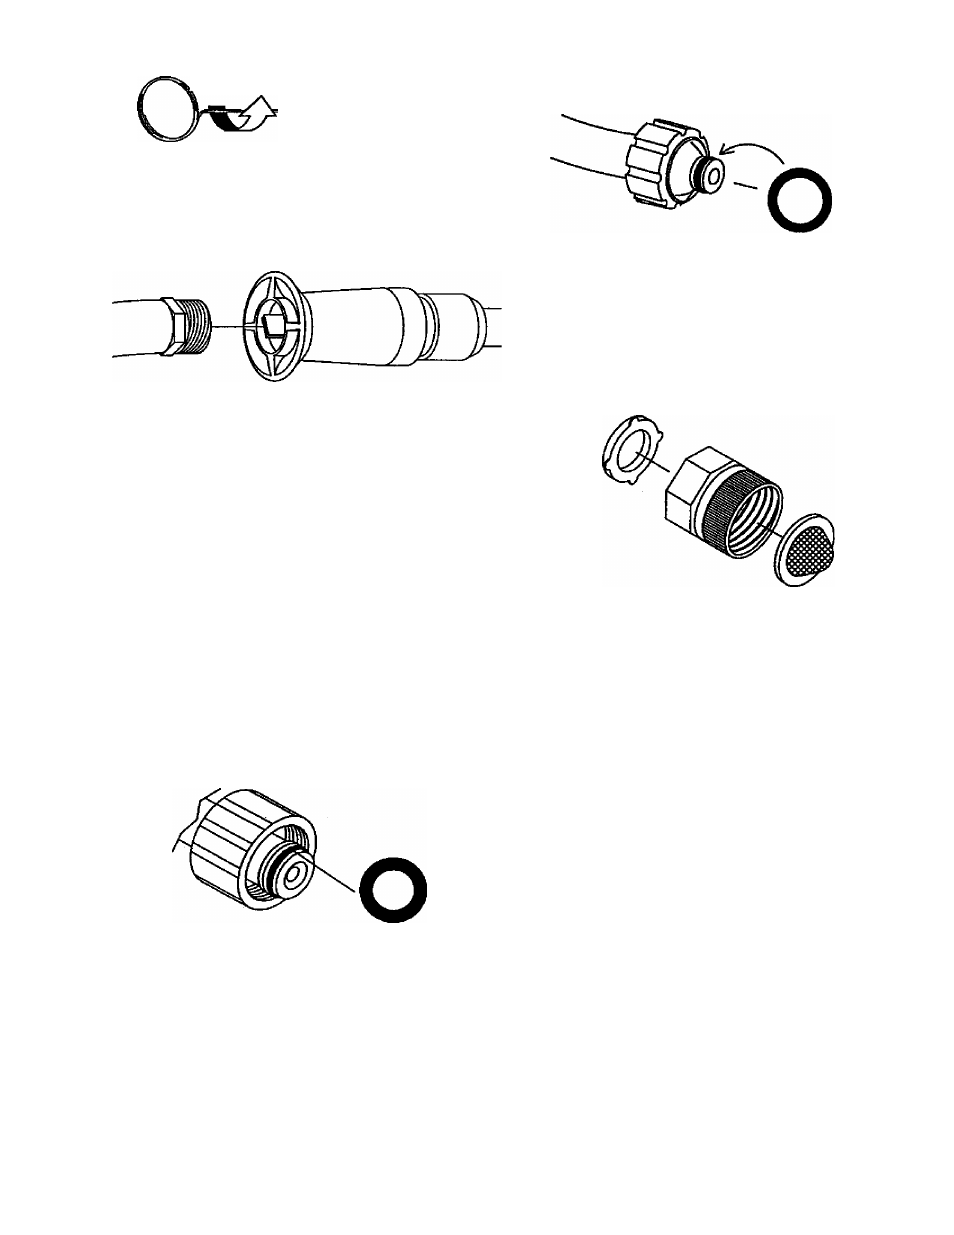
0-Ring Maintenance
Through the normal operation of your cleaning
system, the o-rings keep the connections of the
hoses and gun tight and leak-^ree. They may become
worn or damaged with use. Provided with your
cleaning system is an O-Ring Maintenance Kit
containing replacement o-rtngs, a rubber washer and
a garden hose inlet screen.
Parts in the O-Ring Ktt inciude;
•
1 O-ring, red, {p/n B2726) for the end of the spray
gun connection between gun and high/low spray
wand.
2
O-rings, yellow, (p/n B2264) for the ends of the
high pressure hose.
Note; The above two o-rings are close in size.
Pleas'e match carefully to assure proper o-ring
usage.
•
1 rubber washer (p/n B2385) for the inside of the
garden hose connector.
•
1 water inlet screen (p/n B2384) for the garden
hose connector.
To remove a worn or damaged O-Ring:
• Use a small flalhead screwdriver to get
underneath the o-ring and pry it off.
i2