Using the drc function, Using the dimmer function, Using the s.vol function – Samsung HW-C450 User Manual
Page 16: Software upgrade, Cjd si) gd
Attention! The text in this document has been recognized automatically. To view the original document, you can use the "Original mode".
VOl. nrj'rrCJL
a (ID Q
CJD Si) GD
UiJ LMJ ’3-^
E3 QHJife.G
Video may look slower than the audio if it is oonneoted with digital TV.
If this ooours, adjust the audio delay time to matoh the video.
Press
AV SYNC
on the remote oontrol of this unit repeatedly.
• You oan use + , - button to set the audio delay time between 0 ms and
300 ms.
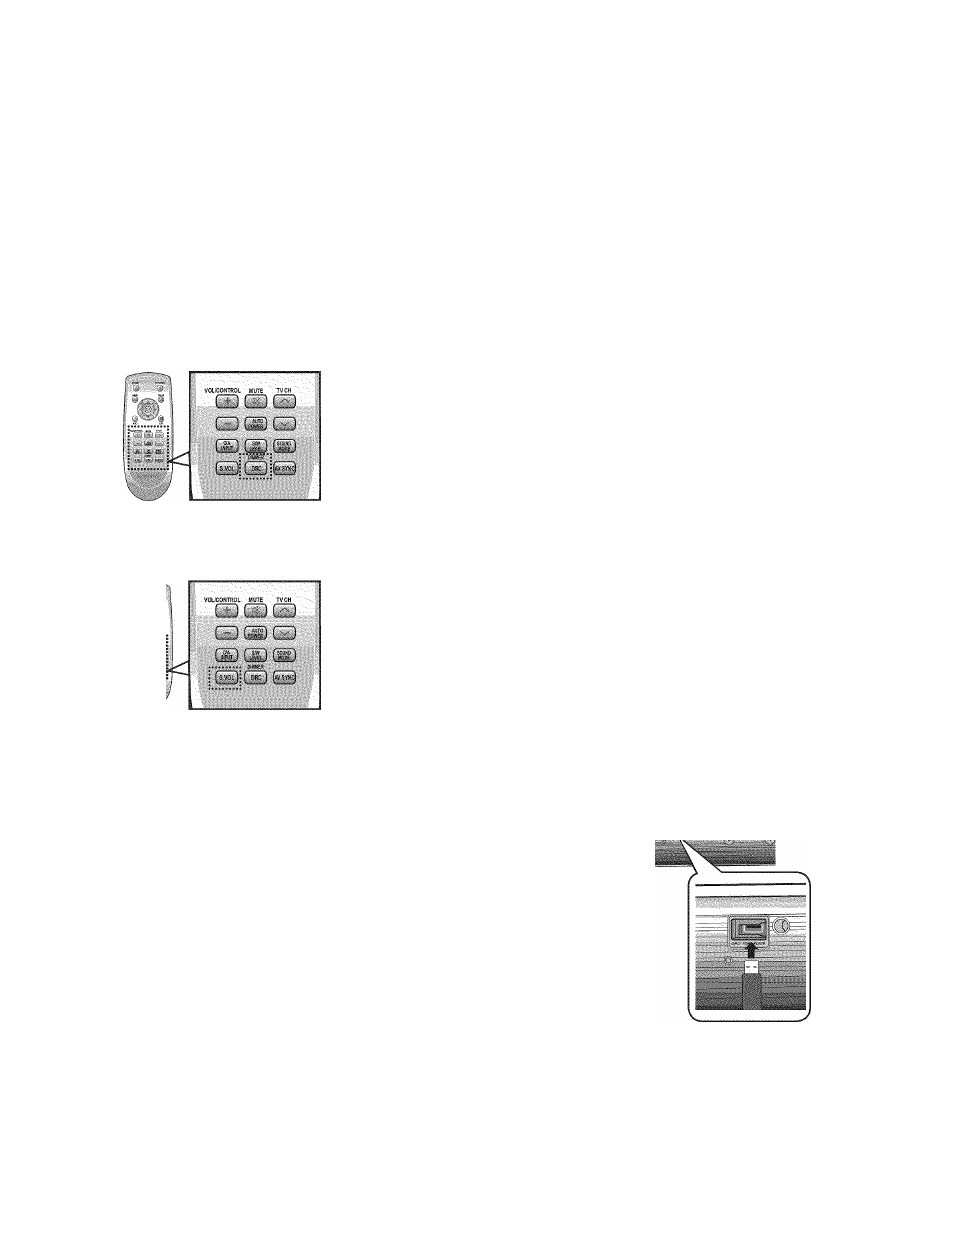
Using the AV SYNC function
Using the DRC function
This feature balanoes the range between the loudest and quietest sounds.
You oan use this funotion to enjoy Dolby Digital sound when watohing
movies at low volume at night.
Press
DRC
on the remote oontrol of this unit.
• Eaoh time the button is pressed, the seleotion ohanges as follows :
DRC MIN DRC STANDARD DRC MAX
Using the DIMMER function
Press Dimmer to oontrol the brightness of the Display.
If you press and hold the
DRC(DIMMER)
button for over 4seoonds, the
Display is dimmed and the message
"DIMMER LEVEL 1"
is appears on
the Display. If the button is pressed and held again, the Display is
brightened and the message
"DIMMER LEVEL 2"
appears on the Display.
Using the S.VOL function
This will regulate and stabilize the volume level against a drastic volume
change in case of a channel change or scene transition.
Press
S.VOL
on the remote control of this unit.
• Each time the button is pressed, the selection changes as follows :
S.VCL CN S.VCL CPE
SOFTWARE UPGRADE
Samsung may offer upgrades for the Crystal Surround
Air Track's system's firmware in the future.
Please visit Samsung.com or contact the Samsung call center at
1 -800-SAMSUNG (726-7864) to receive information about
downloading upgrades and using a USB drive.
Upgrades will be possible by connecting a USB drive to the
USB port located on your Air Track.
f^l
• Insert a USB drive containing the firmware upgrade into the USB port on the back of the main unit.
• Please be careful to not disconnect the power or remove the USB drive while upgrades are being applied. The
main unit will turn off automatically after completing the fi rmware upgrade.
When software is upgraded, settings you have made will return to their default (factory) settings. We recommend
you write down your settings so that you can easily reset them after the upgrade.
• If you fail to upgrade the firnware, we recommend formatting the USB data in FAT 16 and trying again.
• For upgrading purposes, do not format USB data in NTFS because it is not a supported file system.
• Depending on the manufacturer, the USB may not be supported.