Unpacking, Assembly, Assembly -5 – Craftsman 351.223140 User Manual
Page 3
Attention! The text in this document has been recognized automatically. To view the original document, you can use the "Original mode".
UNPACKING
Check for shipping damage, if damage has occurred, a claim
must be filed with the carrier immediately. Check for complete
ness. Immediately report any missing parts to dealer. Remove
all components of dust collector from shipping carton.
Refer to Figure 1.
The dust collector comes assembled as one unit. Additional
loose parts which need to be fastened to the dust collector
should be located and accounted for before assembly:
A Mounting brackets (2)
B Collar with bag clamp
C Hose
D Inlet and screws (4)
E Hose clamp (2)
F Collector bag (3)
G Mounting screws and anchors (4 each)
H Bolts and washers
(8
each)
ASSEMBLY
TOOLS NEEDED
•
Vi" Open End Wrench
•
Offset or Short Phillips Head Screwdriver
•
Portable Drill
•
Vt" Drill Bit
•
Hammer
NOTE: For masonry walls, use four masonry anchors and
masonry drill bit of proper size for anchors (not supplied).
SELECT SITE FOR DUST COLLECTOR
Site for the dust collector should be located as close to the
woodworking machine(s) as possible. Site should be to the
Left of the machine(s), on the wall.
ATTACH WALL BRACKETS TO DUST COLLECTOR
ASSEMBLY
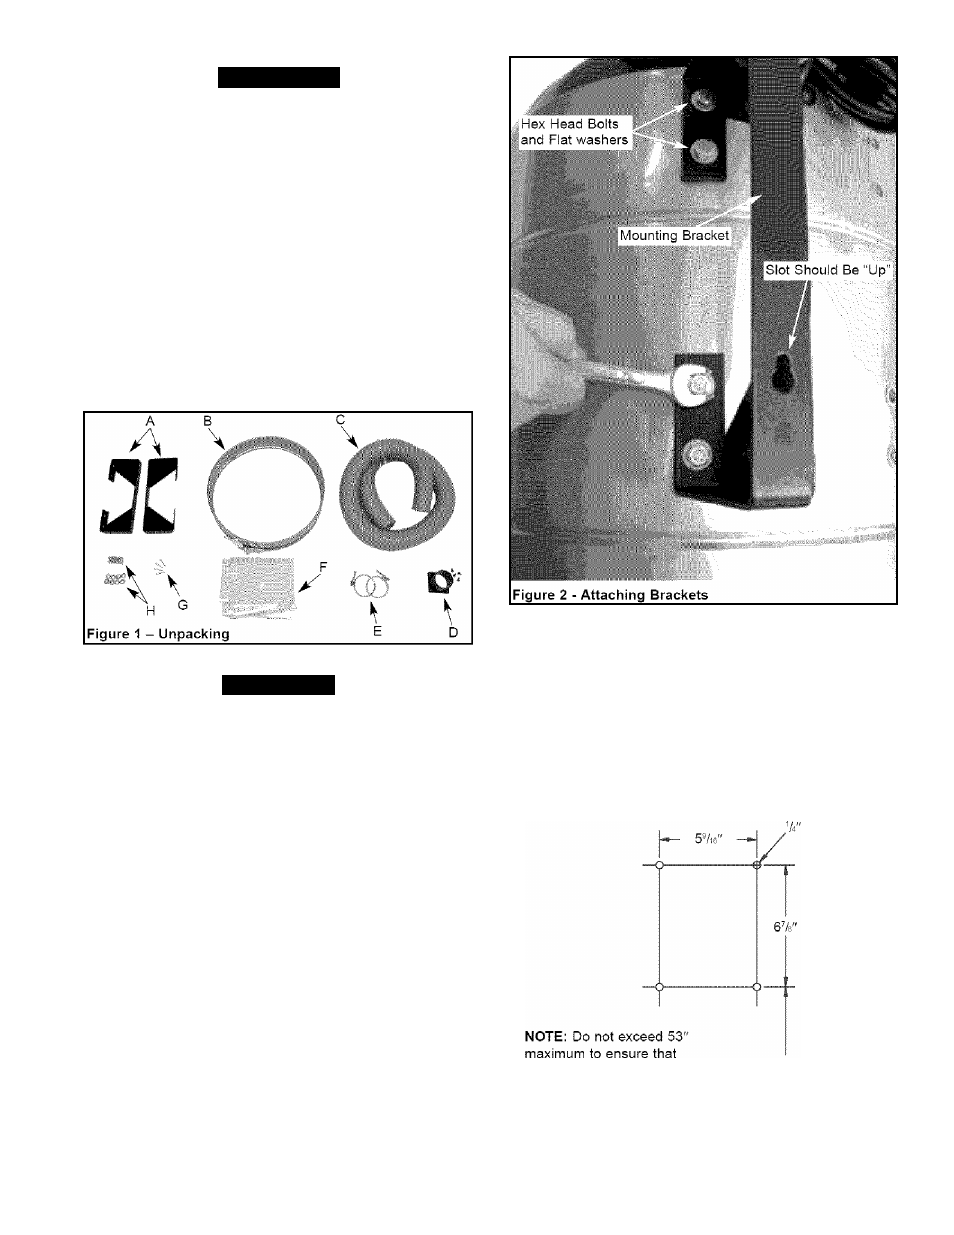
Refer to Figure 2.
Wall brackets need to be attached to dust collector body. To
attach wall brackets:
•
Position wall bracket at set of holes at back of dust
collector body.
•
Make sure that the bracket is straight up and down and
that the narrow side of slot is “UP” as shown.
•
Secure each wall bracket to dust collector assembly using
four hex head bolts and flat washers.
INSTALL WALL ANCHORS
Refer to Figure 3.
Wall anchors need to be installed at the site selected for the
dust collector. To install wall anchors:
•
Mark the location of anchors on the wall according to
Figure 3.
•
Drill
V
a
"
hole, 1’/
4
" deep at each of the four marks.
•
Hammer anchors into each of four holes so that they are
flush with wall.
•
Partially screw in thread-forming screws so that there is
approximately
V
a
"
of threads showing.
the collector bag is
supported by the floor
53" maximum
Floor
/
77777777777777777
"
Figure 3 - Installing Wall Anchors