Operation (cont.) – Craftsman 315.111450 User Manual
Page 7
Attention! The text in this document has been recognized automatically. To view the original document, you can use the "Original mode".
OPERATION (Cont.)
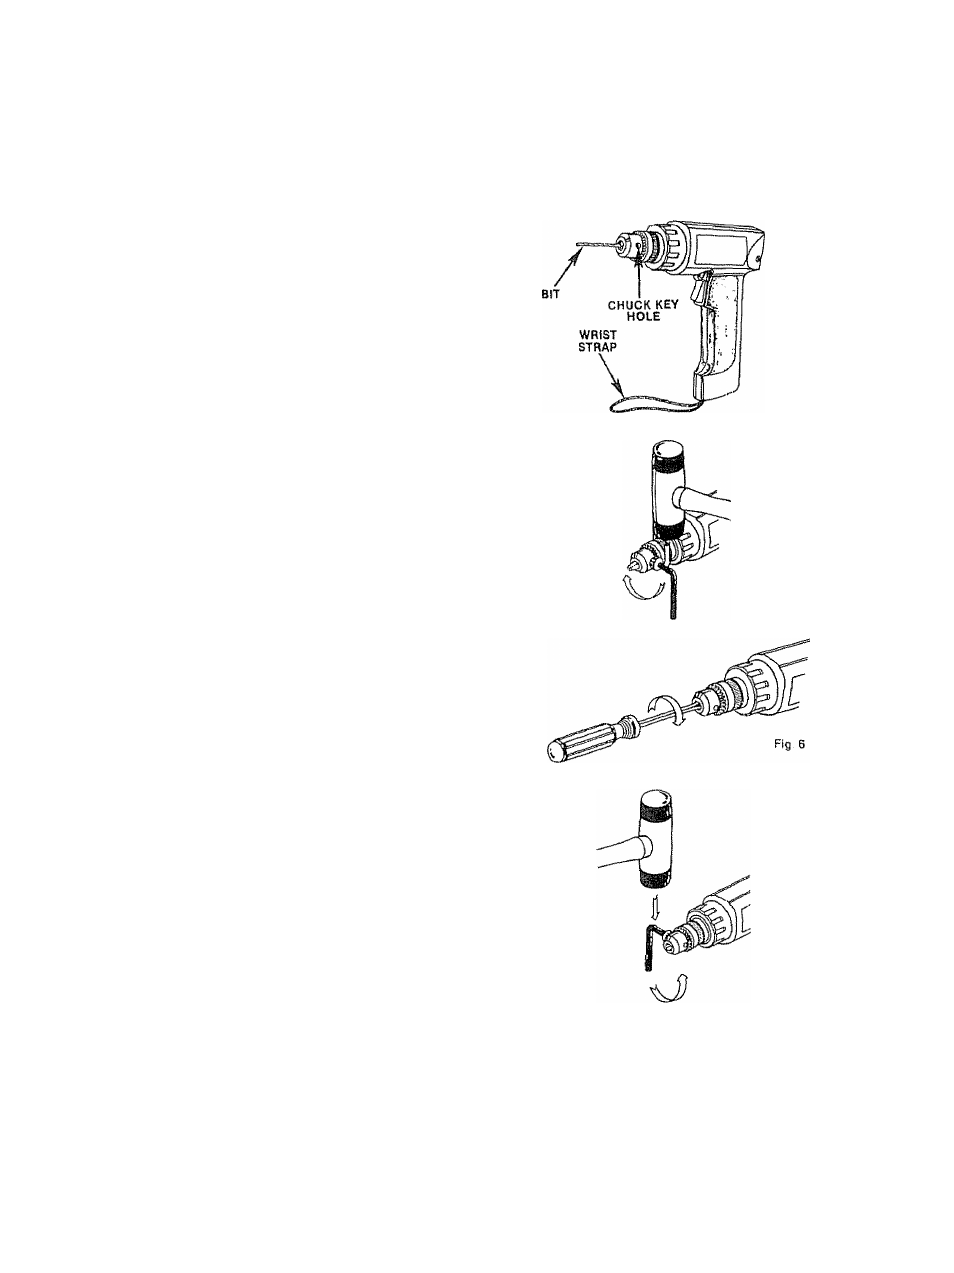
INSTALLING BITS
1 Look switch trigger on your ctrltt by placing the
direction of rotation selector In center position
2 Close chuck jaws to a point where the opening Is
slightly larger than the bit size you intend to use
3 Insert your drill bit Into chuck the full length of the
jaws as shown In Figure 4
4 Remove chuck key from chuck key storage See
Figura 3
5 Tighten chuck jaws by placing chuck key In each
of the three holes, and tighten in a ciockwise
direction. DO NOT USE A WRENCH TO TIGHTEN
OR LOOSEN THE CHUCK,
6, Remove the chuck key and return to chuck key
storage
REMOVING BITS
1, Lock switch trigger on your drill by placing the
direction of rotatiori selector in center position
2, Remove chuck key from chuck key storage. See
Figure 3
3 Loosen chuck jaws using the chuck key, DO NOT
USE A WRENCH TO TIGHTEN OR LOOSEN THE
CHUCK,
4. Remove driii bit from chuck jaws.,
5 Remove chuck key and return to chuck key
storage,
CHUCK REMOVAL
The chuck must be removed in order to use some
accessories To remove:
1 Lock switch trigger on your drill by placing the
direction of rotation selector In center position
2 Remove chuck key from chuck key storage See
Figure 3
3, Close the chuck Jaws, insert chuck key into chuck
and tap sharply with a mallet in a clockwise direc
tion as shown in Figure 5
4, Open the chuck jaws and remove the chuck screw
by turning it in a clockwise direction See Figure 6
NOTE: The chuck screw has left hand threads
5, insert the chuck key in chuck and tap sharply irr a
counterclockwise direction to loosen it on spin
dle, It can now be unscrewed by hand. See Figure
7.
6, Return chuck key to chuck key storage.
The chuck may become loose on spindle and
develop a wobble. Also, the chuck screw may
become loose causing the chuck jaws to bind This
will prevent them from closing To lighten, follow
these steps:
1, Lock switch trigger on your drill by placing the
direction of rotation selector in center position
2 Open the chuck jaws
3 insert chuck key in chuck and tap with a mallet in
a clockwise direction
4, Tighten She chuck screw NOTE; The chuck screw
has left hand threads
Fig 4
Fig 5
Fig, 7
Page
7